GIS data export
A geographic information system (GIS) is a framework for gathering, managing, and analyzing data. Rooted in the science of geography, GIS integrates many types of data. It analyzes spatial location and organizes layers of information into visualizations using maps and 3D scenes.
GIS tools are custom-built to handle maps, with large data sets, integrate with other tools such as databases and create interactive maps such as Google Maps.
Being able to import a fantasy map into a GIS system puts all the power of those systems into your hands. Among other things, a GIS map can have many more layers, for example to have a view of the world at different times in history. It can link to a database to bring in as much information about the world as you have. It can also dynamically update itself from that database. For example, online game Might & Fealty allows to build roads, and roads can deteriorate over time. These roads and their condition are part of the game map.
Also, at this time, it is the only way to zoom from world map to street view without going to a different tool.
What GIS does not do is creating a map, it's made to deal with the real world, it doesn't generate random maps or invent cultures and religions. This is where Fantasy Map Generator comes in order to merge generated data with whatever other data you have in your game and to create an interactive read-only map view.
Here is a fantasy world made with the Fantasy Map Generator and exported to GIS tools: https://lemuria.org/dragoneye/atlas/Auseka
QGIS is a free multi-platform tool for GIS work. It can load, edit and print maps in high quality as well as export the results for interactive online maps. In essence, if you ever thought that having Google Maps for your fantasy world would be incredible cool, this is how you do it.
Download and installation instructions can be found here. There are also many videos and online instructions on QGIS:
- https://freegistutorial.com/qgis-tutorial-beginners/
- https://www.qgistutorials.com/en/
- https://www.youtube.com/watch?v=kCnNWyl9qSE
- https://www.youtube.com/watch?v=ltsKFhYQy_4
- https://www.youtube.com/watch?v=kCnNWyl9qSE
You are not, of course, limited to only QGIS. Data exported can also be used in other GIS tools, such as GRASS, ArcGIS and others.
Fantasy Map Generator allows you to export some data in a GIS-compatible format. Open the Export dialog from the Tools tab; its Export to GeoJSON section has buttons for cells, routes, rivers, markers and zones. The separate Export to JSON section (full, minimal, pack cells, grid cells) is plain JSON, not GeoJSON, and is not meant for GIS tools.
Coordinates in the GeoJSON files are geographic (longitude / latitude) and follow the map coordinates set in Options → Configure world.
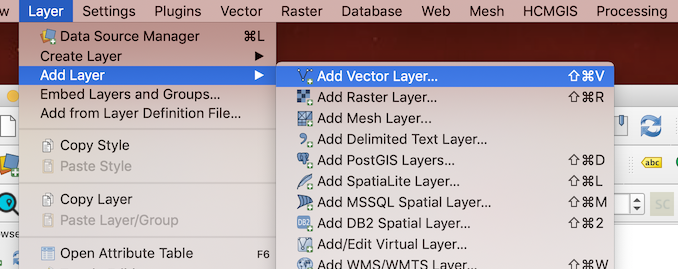
The cells file is a polygon layer with one feature per cell. Each feature carries these properties: id, height, biome, type (feature type, e.g. island or lake), population, state, province, culture, religion and neighbors. Import it into QGIS by choosing Layer -> Add Layer... -> Add Vector Layer....
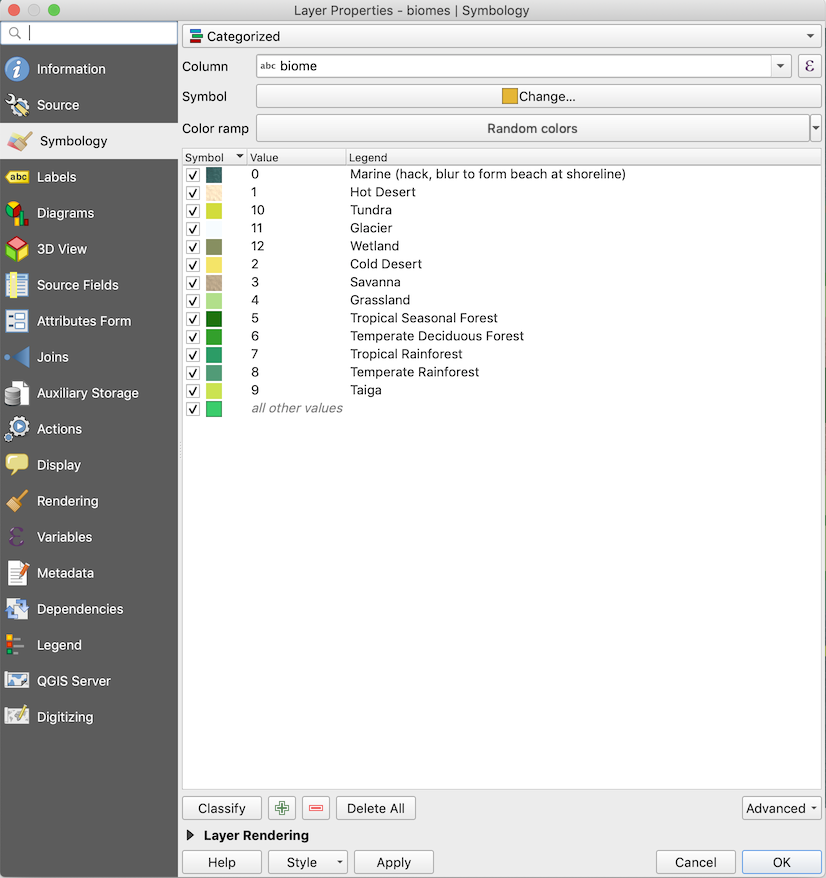
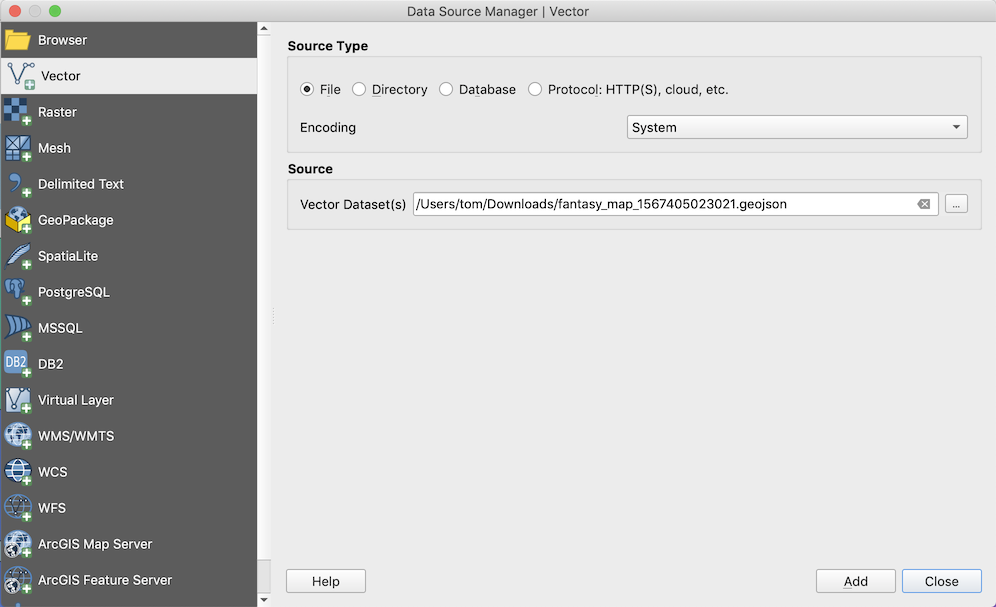
Choose the saved .geojson file. It should be set up correctly as well, but doesn't show much. For the biomes, a prepared style can be found here. Load it for the new layer you just created and the biomes should show up (click on the properties of the initial "cells" layer and then in the symbology tab of the options, you click style then load.)
All of the properties listed above can be used in QGIS to render thematic maps — population density, elevation, political, cultural or religious maps.
Unfortunately, there are sometimes gaps or overlaps in the cell export data. You can find them in QGIS with Vector -> Geometry Tools... -> Check Validity. They are easy to fix by hand, if you need to (only needed if you want to do further processing with the data).
Burg data can be downloaded as a .csv file from the Burgs Overview. The downloaded file contains the burg id, name, province, state, culture, religion, group, population, map coordinates, latitude, longitude, elevation, temperature, the capital / port / citadel / walls / plaza / temple / shanty town flags, the emblem and a preview link. These can be imported into QGIS by choosing Layer -> Add Layer... -> Add Delimited Text Layer...
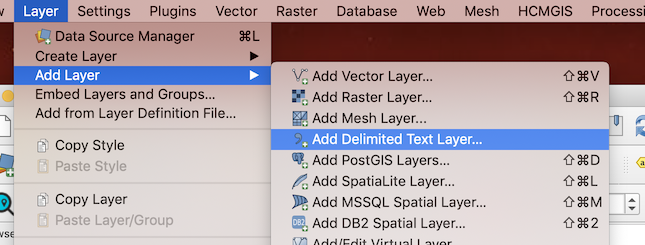
Choose the exported .csv file. It should all be set up correctly automatically, so just check that x and y are correctly set to the longitude and latitude fields.
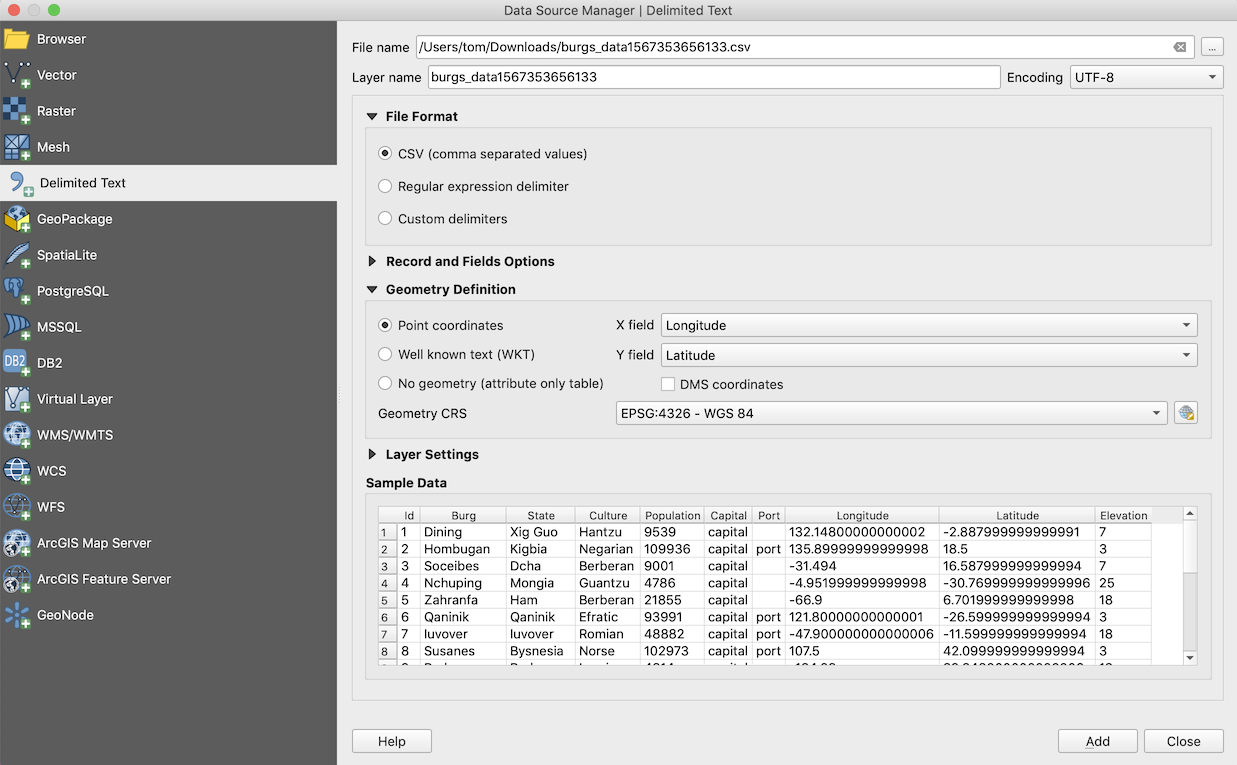
Points of interest (markers) also carry location information. They can be exported as GeoJSON from the Export dialog, or as a .csv file from the Markers Overview (id, type, icon, name, note, state, culture, coordinates, latitude and longitude) and imported the same way as burg data.
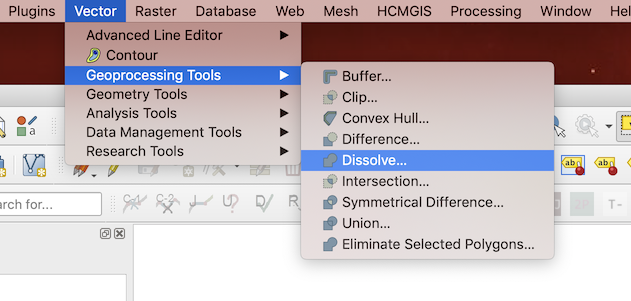
To create a political/religious/provinces/culture/etc. map use Vector -> Geoprocessing Tools -> Dissolve... and select the .geojson file as input and the attribute you want to merge by (e.g. "state"). QGIS will merge all the polygons that share the same attribute so that you end up with one multipolygon per state/culture/religion/etc.
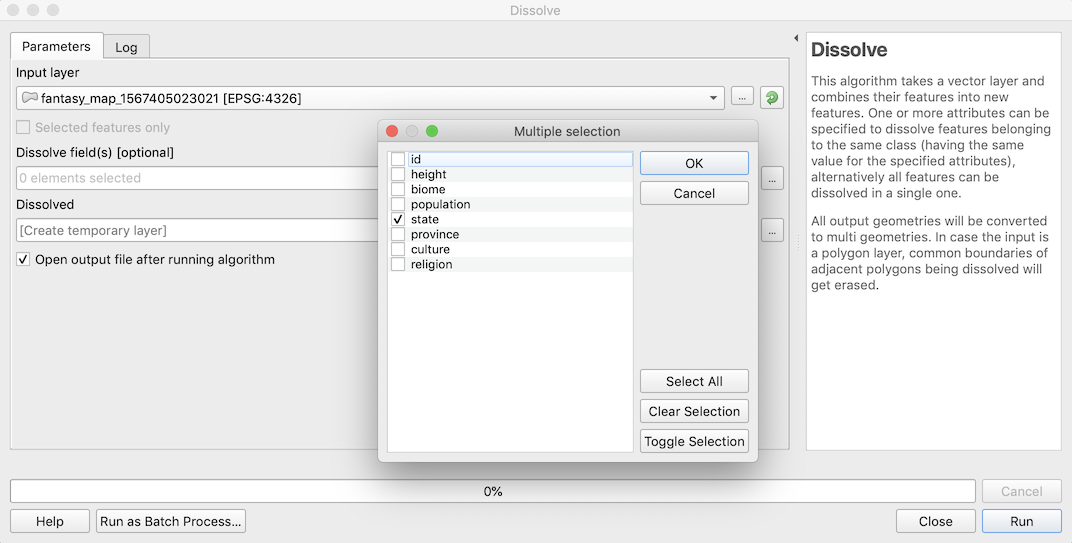
Note that QGIs automatically turns a polygon layer into a multipolygon layer for this.
Simply repeat this step for all the layers that you want to use (once for states, once for provinces, etc.). This will give you one layer in QGIS per attribute, and you can then style and hide/show the layers as needed.
When working with cells, you need to make sure that neighbor cells are changed as well, to prevent overlaps or gaps. QGIS supports topological editing.
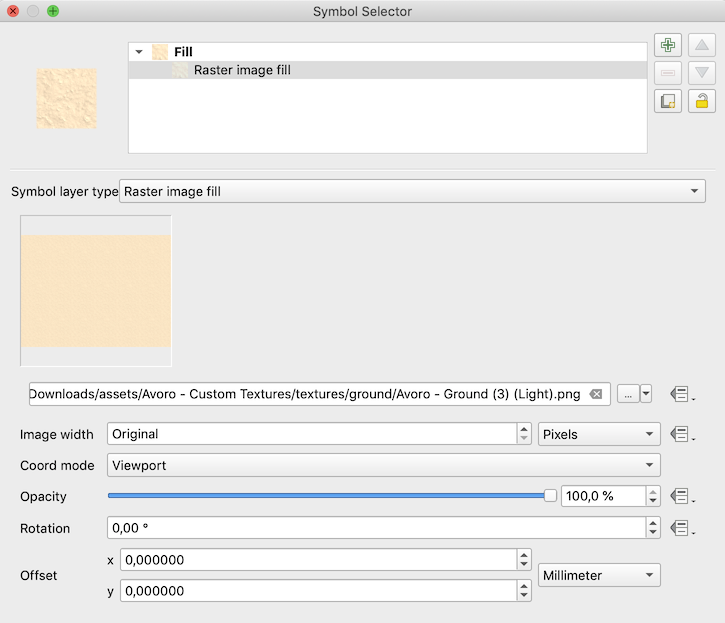
To get that painted look, you want to use textures to fill, especially for biome data. Simply set up the symbology to use a Raster Fill Image, pick your texture and make sure to set the Coord mode to "Viewport":