With YHWH-Script ( pronounced: /jɑːhwe/-script) your web app can become whatever you want it to become. There is nothing so complicated that it can't be made simple. yhwh-script is an advanced, yet minimalistic WebComponents framework featuring most of the functionality of popular JavaScript frameworks, but in a fraction of their complexity and therefore minimizing the effort of refactoring your code. It is written in vanilla JavaScript and you can freely customize it to fit your needs.
yhwh-script is solely built on and has an optional
support within the Origin Private Filesystem (OPFS).
- written in vanilla JavaScript
- support for custom elements in dedicated .html files (SinglePageApplications SPAs and SingleFile WebComponents SFCs), create or use your own library of custom-elements
- following W3C standards and MDN-recommended best practices with just a few hacks to accomplish things where people claim: "This is impossible with WebComponents"
- direct access to ShadowDOM in each component's script (via
shadowDocument) - full reactivity support in vanilla JavaScript (via bubbling events/observers)
- SQLite WebAssembly (WASM) for global state management with OriginPrivateFileSystem (OPFS), your data stays private
- dedicated workers for database pooling
- Responding to attribute changes
- access to modules API (via window object)
- offline capabilities
- pluggable navigation module using history-driven Component Router
- support for containerized builds
- https support out of the box (@vitejs/plugin-basic-ssl)
- basic functionality in under <100LOC
Running yhwh-script is as easy as cloning one of the repositories below.
  git clone https://github.com/yhwh-script/sqlite-examples.git
  cd sqlite-examples
  npm install
OR you can use npx, which is the recommended way
  npx @yhwh-script/create-app {your_project}
  cd {your_project}
  npm install
and then simply
npm run devto quickly setup a yhwh-script project. You can then access the app via https://localhost:3443 in your browser.
Have you ever thought about creating standards-conforming WebComponents in dedicated HTML-files? Just create your custom elements inside the public/elements folder. You just have to stick to (custom elements naming conventions)[https://html.spec.whatwg.org/multipage/custom-elements.html#valid-custom-element-name]. They will work out of the box as HTML, (S)CSS and JavaScript custom elements with script, style and template fragments à la Vue or Svelte.
That's basically everything. Happy coding!
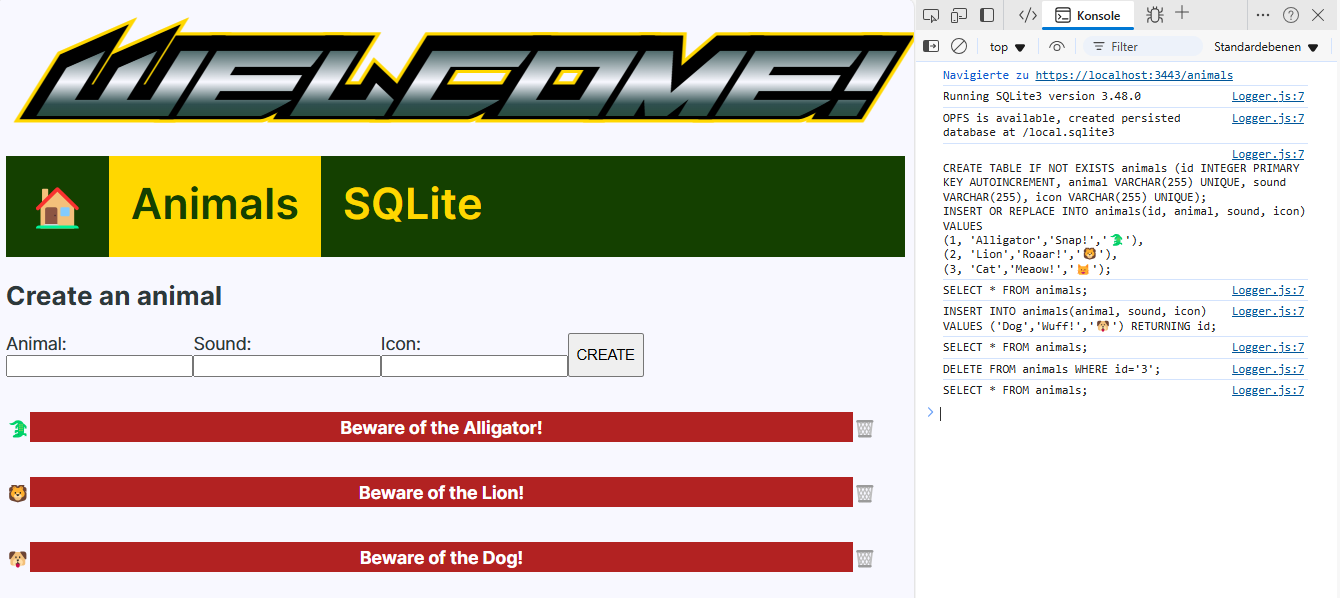
Examples without and with SQLite support can be found in the corresponding sub-projects. It is recommended to use SQLite examples for demonstration purposes and if you need local-persistent state!
Here are some further features You can use in a .html file
- You can use dynamic imports (
await import) to include modules on demand - Use the
stateconstant to accessdata-stateto propagate data into the element or use publicAPIs shadowDocumentis the private scope DOM of the element. You can use most methods that are also available on thedocument, for instanceshadowDocument.getElementById(...)orshadowDocument.querySelector(...).- You can also add syntactic sugar and define your own shorthand versions of access methods like
const $ = (query) => shadowDocument.querySelector(query);
const $$ = (query) => shadowDocument.querySelectorAll(query);
In case you want some deeper insights you should learn and understand how the WebComponents lifecycle is working.
- Put your custom elements in the ./public/elements/ folder (/src/elements/index.js is automagically generated when you run
npm run dev) - After having created your custom elements you can instantiate them programmatically or by tag-name like in the animals-view.html (Check out the other examples to see variations.)
- changing the state of a component is possible via bubbling events from inside or by changing the
data-stateattribute of the host element.
Adding a navigation is very easy. As the example shows You can have an entire navigation in one single html file defined as just another custom element. After having it integrated into your app with a single tag (``), you can have routing support and all the things you would expect.
Of course you are completely free to customize the themes and make them awesome!
If you still have questions please let me know. Your opinion is valuable to me and sharing what you think is higly appreciated! If you have any feedback and want to share your suggestions please consider the contribution guidelines and reach out to @jahro_me

