*Or really anything you want to run on a Raspberry Pi kiosk attached to a wall
You can find more information about the project on the Hackaday.io project page
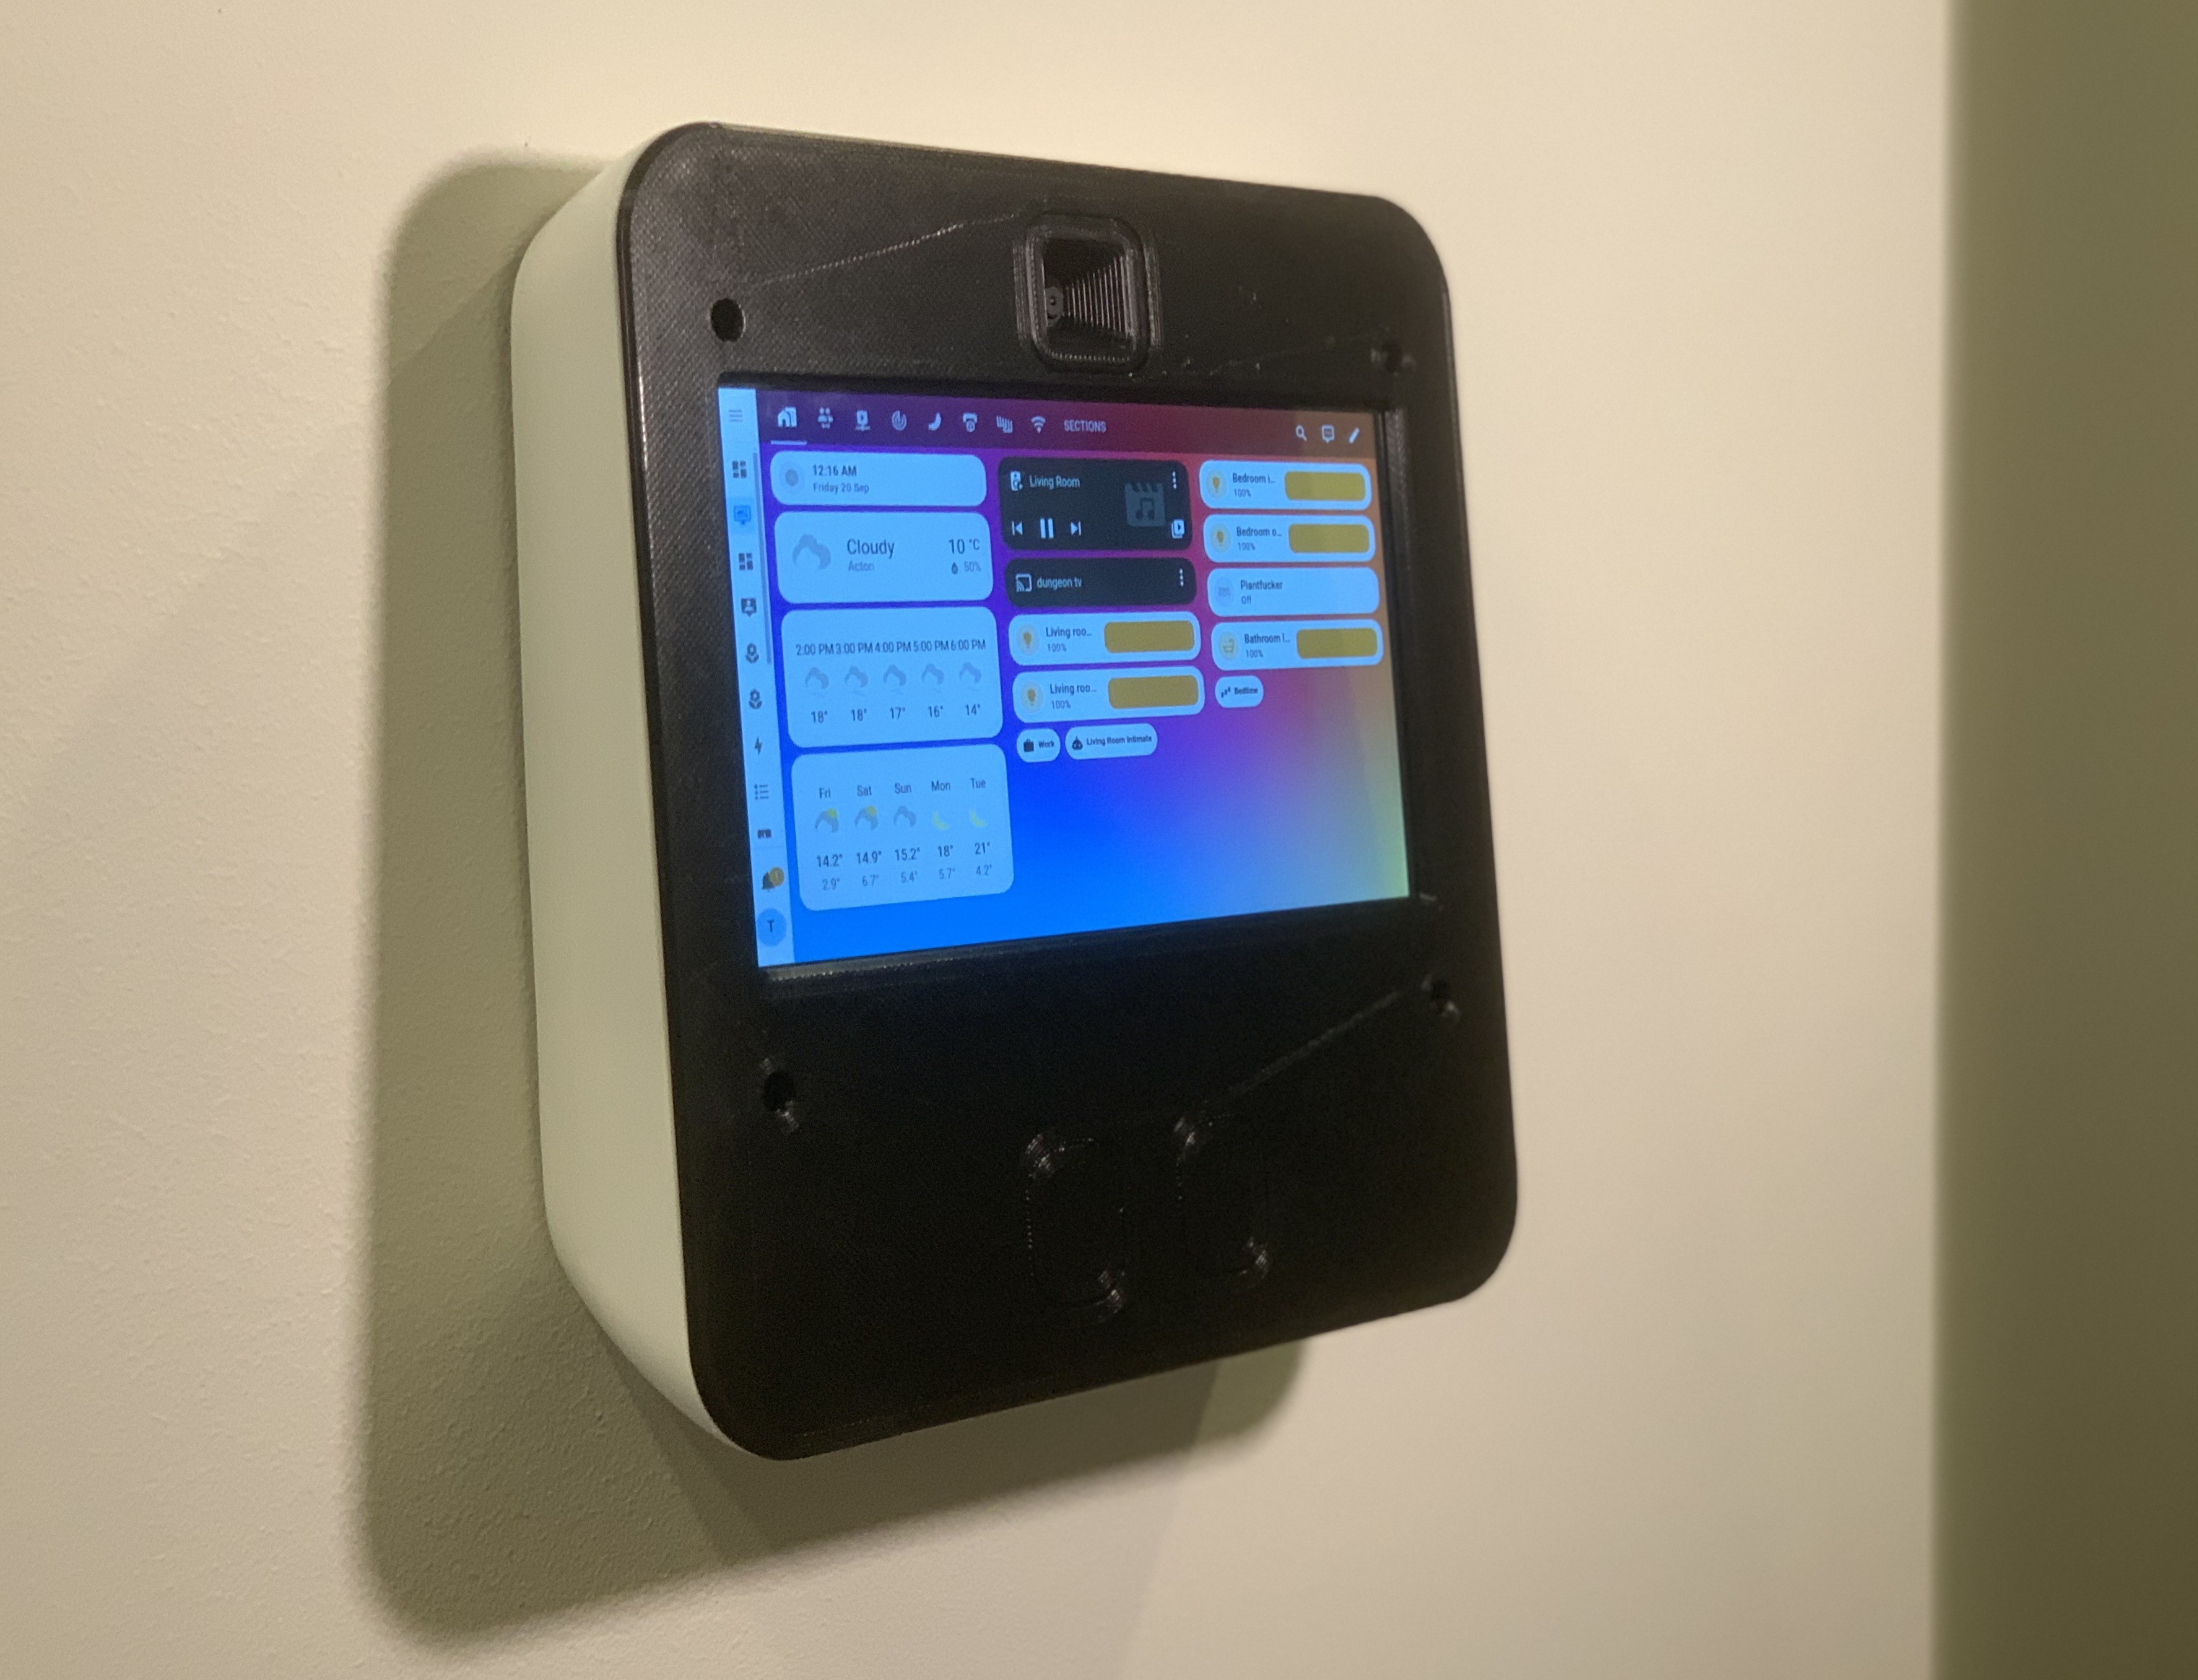
Essentially this is a case for a Raspberry Pi and a 7 inch Waveshare touchscreen, intended to be used as a wall-mounted kiosk for Homeassistant or anything else you might want to look at on a wall. The case is designed to have support for the following features:
- Presence sensing using a LD-2410C-P sensor
- Touch-sensitive buttons using TTP223 sensors
- Power over Ethernet using a RT9460 PoE module
This project consists of three main parts as follows:
- 3D files for the case that can be 3D printed. This repository includes both the parametric OpenSCAD file, as well as STL files that can be sliced and printed. The OpenSCAD file can potentially be changed to add additional sensors or remove unnecessary ones, or just about anything else.
ha_rpi_kiosk_control.py, a Python script that controls the screen backlight based on human presence as determined by the presence sensor. In order to use this script, some additional setup is required as detailed in the next section- Instructions on how to get various kiosk functions working in Raspberry Pi OS, and in the Wayland display server used in Raspberry Pi OS 12 Bookworm (Wayland has replaced the X window system)
The ha_rpi_kiosk_control.py Python script reads the signal from the LD-2410C-P presence sensor, and then turns on the backlight when a human is present, and off when not. To do so, it uses the Waveshare RPi USB Brightness library available at (https://github.com/waveshare/RPi-USB-Brightness). There are more details about installation in the comments in ha_rpi_kiosk_control.py, but it can be installed with the following process:
# Download the library:
git clone https://github.com/waveshare/RPi-USB-Brightness
cd RPi-USB-Brightness/64/desktop/
# Install:
chmod +x install.sh
./install.sh
# Test the library by setting brightness to 1 (10%), then to 10 (100%)
cd ../lite/
./Raspi_USB_Backlight_nogui -B 1
./Raspi_USB_Backlight_nogui -b 10
Now you will just need to get the python script from this repository, make it executable, and then give it a test run:
wget https://github.com/tsnoad/rpi_wall_case/raw/refs/heads/main/ha_rpi_kiosk_control.py
chmod +x ha_rpi_kiosk_control.py
./ha_rpi_kiosk_control.py
I keep this file in the home directory of my Rapberry Pi, but you can put it anywhere. Also, instead of using wget, you could also clone the full repository like this git clone https://github.com/tsnoad/rpi_wall_case.git, which will make it easier to get any potential updated versions. Just remember to update any commands that refer back to the location of the script.
The script will run continually until you quit it, or shutdown the Pi, or if something goes wrong. At the moment there is no Daemon or watchdog to make sure it is always running, and restart it if necessary. I'm hoping to add this in the future
This section has instructions on how to get the following features running:
- Set up multiple workspaces so we can have multiple apps running in full screen (for example Homeassistant, Klipper, etc).
- Allow the RPi to read signals from the TTP223 touch sensors on the front panel via the GPIO pins, and treat this input like a keyboard key. These keys will then be used to move between the fullscreen workspaces
- Automatically start the backlight control script when the Raspberry Pi boots, as well as any other apps that are desired. Ideally these apps will each be assigned to a different workspace, but I'm still trying to ge this to work
First, open the Raspberry Pi config.txt file like this sudo nano /boot/firmware/config.txt and add the following lines
#Assign GPIO to a key
#https://www.reddit.com/r/raspberry_pi/comments/1c9omhy/turning_a_gpio_button_input_into_a_simulated/
# KEY_PREVIOUSSONG      165
# GPIO.board=21 GPIO.bcm=9
dtoverlay=gpio-key,gpio=9,active_low=1,gpio_pull=up,keycode=165
# KEY_NEXTSONG          163
# GPIO.board=19 GPIO.bcm=10
dtoverlay=gpio-key,gpio=10,active_low=1,gpio_pull=up,keycode=163
This will tell the Raspberry Pi to read the signal from the TTP223 touch sensors on GPIO pins 19 and 21, and then when a sensor is triggered, act as if either the KEY_PREVIOUSSONG or KEY_NEXTSONG keyboard key has been pressed. Both the GPIO pins and keyboard keycodes can be changed as needed. After updating the config, the Raspberry Pi will need to be restarted
Next, open the wayland config file like this sudo nano .config/wayfire.ini and add this to the [core] section:
[core]
plugins = alpha animate autostart autostart-static command cube pixdecor expo fast-switcher fisheye grid idle invert move oswitch place resize switcher vswitch window-rules wm-actions wrot zoom winshadows
vwidth = 4
vheight = 1
As we're going to be using a number of Wayland plugins, these may need to be enabled, which is achieved by setting the plugins = line. The trick here is that Wayland won't let you just specify a plugin you want to enable, you have to either use the default set of plugins, or specify every plugin that will be enabled, and if you miss one, you will run into all kinds of issues. The list above worked for me, but what you should do is get the default list like this nano /etc/wayfire/defaults.ini and copy the plugins = line from there into .config/wayfire.ini. Then you will just need to make sure that the plugins we want are in the list, and add them if not. The plugins we need are expo, vswitch, window-rules, and autostart.
The vwidth = 4 and vheight = 1 lines set the number of workspaces, and how they're organised. This setup gives a single row of 4 workspaces, but other configurations are possible, however the organisation isn't really important. The number of workspaces can be increased or decreased as needed.
Next, add the following lines to the .config/wayfire.ini file:
[vswitch]
binding_left = KEY_PREVIOUSSONG
binding_right = KEY_NEXTSONG
This will take the touch sensor keyboard inputs we set up earlier, and tell wayfire to use these keys to switch workspaces left or right.
Optionally, you can also add the following lines:
[expo]
toggle = <ctrl> KEY_SPACE
This will trigger the expo view which shows an overview of all workspaces. At the moment this will be triggered by pressing <ctlr> and SPACE on a keyboard - if you have a keyboard attached - but this could be configured to another touch sensor or other GPIO input
Next, add the following lines to the .config/wayfire.ini file:
[autostart]
# Automatically open some apps in browser windows
browser_workspace1 = chromium --new-window --window-name="workspace1" --start-maximized --start-fullscreen "http://homeassistant.local:8123"
browser_workspace2 = chromium --new-window --window-name="workspace2" --start-maximized --start-fullscreen "http://homeassistant.local:8123/dashboard-weather"
browser_workspace3 = chromium --new-window --window-name="workspace3" --start-maximized --start-fullscreen "http://klipper.local"
# Automatically start the backlight control script when the Raspberry Pi boots up
kiosk_script = lxterminal -e "~/ha_rpi_kiosk_control.py"
top_script = lxterminal -e "top" #optional
This will automatically start the backlight control script when the Raspberry Pi boots, and will also start a couple of browser-based apps. You will need to change these lines depending on the apps you want to run, and what apps or sites you want them to display. The important part is --window-name="workspace[1-9]" which we'll use to put each window where we want it in the next step
Finally, add the following lines to the .config/wayfire.ini file:
[window-rules]
# Move each browser window to its own workspace
browser_workspace1_move = on created if title is "workspace1" then assign_workspace 0 0
browser_workspace2_move = on created if title is "workspace2" then assign_workspace 1 0
browser_workspace3_move = on created if title is "workspace3" then assign_workspace 2 0
# Move the terminal running the backlight control script to its own workspace
kiosk_script_maximize = on created if app_id is "lxterminal" then maximize
kiosk_script_move = on created if app_id is "lxterminal" then assign_workspace 3 0
These window rules will tell Wayland to move an app to a particular workspace when it starts. Eg, lxterminal (in which the backlight control script should be running) is moved to workspace 3 0, meaning column 4, row 1 of the grid of workspaces.
Now, restart the Raspberry Pi and wait to see if all of this has worked as expected... Good luck!