NetHang is a web-based tool designed to simulate network quality, focusing on the diversity of last-mile network conditions. For modern internet applications and services with high real-time requirements, NetHang offers a stable, reentrant, customizable, and easily extensible network quality simulation system, helping to achieve low-latency and high-quality internet services.

Unlike traditional network impairment tools that target backbone network quality between servers and switches, NetHang is optimized for:
- Simulating network quality from user equipment (UE) to servers, typically traversing:
- UE ↔ LAN (Wi-Fi or Wired) ↔ Routers ↔ ISP edge nodes ↔ APP servers
- UE ↔ Cellular ↔ ISP edge nodes ↔ APP servers
- UE ↔ Air interface ↔ Satellite ↔ APP servers
- The current network model is built and simplified based on existing network quality data modeling, while also supporting users to easily customize the network models they need for testing in YAML format. The following image shows the StarLink network simulation (Queuing changes every 20s - 30s caused by Satellite handover):
- NetHang clearly displays the differences in data traffic before and after simulation, as well as the state of the simulation conditions.
- ✅ Configurable traffic rules and models
- ✅ Traffic rate limiting and shaping
- ✅ Throttle queue depth control
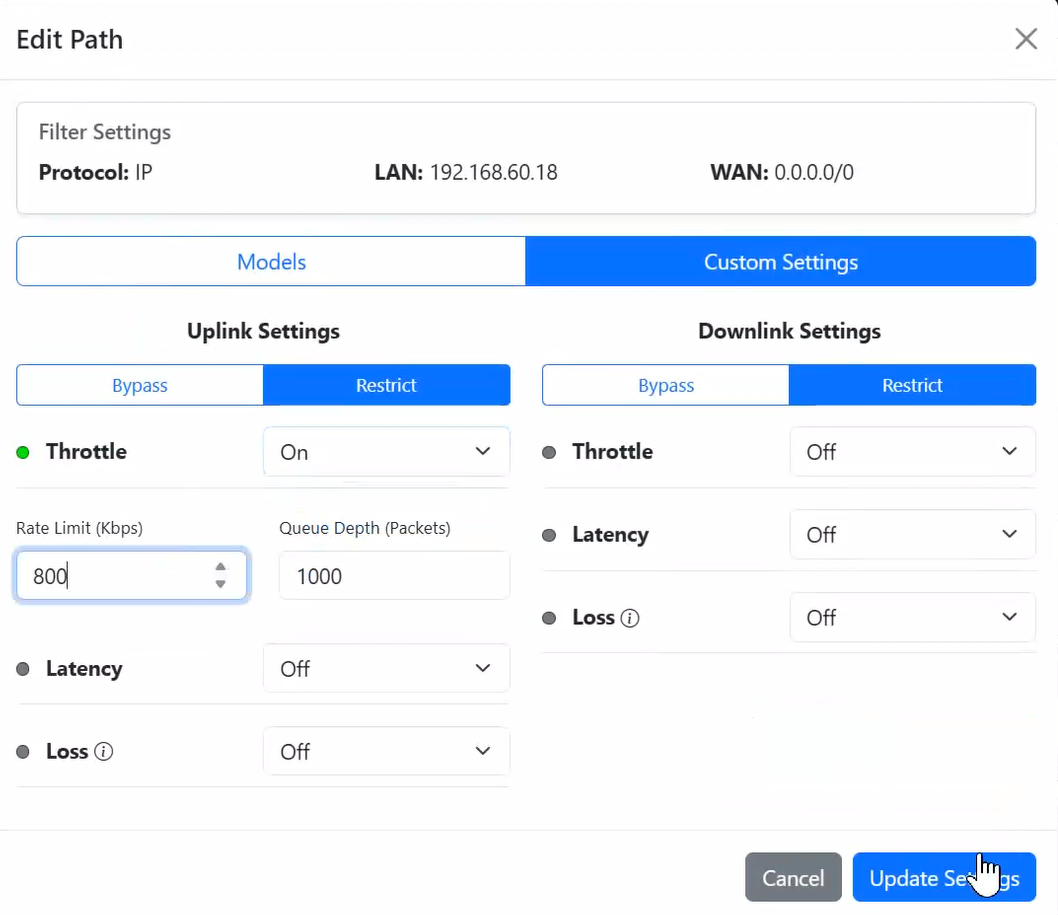
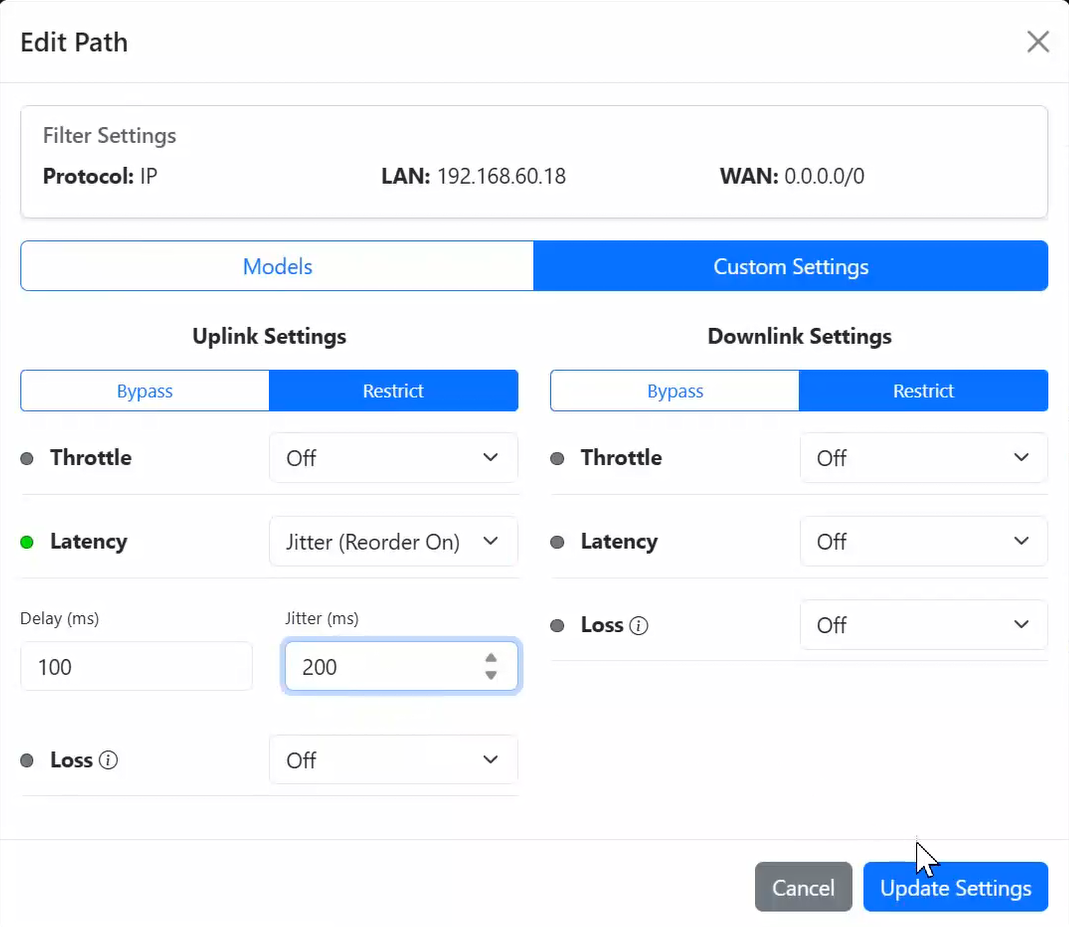
- ✅ Network latency and latency variation (Jitter) simulation
- ✅ Jitter simulation with and without reordering allowed
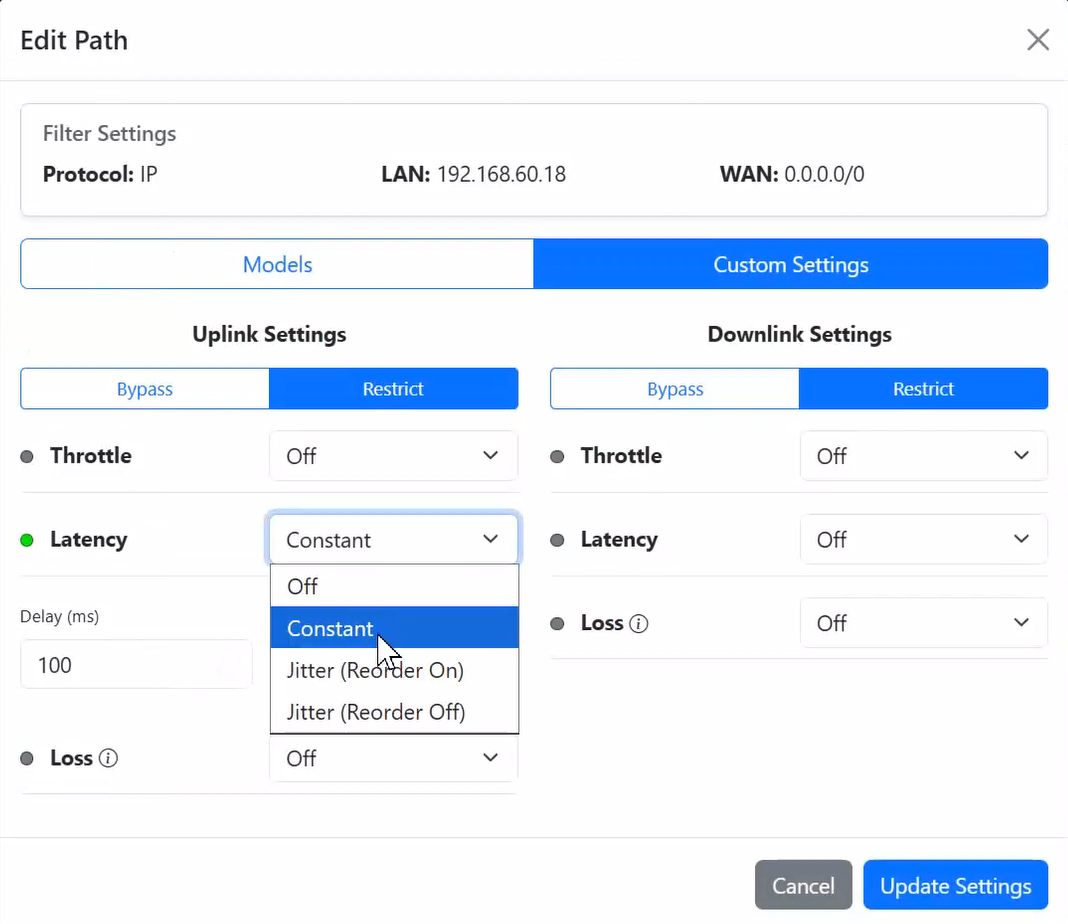
- ✅ Packet loss with random and burst support
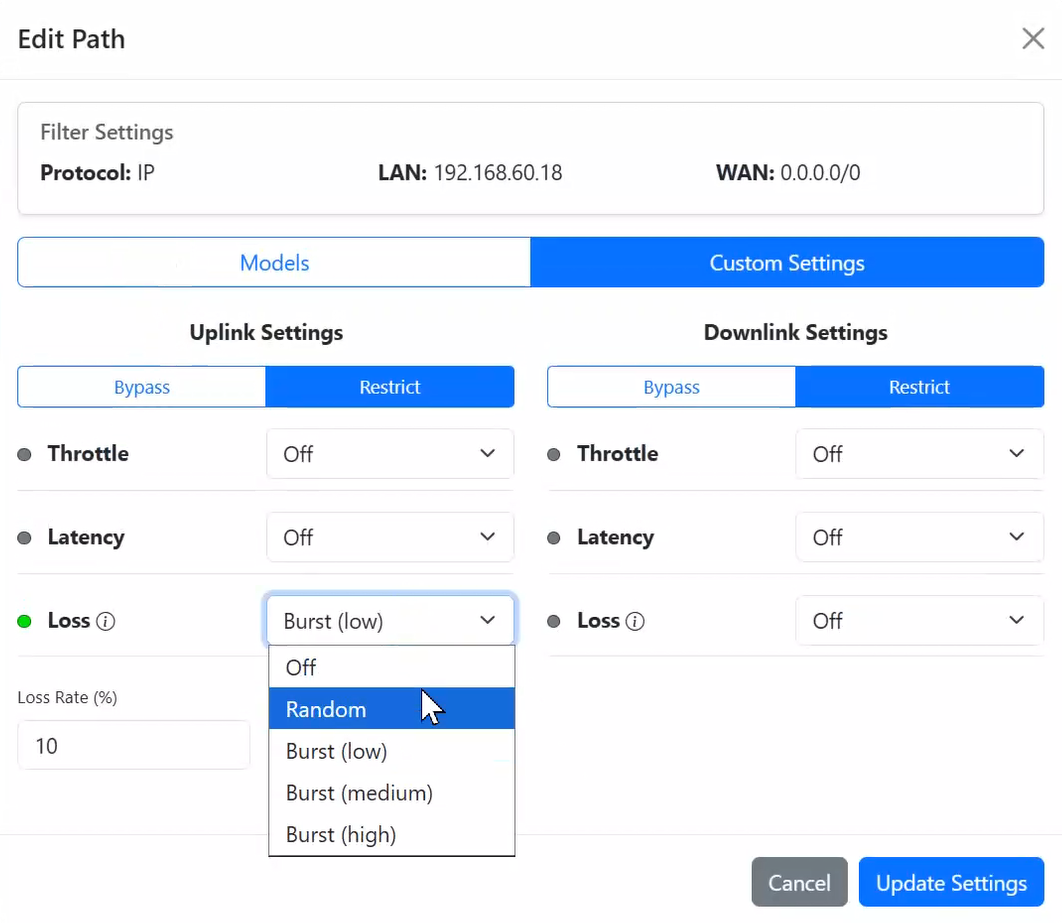
- ✅ Support for both uplink and downlink traffic control
- ✅ Real-time traffic statistics display
- Python 3.8 or higher
- Linux system with
tcandiptablessupport - Root privileges for traffic control operations
- Ubuntu 22.04 LTS (or similar Linux distribution)
- At least TWO network interface cards (NICs)
Before installing NetHang, you need to configure your Linux system as a software router. Follow the steps below to set up the required dependencies and network settings.
Install the required packages:
sudo apt update
sudo apt install iproute2 iptables libcap2-bin
Check command paths:
which tc
which iptables
They are typically located in /sbin/tc and /sbin/iptables (or /usr/sbin/tc and /usr/sbin/iptables).
Grant the CAP_NET_ADMIN capability, which is required for tc and iptables:
sudo setcap cap_net_admin+ep /usr/sbin/tc
sudo setcap cap_net_admin+ep /usr/sbin/xtables-nft-multi
Verify the permissions:
iptables -L
tc qdisc add dev lo root netem delay 1ms
tc qdisc del dev lo root
If the output is without errors, the permissions are set correctly. If not, you may need to reboot the machine.
Step 1: Check Current IP Forwarding Status
Before proceeding, check whether IP forwarding is currently enabled on your Ubuntu machine:
cat /proc/sys/net/ipv4/ip_forwardIf the output is 0, IP forwarding is disabled. If it's 1, it's already enabled.
Step 2: Enable IP Forwarding
To enable IP forwarding temporarily (valid until the next reboot), run:
sudo sysctl -w net.ipv4.ip_forward=1To make the change permanent, edit the /etc/sysctl.conf file and uncomment or add the line:
net.ipv4.ip_forward=1Then, apply the changes:
sudo sysctl -p /etc/sysctl.confStep 1: List Network Interfaces
Identify your network interfaces using the ip command:
ip addrYou should see a list of interfaces like eth0, eth1, etc.
Step 2: Configure Network Interfaces
Edit the network configuration files for your interfaces. For example, to configure eth0 and eth1, edit /etc/network/interfaces:
sudo vi /etc/network/interfacesHere's a sample configuration for eth0 and eth1:
# eth0 - Internet-facing interface
auto eth0
iface eth0 inet dhcp

# eth1 - Internal LAN interface
auto eth1
iface eth1 inet static
    address 192.168.1.1
    netmask 255.255.255.0
Step 3: Apply Network Configuration Changes
Apply the changes to network interfaces:
sudo systemctl restart networkingTo enable NAT for outbound traffic from your LAN, use iptables:
sudo iptables -t nat -A POSTROUTING -o eth0 -j MASQUERADEMake the change permanent by installing iptables-persistent:
sudo apt update
sudo apt install iptables-persistent
Follow the prompts to save the current rules.
This step is optional. If you want to use DHCP to assign IP addresses to devices on the LAN, you can configure the DHCP server.
Step 1: Install DHCP Server
If you want your Ubuntu router to assign IP addresses to devices on the LAN, install the DHCP server software:
sudo apt update
sudo apt install isc-dhcp-server
Step 2: Configure DHCP Server
Edit the DHCP server configuration file:
sudo vi /etc/dhcp/dhcpd.confHere's a sample configuration:
subnet 192.168.1.0 netmask 255.255.255.0 {
  range 192.168.1.10 192.168.1.50;
  option routers 192.168.1.1;
  option domain-name-servers 8.8.8.8, 8.8.4.4;
}
Step 3: Start DHCP Server
Start the DHCP server:
sudo systemctl start isc-dhcp-serverStep 4: Enable DHCP Server at Boot
To ensure the DHCP server starts at boot:
sudo systemctl enable isc-dhcp-serverYou can install NetHang from PyPI using the following command:
pip install nethangYou can also install NetHang from source by cloning the repository and running the following command:
git clone https://github.com/stephenyin/NetHang.git
cd NetHang
pip install .MIT License
Copyright (c) 2025 NetHang Contributors
Permission is hereby granted, free of charge, to any person obtaining a copy of this software and associated documentation files (the "Software"), to deal in the Software without restriction, including without limitation the rights to use, copy, modify, merge, publish, distribute, sublicense, and/or sell copies of the Software, and to permit persons to whom the Software is furnished to do so, subject to the following conditions:
The above copyright notice and this permission notice shall be included in all copies or substantial portions of the Software.
THE SOFTWARE IS PROVIDED "AS IS", WITHOUT WARRANTY OF ANY KIND, EXPRESS OR IMPLIED, INCLUDING BUT NOT LIMITED TO THE WARRANTIES OF MERCHANTABILITY, FITNESS FOR A PARTICULAR PURPOSE AND NONINFRINGEMENT. IN NO EVENT SHALL THE AUTHORS OR COPYRIGHT HOLDERS BE LIABLE FOR ANY CLAIM, DAMAGES OR OTHER LIABILITY, WHETHER IN AN ACTION OF CONTRACT, TORT OR OTHERWISE, ARISING FROM, OUT OF OR IN CONNECTION WITH THE SOFTWARE OR THE USE OR OTHER DEALINGS IN THE SOFTWARE.
Contributions are welcome! Please follow these steps:
- Fork the repository
- Create a feature branch (
git checkout -b feature/AmazingFeature) - Commit your changes (
git commit -m 'Add some AmazingFeature') - Push to the branch (
git push origin feature/AmazingFeature) - Open a Pull Request
Please make sure to update tests as appropriate and adhere to the existing coding style.
NetHang Contributors
- Thanks to all contributors who have helped with the project
- Inspired by various network traffic control tools and utilities
Made with ❤️ by the NetHang community