


Customizable input accessory view
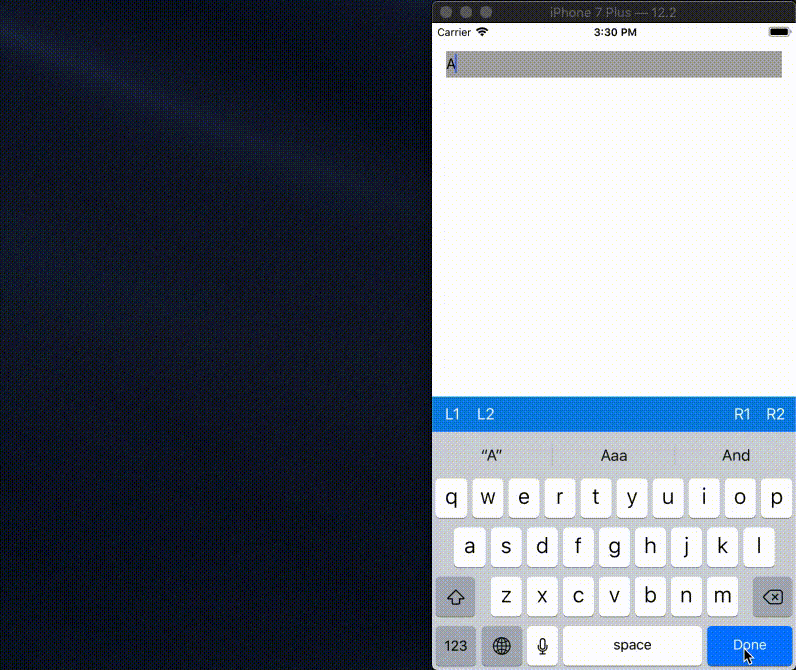
- You can create an bar on the keyboard with easy way.
- FlexibleInputStackBar has two UIStackView at left and right.
The example application is the best way to see FlexibleInputStackBarDemo in action. Simply open the Demo.xcworkspace.
FlexibleInputStackBar is available through CocoaPods. To install it, simply add the following line to your Podfile:
pod 'FlexibleInputStackBar'Carthage is a decentralized dependency manager that builds your dependencies and provides you with binary frameworks.
To integrate FlexibleInputStackBar into your Xcode project using Carthage, specify it in your Cartfile:
github "kzumu/FlexibleInputStackBar"
Run carthage update to build the framework and drag the built FlexibleInputStackBar.framework into your Xcode project.
On your application targets’ “Build Phases” settings tab, click the “+” icon and choose “New Run Script Phase” and add the Framework path as mentioned in Carthage Getting started Step 4, 5 and 6
To integrate using Apple's Swift Package Manager, add the following as a dependency to your Package.swift:
dependencies: [
    .package(url: "https://github.com/kzumu/FlexibleInputStackBar.git", from: "0.0.2")
]import FlexibleInputStackBar
class ViewController: UIViewController {
private let textField: UITextField = {
let field = UITextField()
return field
}()
private lazy var flexibleInputStackBar: FlexibleInputStackBar = {
let bar = FlexibleInputStackBar(height: 40)
bar.addArrangedSubviewToLeft(leftButton1)
bar.addArrangedSubviewToRight(rightButton2)
return bar
}()
private let leftButton1 = UIButton(frame: .init(x: 0, y: 0, width: 40, height: 40))
private let rightButton1 = UIButton(frame: .init(x: 0, y: 0, width: 40, height: 40))
override var inputAccessoryView: UIView? { return flexibleInputStackBar }
// if you return true, always input bar is shown.
override var canBecomeFirstResponder: Bool { return true }
override func viewDidLoad() {
super.viewDidLoad()
view.addSubview(textField)
}
}Contributions are very welcome 🙌
