This report delves into the realm of toon shading techniques within Unity, employing Shader Graph and HLSL for the lighting implementation.
Made by: Rafael José, a22202078
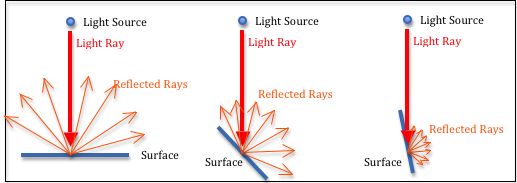
The diffuse lighting model considers both the direction of light and the orientation of the surface to determine the quantity of light that is dispersed and reflected from the surface in various directions.
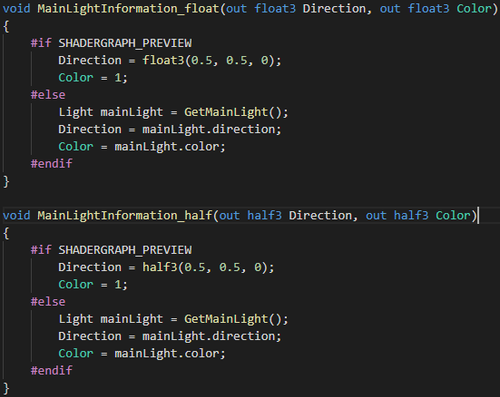
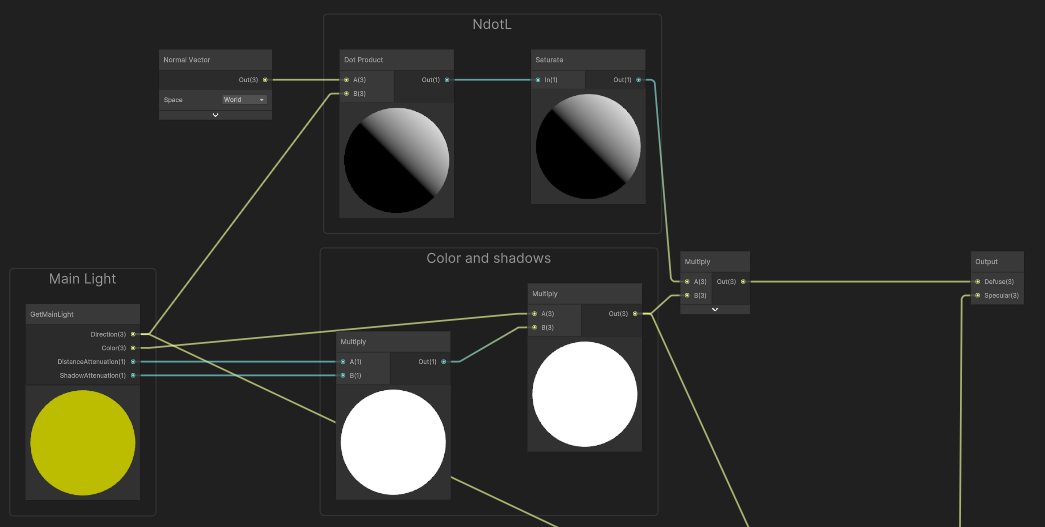
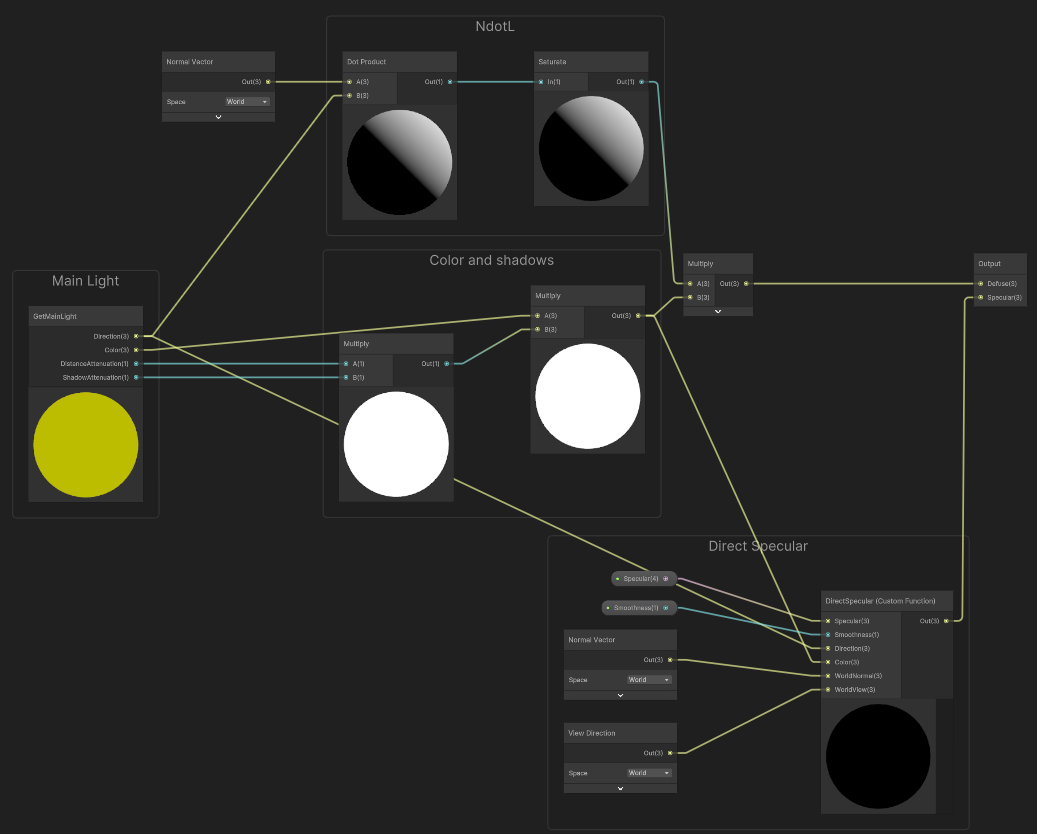
To calculate this light, initially, I obtained the scene lighting through a function in .hlsl, setting predefined values while inside the shader graph. Within the scene, the scene's own light was used, captured through the Unity function GetMainLight().
Following that, I utilized the Lambert lighting model, calculating the dot product of the world's normal and the light direction. Afterward, I applied a saturate function to catch values that are below 0 and above 1, essentially determining how much the light reflects in the model in all directions. Finally, I multiplied the saturated dot product values by the color of the main light, all of this in the shader graph.
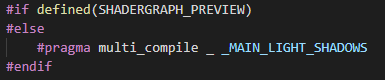
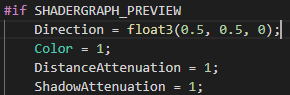
The next step was to add shadows to the Lambert lighting model. I began by using a #pragma multi_compile _ MAIN_LIGHT_SHADOWS. This directive is specific to Unity's shader system and is employed to generate various versions of the shader for different scenarios. In this instance, it's creating versions of the shader with and without main light shadows. The _ denotes a version of the shader without main light shadows, while _MAIN_LIGHT_SHADOWS designates a version with main light shadows. This line will only be executed if the shader is not being previewed in Shader Graph.
A float3 representing the world position, the distance attenuation DistanceAttenuation, and the shadow attenuation ShadowAttenuation was added. Additionally, an If SHADERGRAPH_PREVIEW is defined, the function sets all output values to default values.
If SHADOWS_SCREEN is defined, the function calculates the clip position and shadow coordinates based on the screen position. Otherwise, it calculates the shadow coordinates based on the world position. These pieces of code are used to control the lighting and shadowing effects in the shader.

The function retrieves the main light's properties using the GetMainLight(shadowCoord) function and stores them in the Direction, Color, and DistanceAttenuation variables.

If _MAIN_LIGHT_SHADOWS is not defined or _RECEIVE_SHADOWS_OFF is defined, the function sets the shadow attenuation to 1.0, effectively disabling shadows.

If SHADOWS_SCREEN is defined, the function calculates the shadow attenuation based on the screen space shadow map. Otherwise, it calculates the shadow attenuation based on the shadow map.

In the Shader Graph, the Distance Attenuation and Shadow Attenuation are multiplied to obtain a final shadow value. This value is then multiplied by the color and, finally, by the result given by the light to calculate the Lambert lighting model with shadows.
Diffuse in the sub shader graph:
Specular lighting relies on the direction vector of the light, the normal vectors of the object, and the viewer's perspective, such as the direction from which the player observes the fragment. It is grounded in the reflective characteristics of surfaces. If we envision the object's surface as a mirror, specular lighting is most intense in areas where the reflected light would be prominently visible on the surface.

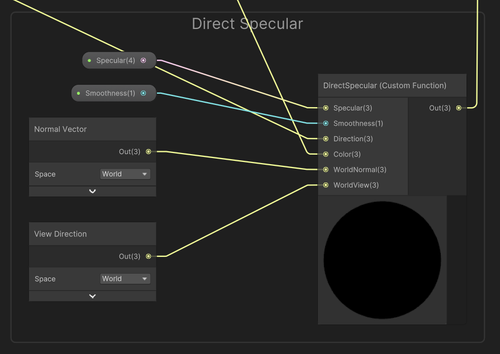
To achieve this, I created a function called DirectSpecular.

This is the function signature. The function takes in several parameters:
Specular: The base specular color of the material.Smoothness: The smoothness of the material, which affects the size and sharpness of the specular highlight.Direction: The direction of the light.Color: The color of the light.WorldNormal: The normal vector at the point on the surface being shaded, in world space.WorldView: The direction from the point on the surface being shaded to the camera, in world space.Out: An output parameter that is used to store the calculated specular lighting
If SHADERGRAPH_PREVIEW is defined, the function set the output to 0, meaning there's no specular lighting.
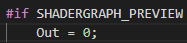
Else If the shader is not being previewed in Shader Graph, the function calculates the specular lighting based on the input parameters. First, the Smoothness value is transformed using an exponential function to increase its range. Then, the WorldNormal and WorldView vectors are normalized to ensure they have a length of 1. Finally, the LightingSpecular function is called to calculate the specular lighting based on the light color, light direction, surface normal, view direction, specular color, and smoothness. The result is stored in the Out variable.

Afterward, this created function is used in the Shader Graph, and the necessary inputs are provided, including specular and smoothness settings for the specular. The remaining inputs are essential for calculating the specular effect, using the direction, and the color, previous used.
Specular in the sub shader graph:
In the end, the specular and the diffuse are combined by an add node at the main shader graph.
Final Main light sub shader graph:
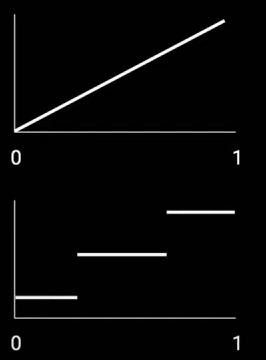
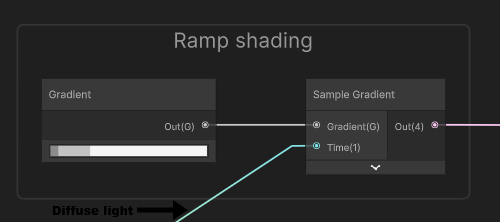
Basically, I took a gradient and mapped the same values to a sample gradient to create hard transitions between colors. Without this gradient, the light would have continuous values between 0 and 1, and by mapping the values using a ramp, we obtain step values. In the case of this shader, these steps occur multiple times.
Example graph:
In shader graph:
Preview:
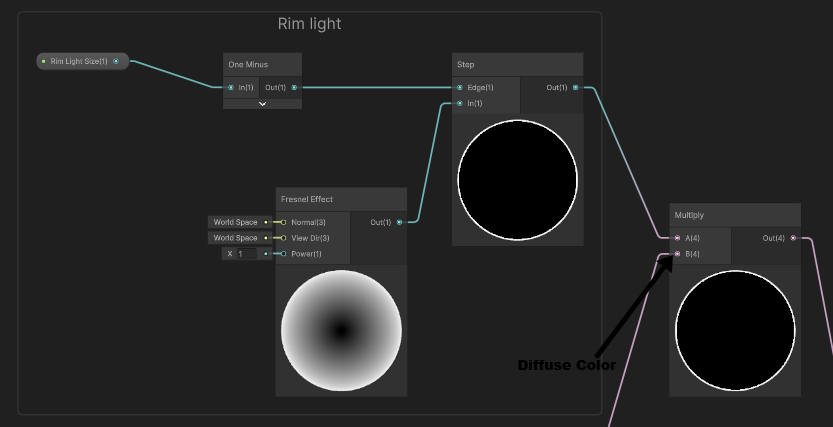
It's essentially a light outline which always appears around the character updating from the angle we are looking at it, and its color is the one that the light reflects from each part of the object (if one part of the object is blue the glow will be blue but if another part is white the glow will be white, etc.). This is achieved through a step between the desired size of this light and a Fresnel Effect, manipulating the Fresnel Effect to achieve the desired size of the light. A value size of 1 means the entire model is filled with this light. The light expands and contracts from the edges of the model towards the center or vice versa.
In shader graph:
Preview:
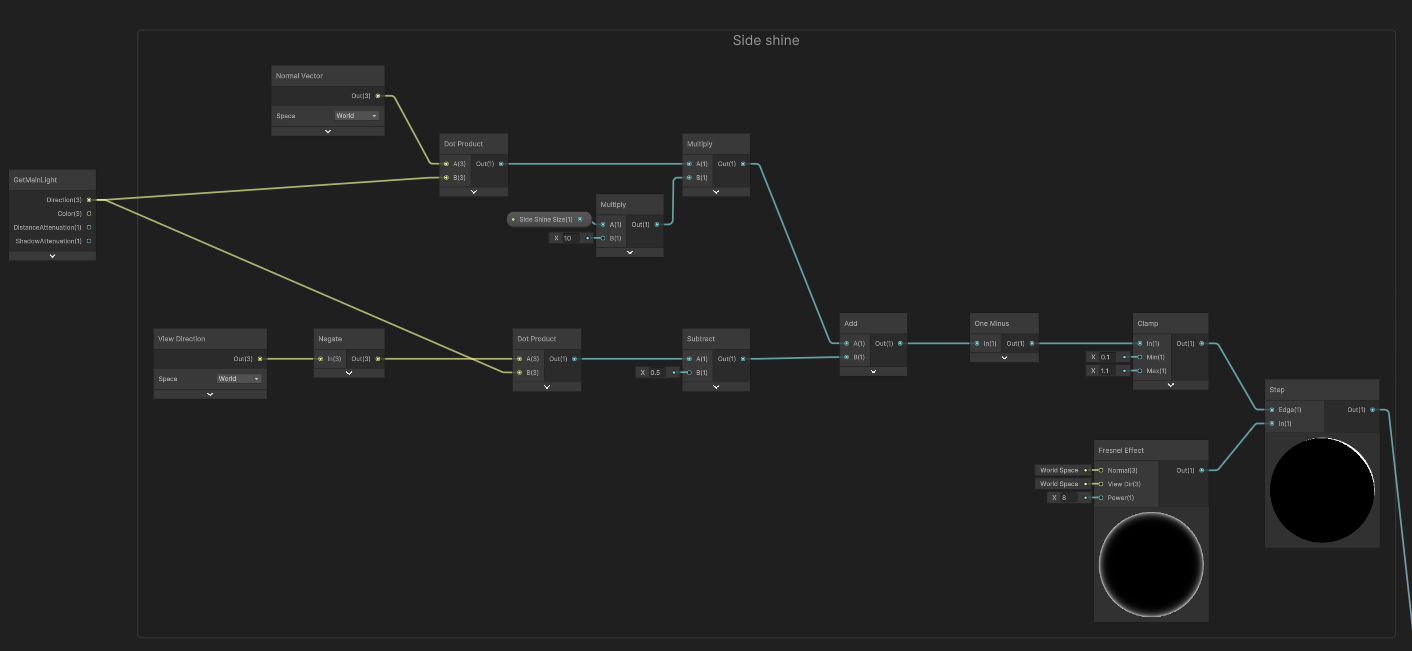
It illuminates the side being lit by the light at the brightest point of the lighting model. Two factors control the brightness of this shine. One is the dot product of the view direction in inverted world space and the light direction, which is then multiplied by the desired size multiplied by 10. This multiplication by 10 scales the desired size to a larger number, allowing the parameter to be adjusted between 0 and 1 by the user. The other factor is the dot product of the world normal with the light direction, which is then subtracted by 0.5. This subtraction makes the side shine smaller and more practical for the user-defined size of the side shine. These two factors are added together to calculate how much we see the Fresnel Effect. A "one minus" operation is then used to invert the value, making it negative and thus directing the shine toward the light instead of against it. A clamp function is applied to prevent these values from exceeding the range of 0.1 to 1.1. All of this is then subjected to a step function between the previous calculations and a Fresnel Effect. This light effect becomes noticeable when viewing the model from a slightly off-center angle.
In shader graph:
Preview:

(The preview has the side shine + ramp shading)
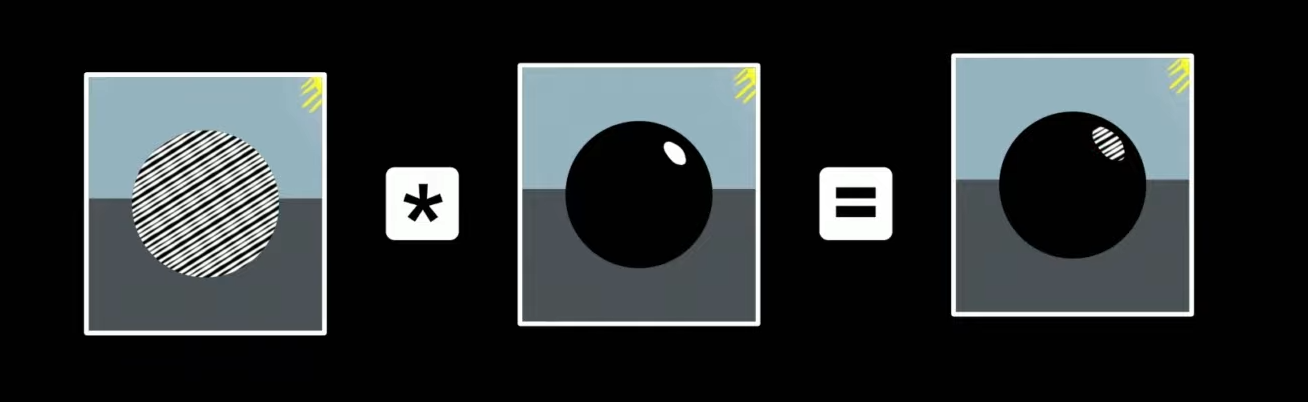
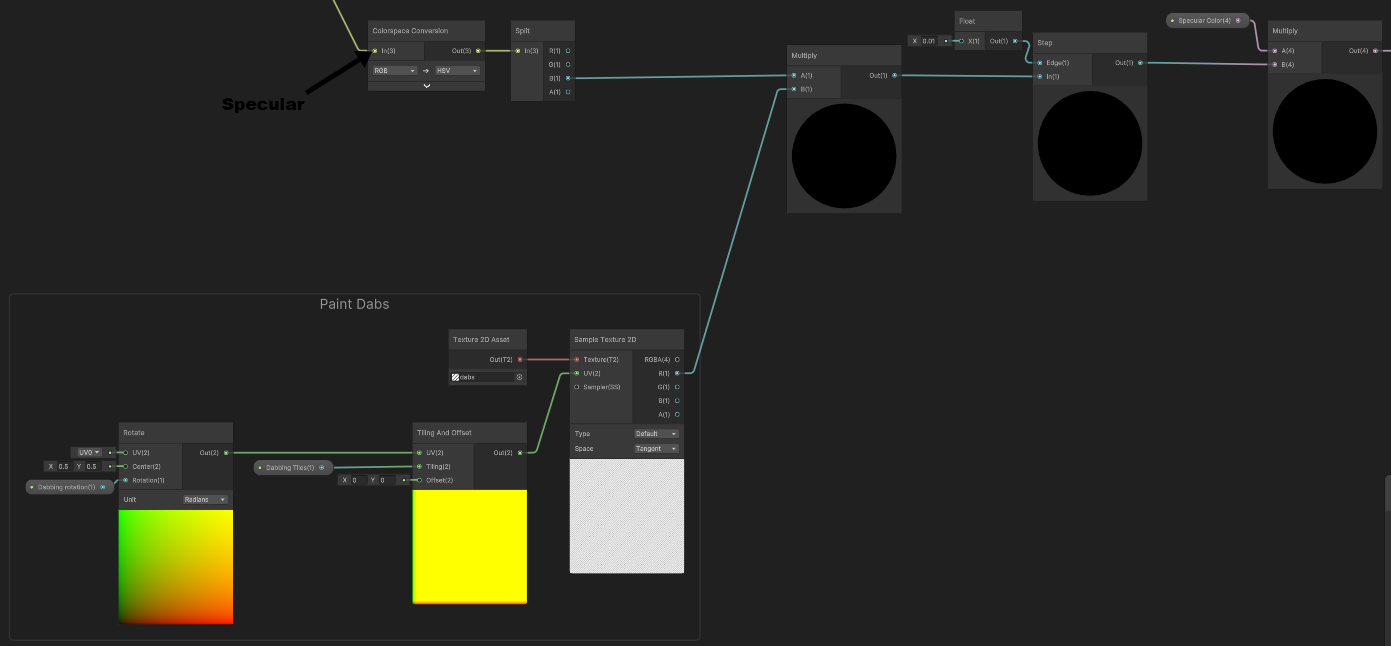
This effect is designed to make the specular component appear as if it were painted with a brush. Essentially, a texture with repeating lines is used, allowing the adjustment of the number of lines and their rotation. The specular is converted from RGB to HSV, and the blue component is employed to multiply the red RGB values from the texture. This multiplication achieves color blending, modulating the intensity of specular highlights and ensuring a unified and harmonized combination of colors in the final output. Following this, the result of the multiplication undergoes a step function at a certain point to distinguish what is white, and the rest is black. Finally, it is multiplied by the color of the specular, which can be adjusted by the user within the editor.
Mockup:
In shader graph:
Preview:
The entire size of the outline is controlled by the user through the outline size, which calculates how much the depth textures shift in each direction per pixel. To achieve this, screen width and height are utilized, and instead of subtracting two shifted depth textures, all four diagonals are used to appear more balanced. The values of the four diagonals are then added to the initial depth texture and subtracted from the initial depth texture, transforming them into absolute values. To ensure that the outline is equally visible in both the Scene view and the Game view, I multiplied the division of the camera far plane by 10. However, this introduced another issue - a white background now appeared in the scene. To address this, I implemented a fade controlled by the user, causing the outline to fade even more with distance. I took the power of the scene depth in eye mode, which converts the depth into eye space units, using the value of this fade, and divided the current output by the result of this power. In the end, only 0 or 1 is retained using a compare node and I performed a linear interpolation (lerp) between the lighting color and the outline color using the outline.
In shader graph:

Preview:

Learn stylized shading with Shader Graph - Unite Copenhagen
Custom lighting in Shader Graph: Expanding your graphs in 2019
9.2 - Diffuse Lighting — LearnWebGL (brown37.net)
Specular Lighting - A Visual Explanation - YouTube
Book | The Unity Shaders Bible | Jettelly
Unity Toon Shader Tutorial (roystan.net)
How we built the toon shading | Open Projects Devlog (youtube.com)
Unity Toon Shader Tutorial (2023) (occasoftware.com)
Best Unity Shader Graph Tutorials - Game Development - GameDev Academy
Creating a Cel-Shading Toon Shader (youtube.com)
Toon Shading - The EASIEST WAY! Unity3D URP Shadergraph Tutorial
Computação Gráfica - Aula 08/11/2023 (youtube.com)
Computação Gráfica - Aula 06/12/2023 (youtube.com)
Computação Gráfica - Aula 13/12/2023 (youtube.com)
Github - Shader Graph Custom Lighting (by: alindmanUnity)
Github - BotW Toon Shader (by: ciro-unity)
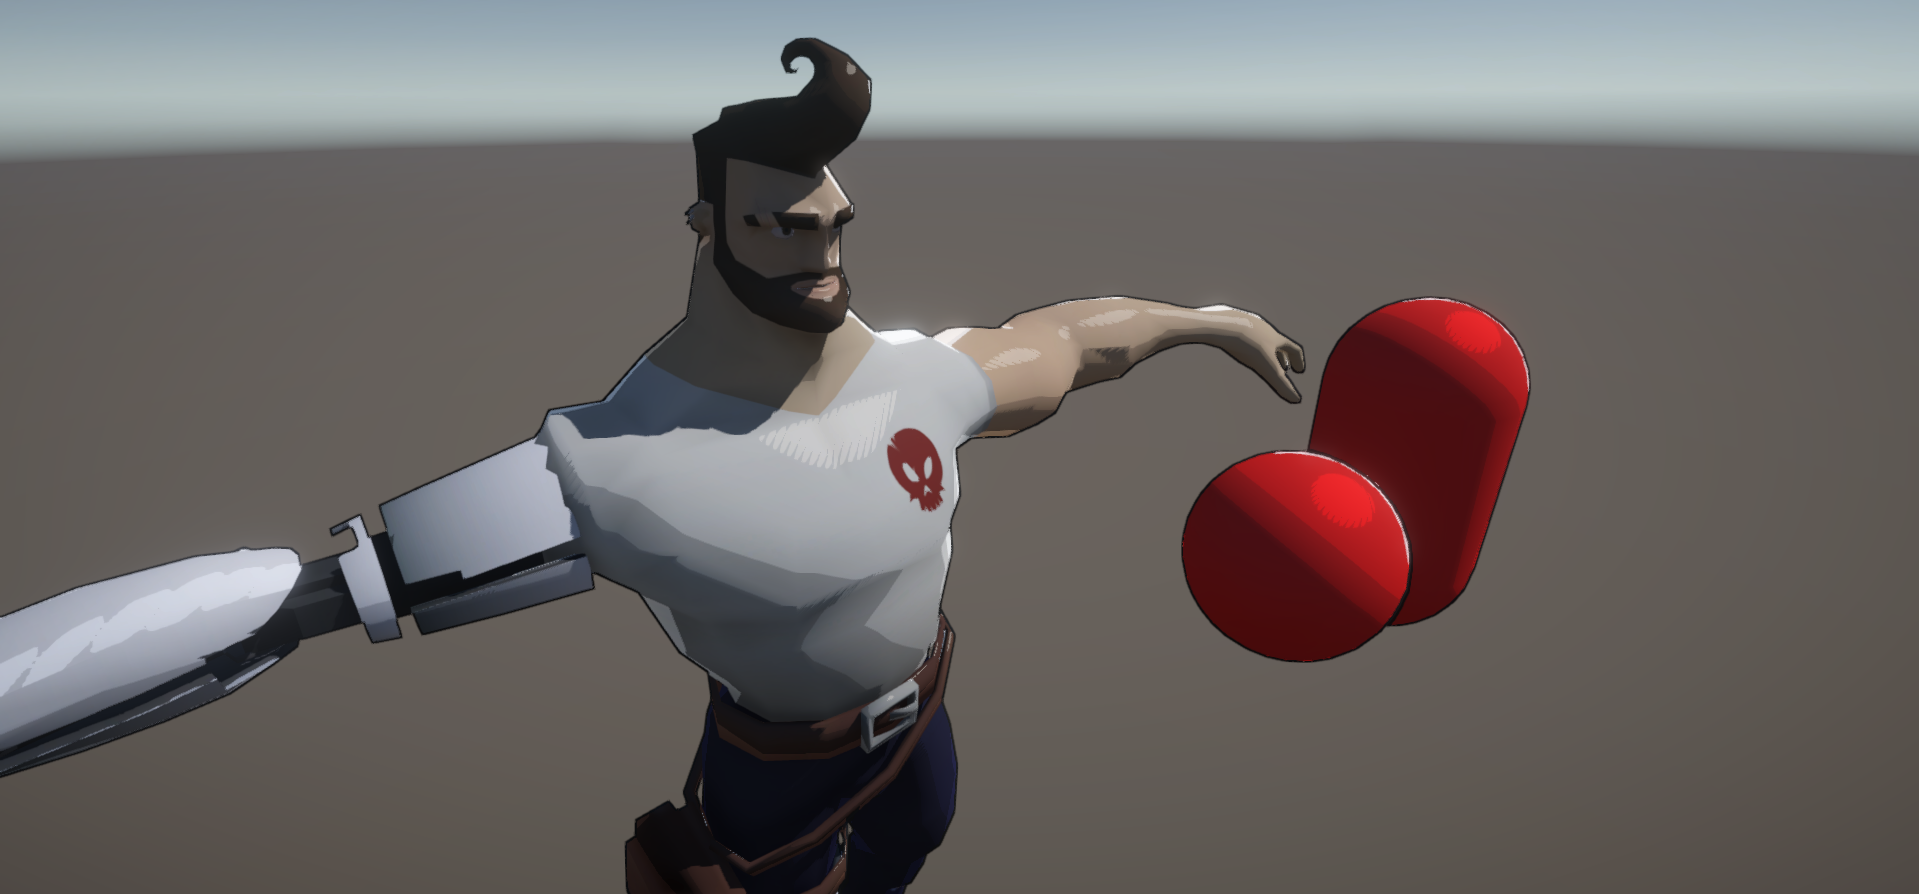
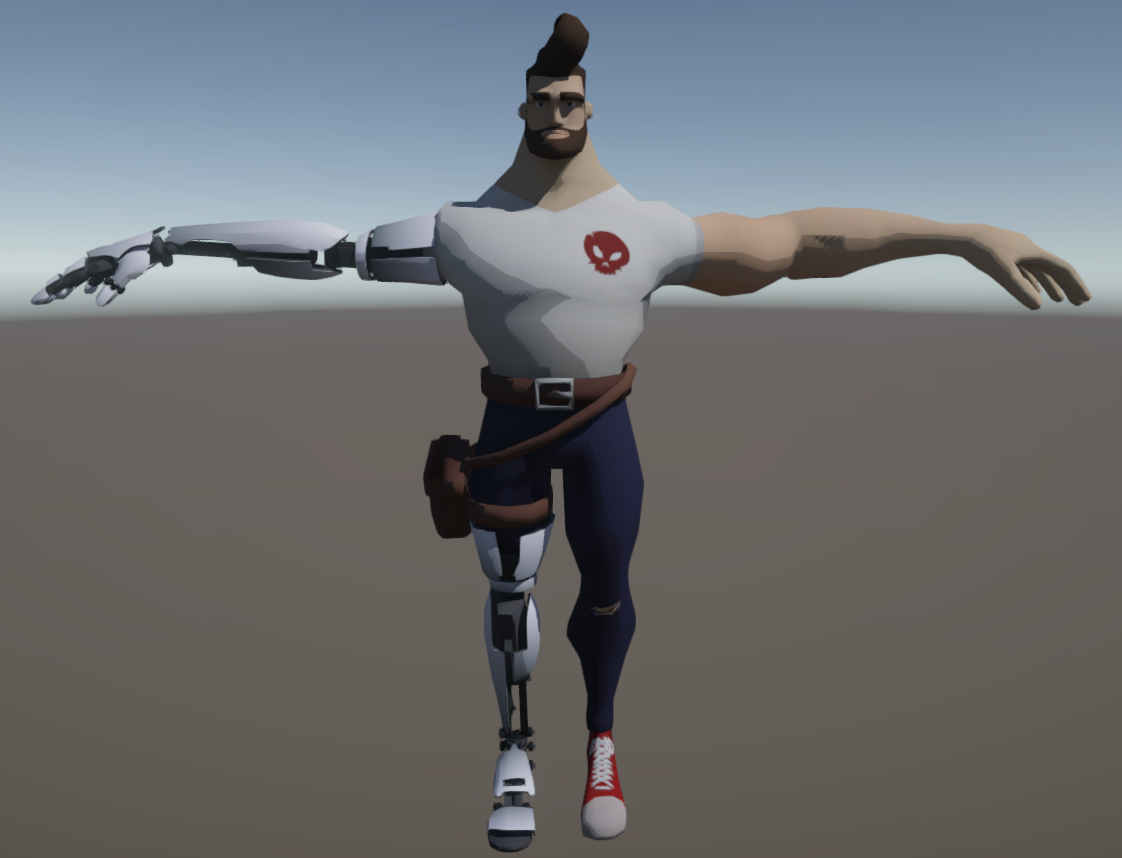
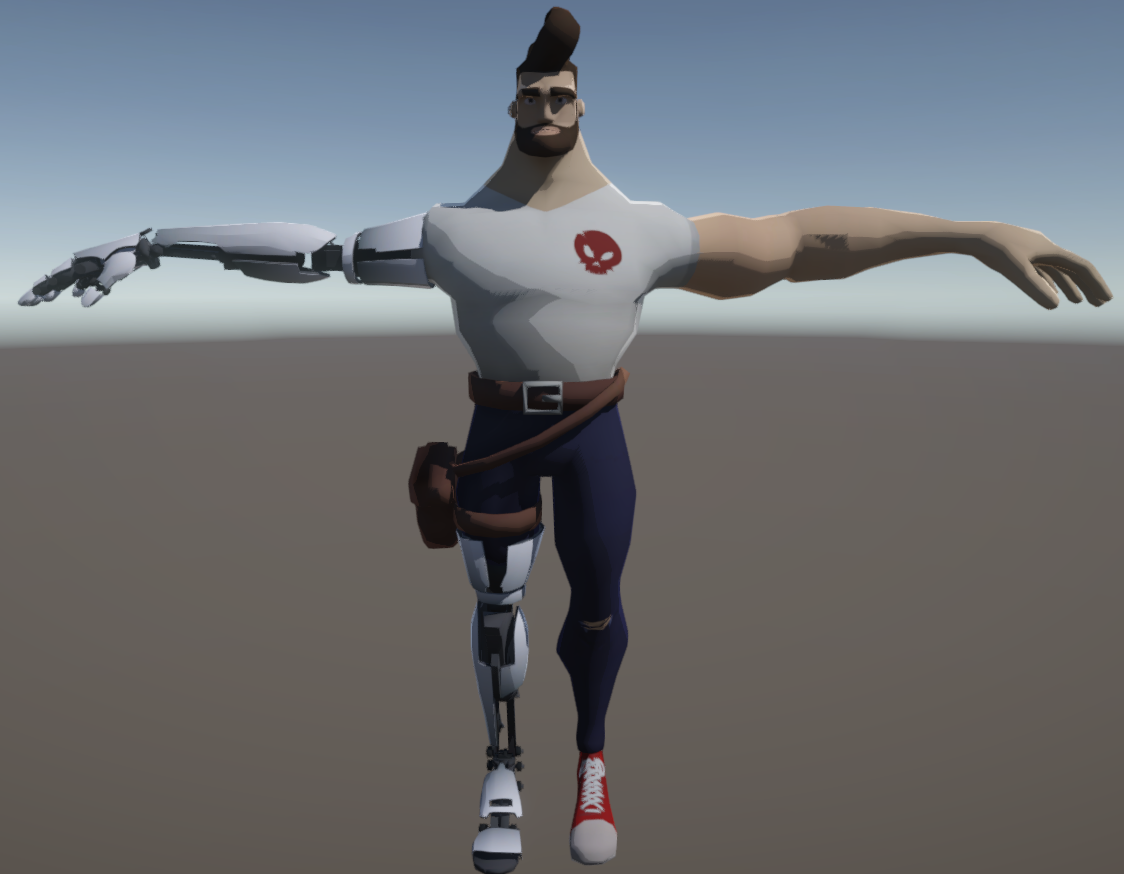
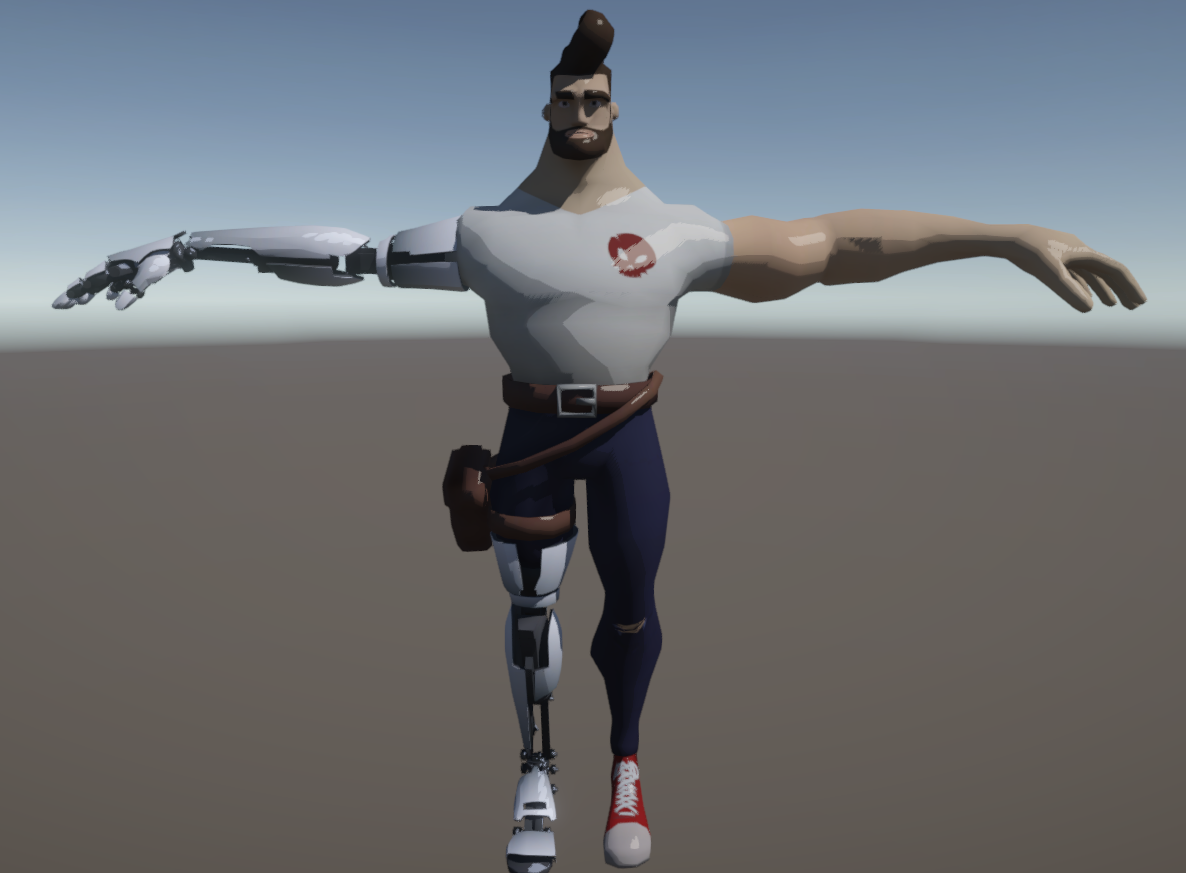
Character used to test the shader: Cyborg Character by: Hadron Studio