This project demonstrates how to build stateful AI agents and deploy a Spring Boot application that leverages the Google Agent Development Kit (ADK) and Firestore to create an AI-powered agent that is deployed to Google Cloud Run and also provides an API to interact with the agent while storing the session state in Firestore so that the agent can be used in a production or enterprise environment that can be scaled and managed.
🚀 Full Guide & Architectural Breakdown: https://www.garvik.dev/ai-agents/pattern/google-ai-sdk-spring-boot
The application consists of:
- Spring Boot: The core framework for the web application.
- Google ADK: Simplifies interaction with Gemini models and tool calling.
- Firestore: Used for session persistence and state management.
- Swagger/OpenAPI: Provides interactive API documentation.
- Google Cloud Run: The target platform for deployment.
- Java 17 or higher
- Maven 3.8+
- Google Cloud SDK (gcloud CLI)
- An active Google Cloud Project
The following APIs must be enabled in your Google Cloud Project:
- Vertex AI API:
aiplatform.googleapis.com - Cloud Firestore API:
firestore.googleapis.com - Cloud Run API:
run.googleapis.com - Cloud Build API:
cloudbuild.googleapis.com - Artifact Registry API:
artifactregistry.googleapis.com
gcloud services enable aiplatform.googleapis.com firestore.googleapis.com run.googleapis.com cloudbuild.googleapis.com artifactregistry.googleapis.comInitialize Firestore in Native Mode in your preferred region (e.g., us-central1).
Create a service account for the application and grant it the necessary roles:
- Vertex AI User:
roles/aiplatform.user(to call Gemini) - Cloud Datastore User:
roles/datastore.user(legacy role needed for Firestore access) - Firestore User:
roles/datastore.user
# Create Service Account
gcloud iam service-accounts create spring-adk-sa

# Grant Roles
gcloud projects add-iam-policy-binding [PROJECT_ID] \
    --member="serviceAccount:spring-adk-sa@[PROJECT_ID].iam.gserviceaccount.com" \
    --role="roles/aiplatform.user"

gcloud projects add-iam-policy-binding [PROJECT_ID] \
    --member="serviceAccount:spring-adk-sa@[PROJECT_ID].iam.gserviceaccount.com" \
--role="roles/datastore.user"API key must either be provided or set in the environment variable GOOGLE_API_KEY or GEMINI_API_KEY. If both are set, GOOGLE_API_KEY will be used For Vertex AI APIs, either project/location or API key must be set. Recommended to use GOOGLE_CLOUD_LOCATION=us-central1,GOOGLE_GENAI_USE_VERTEXAI=true. one less thing to worry about.
Set the following environment variables if not using default configurations:
GOOGLE_CLOUD_PROJECT: Your GCP Project ID.GOOGLE_API_KEY: (Optional) If not using Vertex AI, you can use a Gemini API key.
For local development, use Application Default Credentials:
gcloud auth application-default loginmvn clean compile spring-boot:runThe application will be available at http://localhost:8080.
The project includes built-in Swagger UI for exploring the API.
- Swagger UI:
http://localhost:8080/swagger.html - OpenAPI Docs:
http://localhost:8080/api-docs
Note
When deployed to Cloud Run, Swagger is enabled by default via springdoc.enabled=true in application.properties.
The project includes a cloudbuild.yaml for automated deployment.
Run the following command from the project root:
gcloud builds submit --config cloudbuild.yaml .This will:
- Build the Docker image using the
Dockerfile. - Push the image to Artifact Registry (Google Container Registry).
- Deploy the service to Google Cloud Run with limited permissions.
The cloudbuild.yaml sets key environment variables:
GOOGLE_CLOUD_PROJECT: AutomaticGOOGLE_CLOUD_LOCATION:us-central1GOOGLE_GENAI_USE_VERTEXAI:true
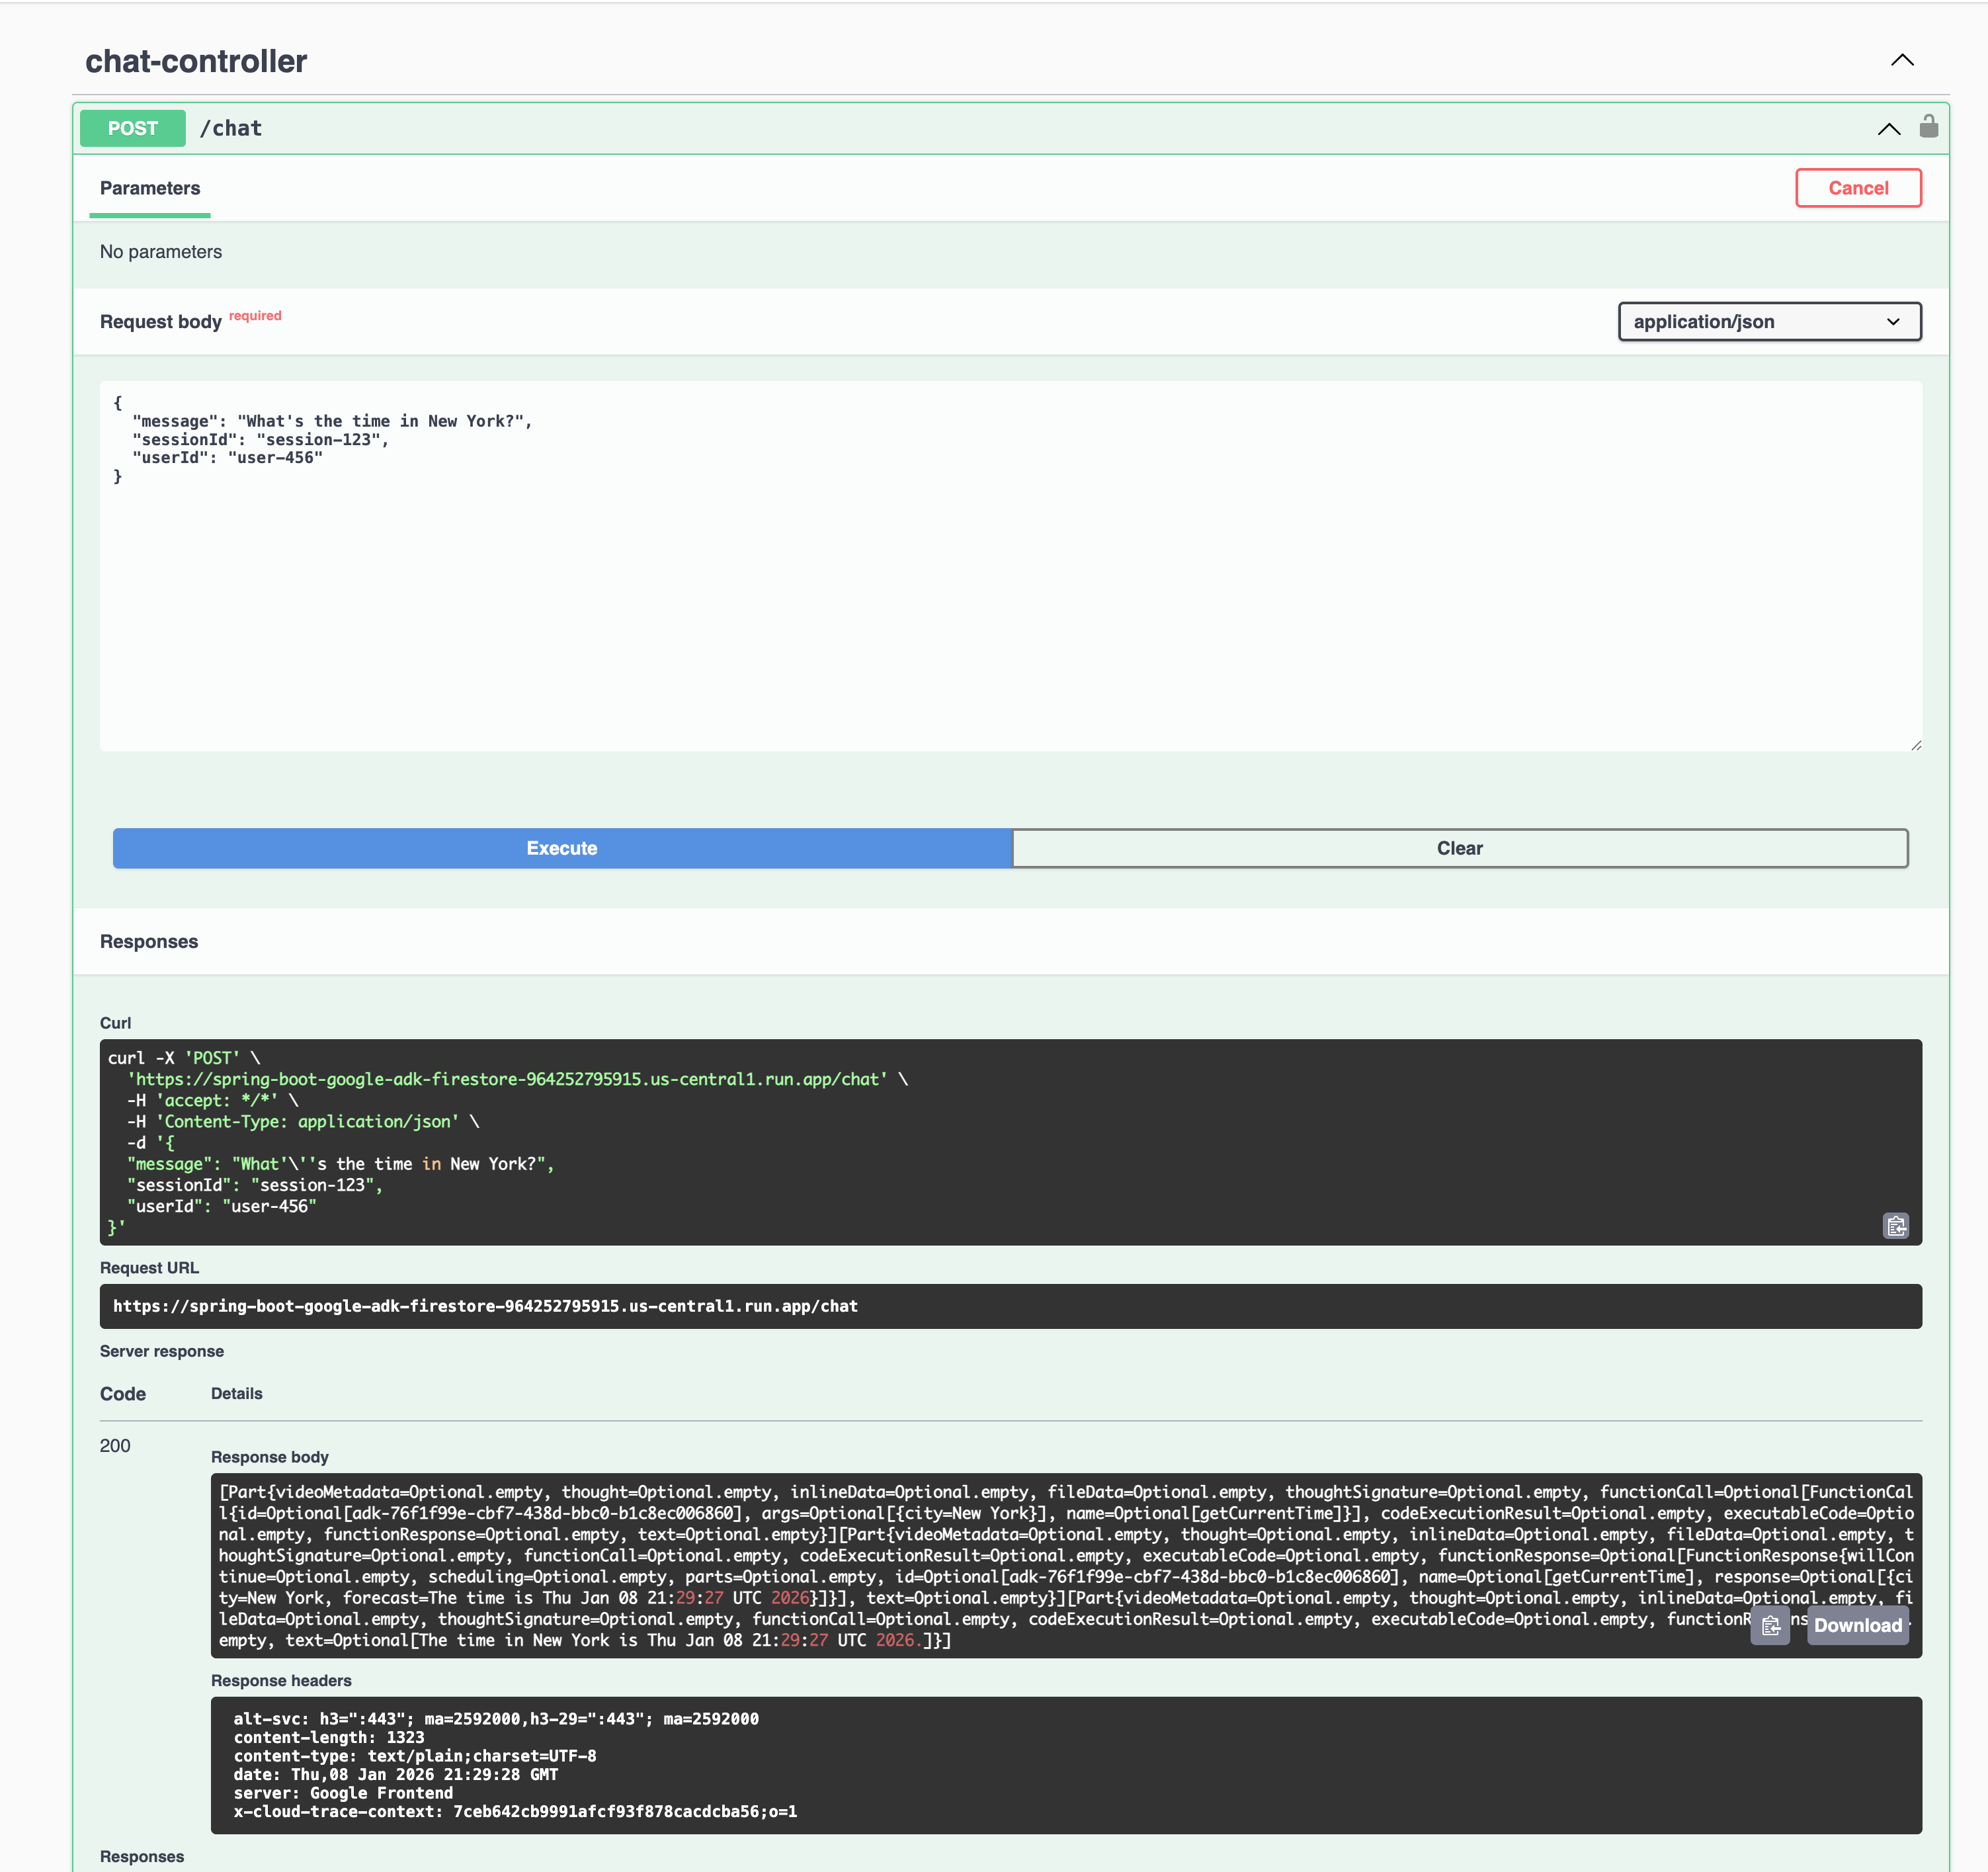
Post deployment, you can validate the application by accessing the Cloud Run service URL. Sample input:
{
    "message": "What's the time in New York?",
    "sessionId": "session-123",
    "userId": "user-456"
}
Sample output:
[
   "Part"{
      "videoMetadata=Optional.empty",
      "thought=Optional.empty",
      "inlineData=Optional.empty",
      "fileData=Optional.empty",
      "thoughtSignature=Optional"[
         [
            B@3d4ce52d
         ],
         "functionCall=Optional"[
            "FunctionCall"{
               "id=Optional"[
                  adk-2ea7aebe-a281-47a0-9c82-58eab74dd084
               ],
               "args=Optional"[
                  {
                     "city=New York"
                  }
               ],
               "name=Optional"[
                  "getCurrentTime"
               ]
            }
         ],
         "codeExecutionResult=Optional.empty",
         "executableCode=Optional.empty",
         "functionResponse=Optional.empty",
         "text=Optional.empty"
      }
   ][
      "Part"{
         "videoMetadata=Optional.empty",
         "thought=Optional.empty",
         "inlineData=Optional.empty",
         "fileData=Optional.empty",
         "thoughtSignature=Optional.empty",
         "functionCall=Optional.empty",
         "codeExecutionResult=Optional.empty",
         "executableCode=Optional.empty",
         "functionResponse=Optional"[
            "FunctionResponse"{
               "willContinue=Optional.empty",
               "scheduling=Optional.empty",
               "parts=Optional.empty",
               "id=Optional"[
                  adk-2ea7aebe-a281-47a0-9c82-58eab74dd084
               ],
               "name=Optional"[
                  "getCurrentTime"
               ],
               "response=Optional"[
                  {
                     "city=New York",
                     "forecast=The time is Fri Jan 09 17":"26":29 EST 2026
                  }
               ]
            }
         ],
         "text=Optional.empty"
      }
   ][
      "Part"{
         "videoMetadata=Optional.empty",
         "thought=Optional.empty",
         "inlineData=Optional.empty",
         "fileData=Optional.empty",
         "thoughtSignature=Optional.empty",
         "functionCall=Optional.empty",
         "codeExecutionResult=Optional.empty",
         "executableCode=Optional.empty",
         "functionResponse=Optional.empty",
         "text=Optional"[
            "The time in New York is Fri Jan 09 17":"26":29 EST 2026.
         ]
      }
   ]
The core logic of the application resides in the ChatController and its interaction with the Google ADK.
When a POST request hits the /chat endpoint, the ChatController takes over.
FirestoreDatabaseRunner: In the constructor, we initialize this runner with theWeatherAgent's root agent and the Firestore instance. This runner is the engine that orchestrates the flow between the user, the LLM, and the database.
The application uses a robust session management flow to maintain conversation history in Firestore:
- Retrieval: It first attempts to retrieve an existing session from Firestore using
sessionService().getSession(). - Automatic Creation: If a session doesn't exist (e.g., for a new
sessionId), theonErrorResumeNextblock catches theSessionNotFoundExceptionand automatically creates a new session in Firestore viasessionService().createSession().
Once a session is established:
runAsync(...): This is where the magic happens. The runner invokes the LLM with the user's message and the session context.- Tool Calling: If the LLM determines it needs to call a tool (like
WeatherAgent.getCurrentTime), the ADK handles this automatically, executes the tool, and feeds the result back to the LLM to generate the final response.
The ADK returns the response as a stream of events. The controller filters for content, extract the text parts, and aggregates them into a final string that is returned to the user.
- Ensure your Google Cloud Project has billing enabled.
- For Vertex AI, ensure the model (e.g.,
gemini-2.5-flash) is available in your region.