
This is the open-source project behind mindmapwizard.com
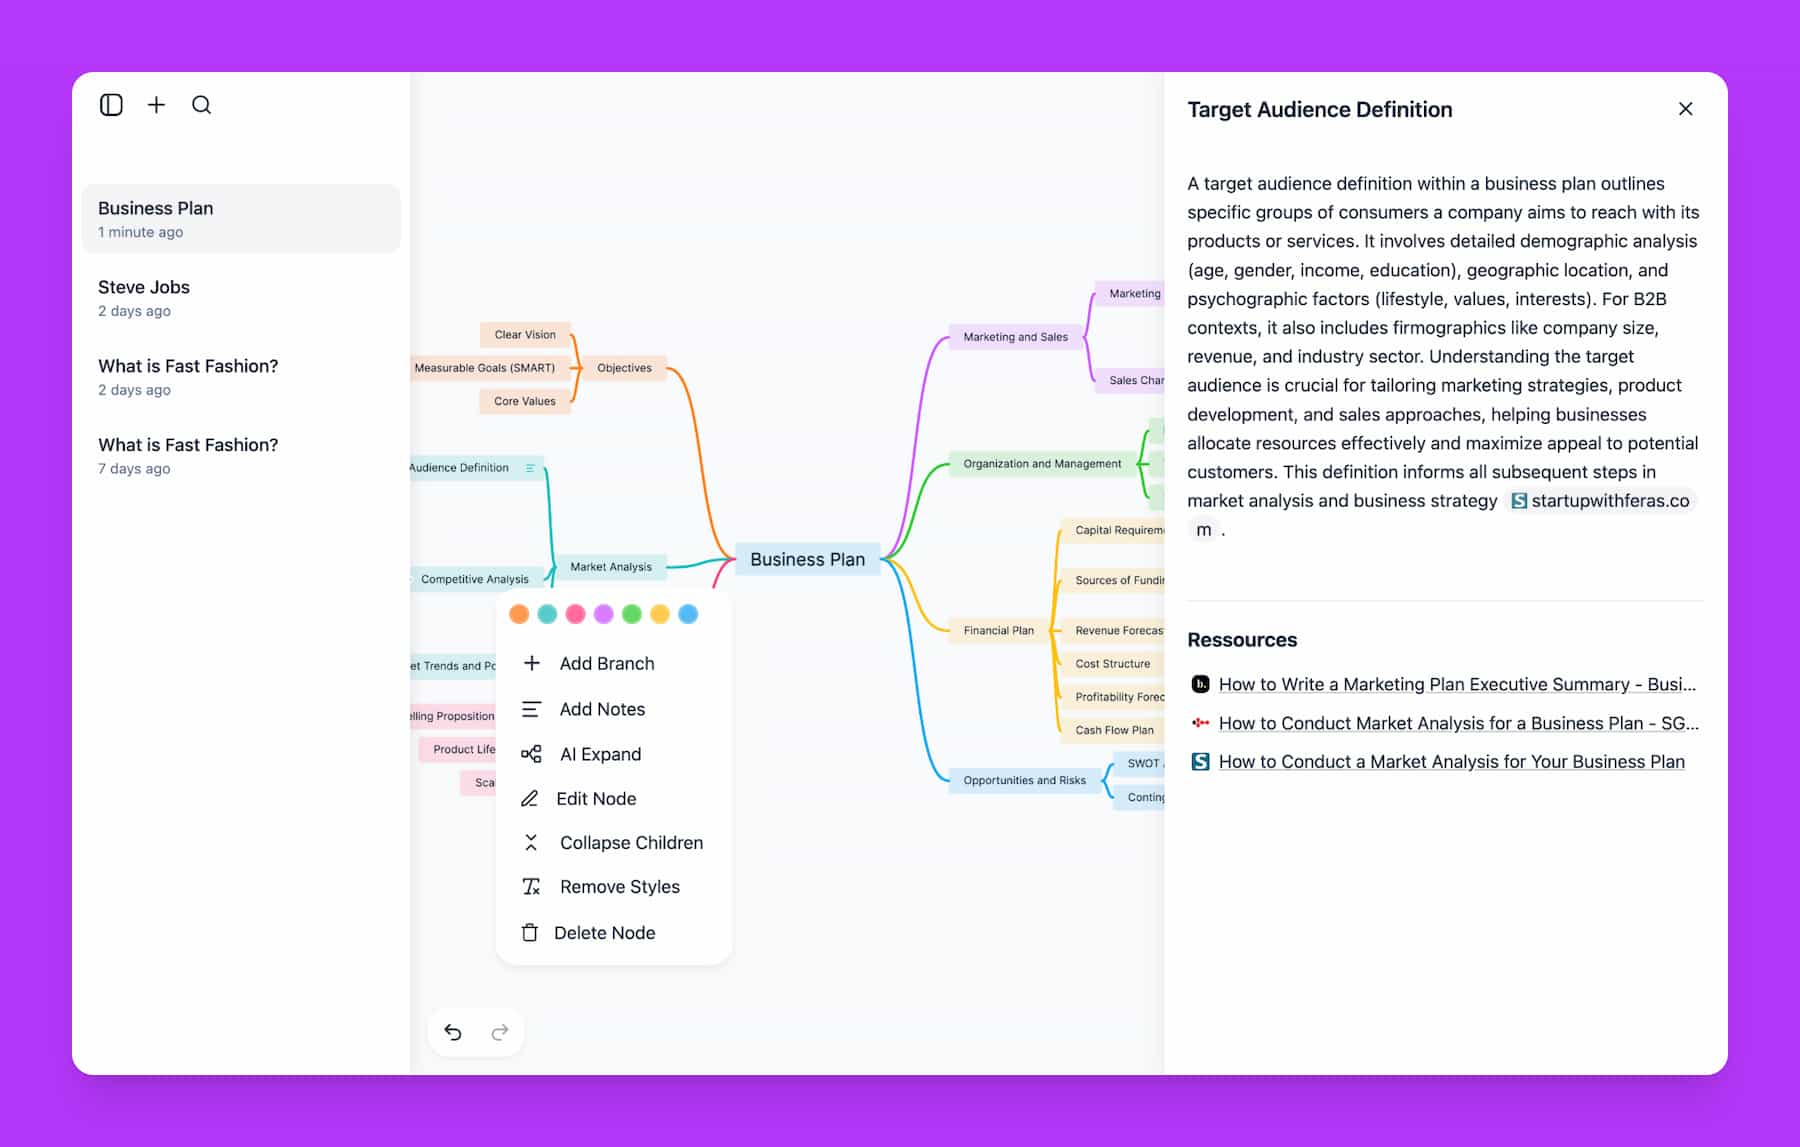
Generate comprehensive mind maps about any topic using artificial intelligence.


- 🤖 AI Mind Map Generation
- 🔒 Local AI support (Ollama)
- 🌐 Web Search
- 🖼️ Image inserting
- ✏️ Direct mind map editing
- ✍️ AI editing assistant
- 🕹️ Drag and drop reordering
- 🎨 Style customization
- ☑️ Checkboxes
- 💾 Multiple export formats
- 📝 AI summaries
- 📚 Generation history
- ➕ Mind map expansion
- 🌈 Branch coloring
- ↩️ Redoing & Undoing
- 🔍 Zoom & pan
- ⌨️ Keyboard shortcuts
-
Generate your mind map
Start by entering a topic or uploading a file—AI will create an initial mind map for you. -
Expand branches
Generate new sub-branches from any node to explore topics in more depth. -
Learn further
Let AI to search the web and write summaries with relevant resources and links for deeper study.
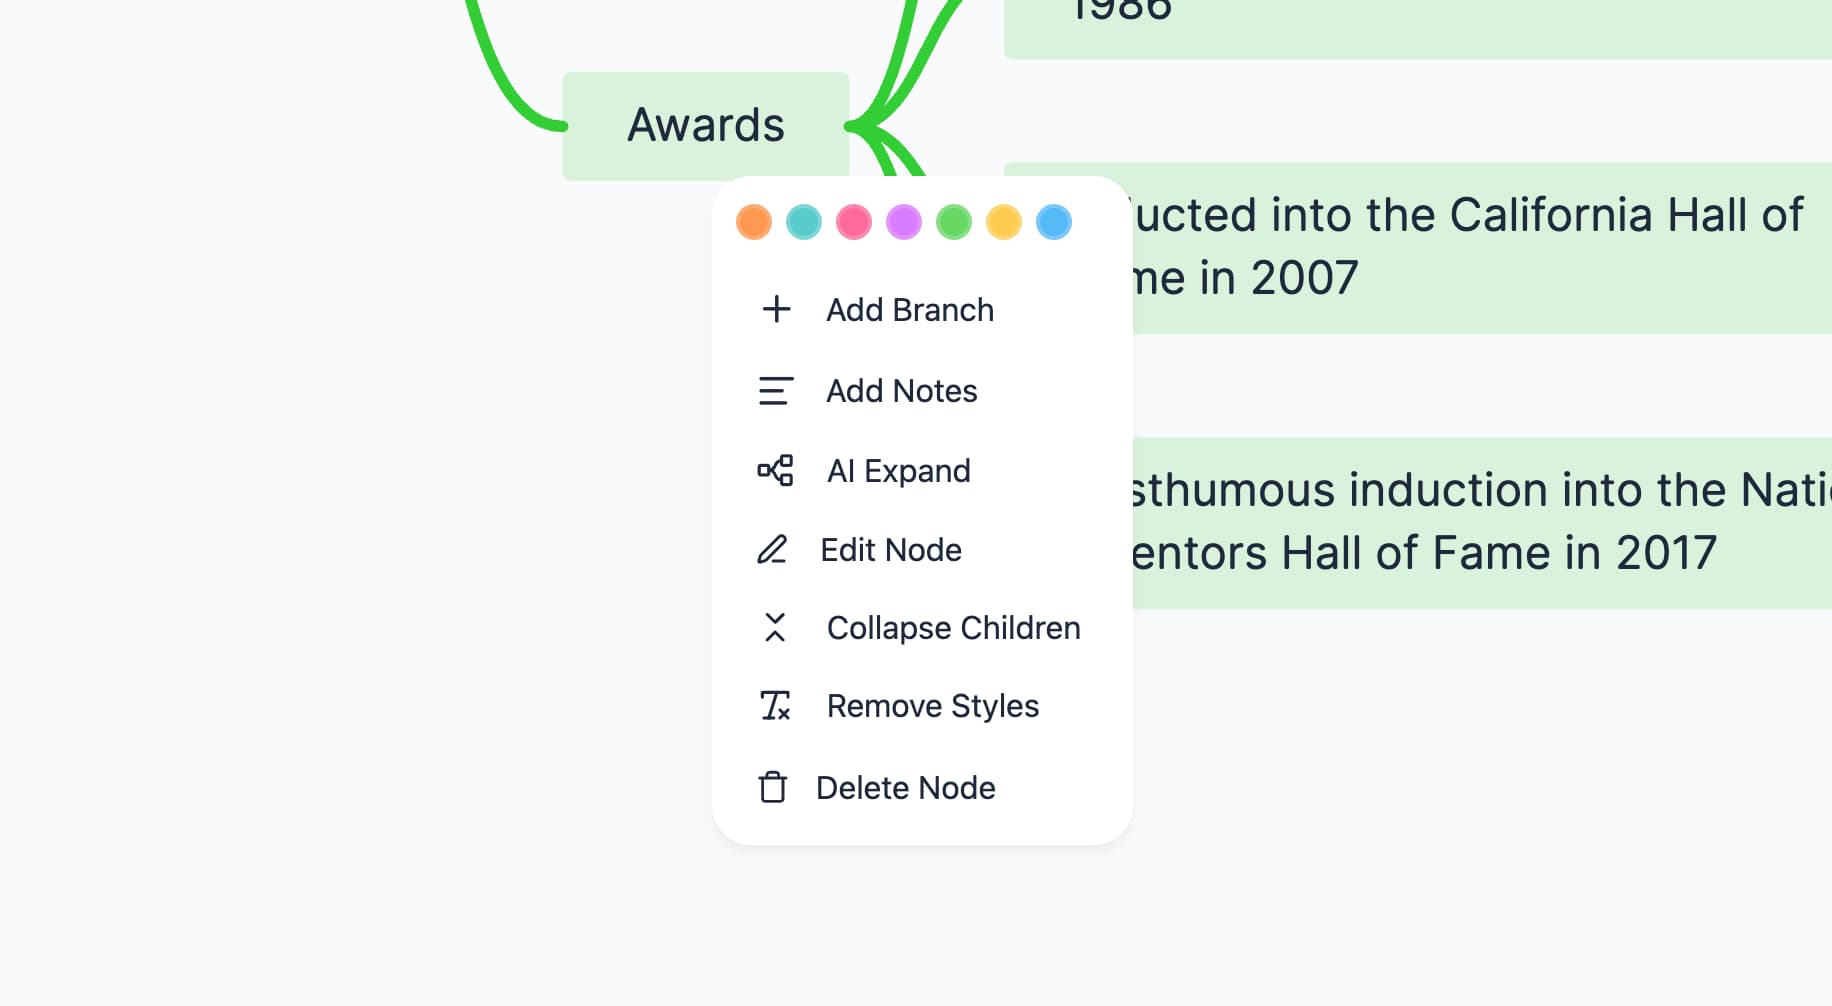
A screenshot of the context menu and all its options.
Edit any node by double-clicking its text. Right-click a node to open the context menu for more actions: delete nodes, change node color, or add sub-nodes.
The context menu also lets you expand the map by generating new branches from a node. Press and hold a node to have the AI produce a web-search-based summary with in-text references and links for further reading.
Choose "Collapse children" to hide a node’s sub-branches and focus on a specific area; click the arrow beside a collapsed node to expand it again.
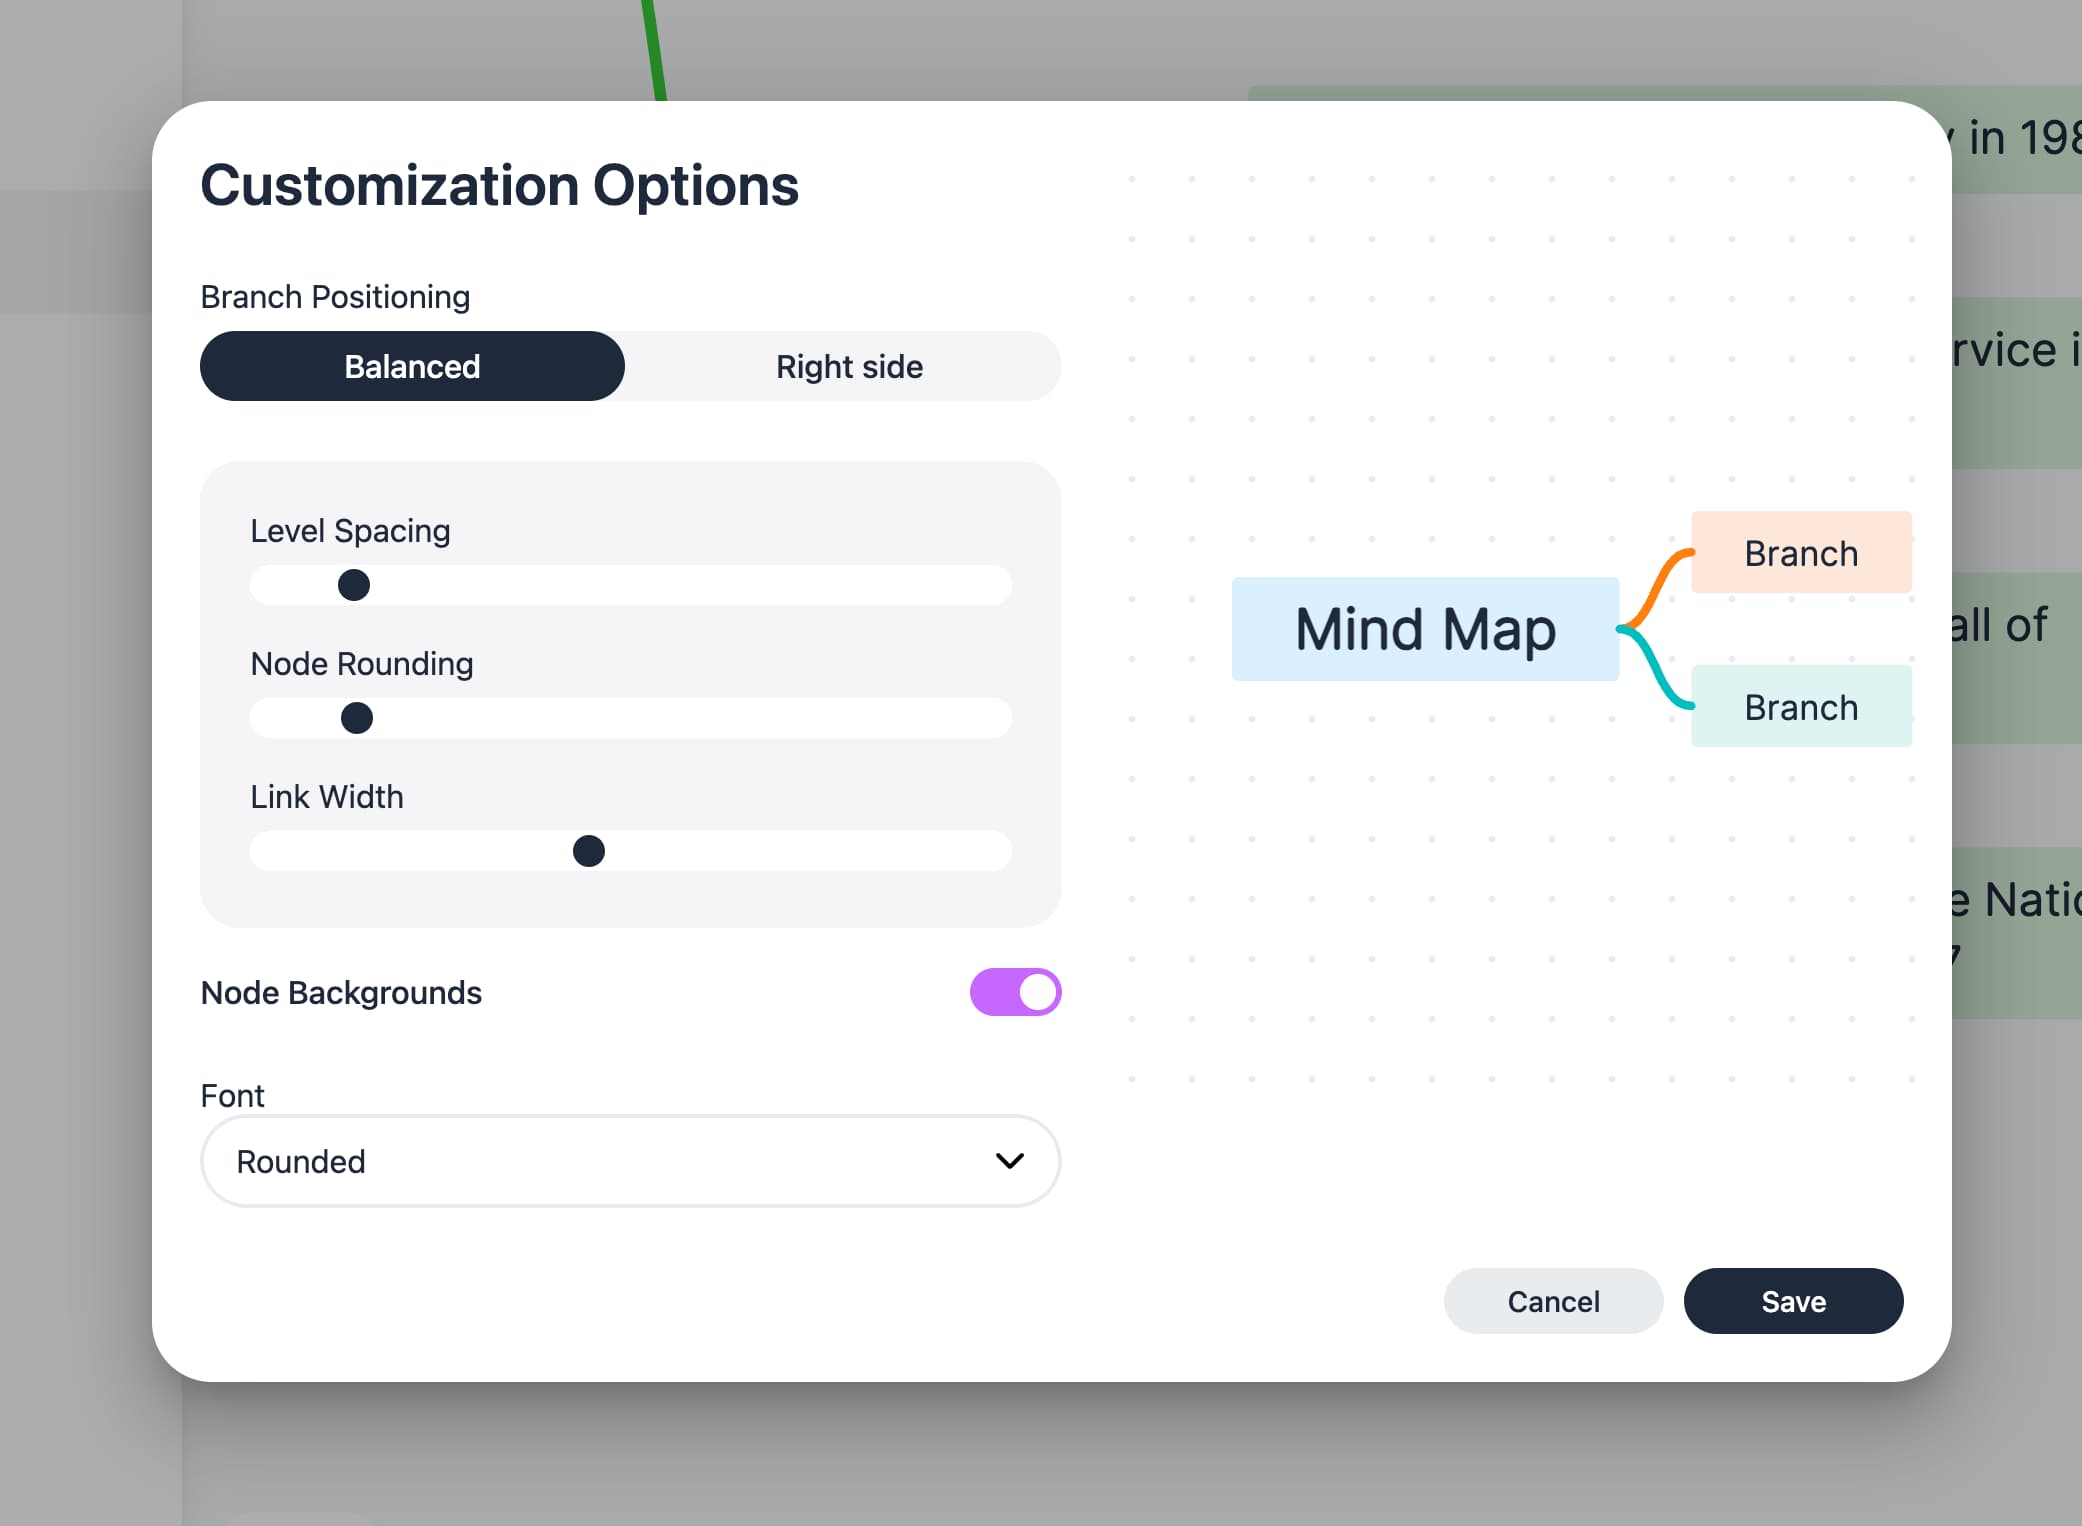
A screenshot of the customization options menu with styling controls for adjusting node roundings, link widths, layout, and font.
The mind maps are rendered with our own mind map renderering engine and not with any third-party service.
| Shortcut | Action |
|---|---|
| K | Search through all mind maps |
| E | Toggle edit mode |
| D | Download current mind map |
| F | Fit mind map to screen |
The AI uses this prompt to generate well-structured mind maps:
Create a comprehensive, fact-rich mind map about {YOUR_TOPIC} using the following structure:

# Matching Mind Map Title
## Branch 1
### Sub Branch A
### Sub Branch B
## Branch 2

- Each text element must be aligned to a specific hierarchical level using a new line plus the appropriate number of # symbols
- Aim for 2-3 levels of depth to keep the mind map scannable and not overwhelming but keep lenght relative to input depth.
- For large enumerations (6+ items), combine related items into comma-separated lists within a single branch rather than creating excessive sub-branches

- Include **specific, concrete details and facts**, not just category labels
  - Bad: "## Education"
  - Good: "## Education: PhD in Physics from MIT (2015)"
- Avoid generic structural sections like "Overview," "Introduction," or "Conclusion" this is a mind map, not an essay
- If the topic contains extensive information, prioritize breadth over depth and consolidate where necessary
- Focus on the most relevant and interesting information that creates a useful knowledge structure
- Make the branches have different lengths for making the mind map visually more interesting.
- The mind map should be in the language of the user input.
- The title should be as short as possible.
- The mind map should have at least 3 branches going out of the title node.

**Output Format:**
Structure your response exactly like this:
{
	"markdown": "# Main Topic\\n\\n## Subtopic 1\\n- Point A\\n- Point B\\n\\n## Subtopic 2\\n- Point C\\n- Point D"
}
- ✅ Private & Fast: Your mind maps are stored locally on your browser, making them truly private. As a side effect, navigating the site is lightning fast!
- ✅ Simple: Mind Map Wizard is designed to be simple and user-friendly, allowing you to focus on your work without distractions.
- ✅ BYOK: Use your own Openrouter API key for enhanced privacy and control over your mind map generation.
- ✅ Fully local option: Prefer to keep everything on your machine? Connect a local Ollama model and generate mind maps completely offline and privately.
Mind Map Wizard is a static site (HTML/CSS/JS) with no build step. You just need to serve the folder over HTTP and open it in a browser. Opening index.html directly via file:// will not work, because browsers block the module/fetch requests the app makes.
-
Clone the repository:
git clone https://github.com/linus-sch/Mind-Map-Wizard.git cd Mind-Map-Wizard -
Start a local server using any one of these:
Python 3 (preinstalled on macOS/Linux; on Windows install from python.org):
# macOS / Linux
python3 -m http.server 8000

# Windows
python -m http.server 8000
Node.js (no install beyond Node itself):
npx serve -l 8000
# or
npx http-server -p 8000
VS Code: install the Live Server extension, then right-click
index.html→ "Open with Live Server". -
Open your browser to
http://localhost:8000/index.html(Node'sservemay use a different port — check its output).
That's it! The app runs entirely in your browser.
Prefer to keep your data on your own machine? Mind Map Wizard can talk to a local Ollama server instead of the OpenRouter cloud, so topics never leave your computer.
-
Install Ollama and pull a model, e.g.:
ollama pull llama3.1 -
Start Ollama so the browser is allowed to reach it (CORS):
OLLAMA_ORIGINS='*' ollama serveOn macOS you can instead run
launchctl setenv OLLAMA_ORIGINS '*'and restart the Ollama app. You may scopeOLLAMA_ORIGINSto a specific origin (e.g.http://localhost:8000) if you prefer. -
In Mind Map Wizard, open the API key / AI settings dialog, choose Local (Ollama), and (optionally) adjust the server URL — it defaults to
http://localhost:11434. -
Pick one of your locally installed models from the model selector and generate mind maps as usual.
Notes:
- Node expansion and the AI editing assistant work with local models too.
- PDF upload and web search rely on OpenRouter-specific features and remain available only with the cloud provider.
Creating a mind map involves a few simple steps. Here’s how it works:
- User Submits Topic - Enter your desired subject
- API Processing - Topic sent to AI provider
- LLM Analysis - AI generates structured outline with key concepts
- SVG Rendering - Markdown transformed into interactive SVG using our mind map rendering engine.
Have questions or feedback? We'd love to hear from you!
Email: contact@mindmapwizard.com