This project enables the use of an ESP32-P4 display into an all-sky camera viewer. It features multi-image cycling, hardware acceleration, and seamless integration with Home Assistant.
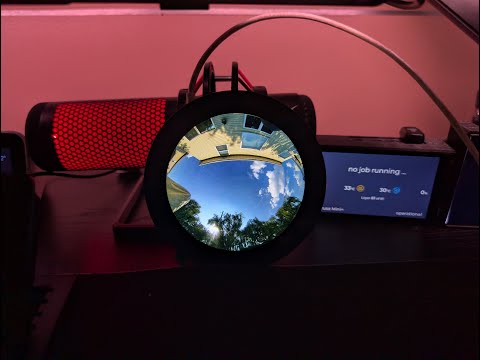
3.6" Screen

4" Screen

Click here to watch on YouTube
![]()

Comprehensive documentation for both users and developers is organized as follows:
- Hardware Requirements - Details on supported displays, ESP32-P4 specifications, and required libraries.
- Installation Guide - Instructions for flashing firmware, compiling from source, and initial WiFi setup.
- Configuration Guide - Guide for Web UI, MQTT, multi-image setup, and serial commands.
- Features and Usage - Information on multi-image cycling, touch controls, health monitoring, and Home Assistant integration.
- OTA Updates - Procedures for wireless firmware updates with automatic rollback.
- Troubleshooting - Solutions for common issues, crash diagnosis, and support channels.
- System Architecture - Overview of system design, memory layout, and control flow.
- API Reference - Documentation for classes and REST API endpoints.
- Multi-Image Display: Automatically cycle through up to 10 image sources or control via API.
- Flexible Update Modes: Choose between automatic cycling or API-triggered refresh for external control (v-snd-0.62+).
- Runtime Display Selection: Switch between 3.4" and 4.0" displays via the Web UI without recompilation (v-snd-0.61+).
- Enhanced Brightness Control: Three modes available: Manual, MQTT Auto, or Home Assistant with clear UI indication (v-snd-0.61+).
- AllSky Module: Dedicated allsky_esp32round module by Alex for automatic image resizing for both display sizes.
- Hardware Accelerated: Utilizes ESP32-P4 PPA for fast scaling and rotation (385-507ms render time).
- High Resolution: Supports images up to 1448×1448 pixels with 2× scaling capability.
- Per-Image Transforms: Individual scale, offset, and rotation settings for each image.
- Touch Controls: Tap to navigate; double-tap to toggle modes.
- Home Assistant Ready: Features auto-discovery via MQTT with full control capabilities.
- Web Configuration: Modern, responsive UI for managing all settings.
- OTA Updates: Wireless firmware updates with automatic rollback functionality.
- Easy Setup: Captive portal for WiFi configuration featuring a QR code.
- Waveshare 3.4" ESP32-P4 Touch LCD (800×800) - Tested and Working
- Waveshare 4.0" ESP32-P4 Touch LCD (720×720) - Tested and Working
Requirements: ESP32-P4 with WiFi 6, DSI display, GT911 touch, and PSRAM.
Note: Both displays are supported. Select the appropriate display type in the Web UI System settings after flashing (v-snd-0.61+).
Full Details: Hardware Requirements Guide
Download Latest Release:
- Navigate to Releases.
- Download
ESP32-P4-Allsky-Display-Factory.bin(for initial USB installation).
Important: Use the -Factory.bin file for USB flashing. The -OTA.bin file is intended for wireless updates only.
Flash using esptool:
esptool.py --chip esp32p4 --port COM3 --baud 921600 write_flash 0x0 ESP32-P4-Allsky-Display-Factory.binUniversal Display Support: Pre-compiled firmware is compatible with both 3.4" (800×800) and 4.0" (720×720) displays. Select the display type in the Web UI System settings after flashing.
Full Instructions: Installation Guide
On first boot, the device establishes a WiFi network:
- Connect to:
AllSky-Display-Setup(no password). - Scan QR Code on the display or navigate to
http://192.168.4.1. - Select network, enter password, and click Connect.
- Device reboots and displays the IP address.

Full Details: Installation Guide - First Boot
Access http://[device-ip]:8080/ to configure:
- Image sources (up to 10 URLs).
- MQTT and Home Assistant settings.
- Display transforms and brightness.
- Cycle intervals.

Full Guide: Configuration Guide

Auto-Discovery: Enable MQTT in the web interface; the device will appear automatically.
Control: Manage brightness, cycling, image selection, transforms, and system actions.
Full Integration Guide: Features - Home Assistant

Download:
- Hardware Requirements - Displays, ESP32-P4, libraries, wiring.
- Installation Guide - Flash firmware, compile from source, WiFi setup.
- Configuration Guide - Web UI, MQTT, images, serial commands.
- Features and Usage - Controls, health monitoring, Home Assistant.
- OTA Updates - Wireless updates, A/B partitions, safety.
- Troubleshooting - Common issues, crash diagnosis, diagnostics.
- System Architecture - Design, memory layout, data flow.
- API Reference - Classes, REST endpoints, MQTT topics.