-
Notifications
You must be signed in to change notification settings - Fork 11
FakeS3 on a Raspberry Pi 3 with Raspbian (Debian Jessie 8.0)
The Raspberry Pi 3 single board computer from the Raspberry Pi Foundation has a 1.2 GHz quad-core ARMv8 processor, 1 GByte main memory and a 10/100 Mbps Ethernet interface.
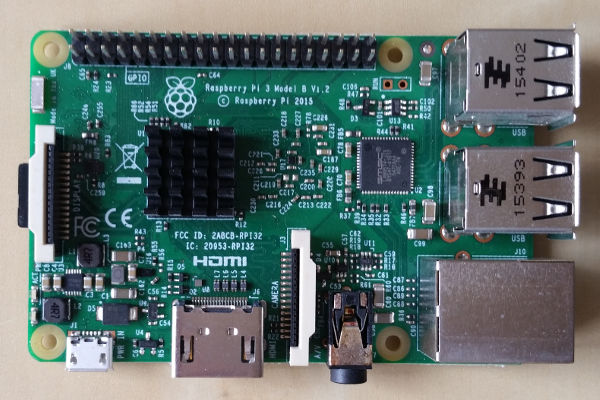
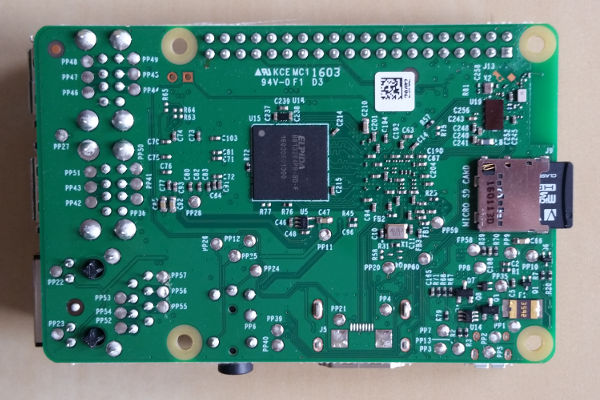
This installation tutorial explains the installation of a Raspberry Pi 3 device from scratch and the configuration of s3cmd on your computer.
This implies that you have already an installation of s3cmd on the system you want to use for the interaction with the Fake S3 storage service.
$ wget https://downloads.raspberrypi.org/raspbian_lite/images/raspbian_lite-2017-03-03/2017-03-02-raspbian-jessie-lite.zip
$ unzip 2017-03-02-raspbian-jessie-lite.zip
Check which one is the correct device! If you use an internal card reader, it is often /dev/mmcblk0.
# dd bs=1M if=2017-03-02-raspbian-jessie-lite.img of=/dev/sdb && sync
Default login of this image is pi/raspberry. To become user root, execute sudo su.
Older Raspian versions started the SSH server by default. Because of security reasons (as explained here), all Raspian versions since version 2016-11-25 (see the release notes) have the SSH server disabled by default. To get the SSH server automativally activated during boot time, create a file ssh with any content (or just an empty file) inside the boot partition (it is the first partition) of the micro SD card.
# mount /dev/sdb1 /media/
# touch /media/ssh
# umount /media/
Insert the micro SD card into the Raspberry Pi computer, connect it with the ethernet cable and the micro USB cable for power suppy and switch on the power supply. The operating system will try to fetch network configuration by using DHCP on the Ethernet interface per default. If you activated the SSH server, you can now log in via SSH.
The system used with this tutorial had these characteristics
$ lsb_release -a
No LSB modules are available.
Distributor ID:	Raspbian
Description:	Raspbian GNU/Linux 8.0 (jessie)
Release:	8.0
Codename:	jessie
$ uname -a
Linux raspberrypi 4.4.50-v7+ #970 SMP Mon Feb 20 19:18:29 GMT 2017 armv7l GNU/Linux
$ sudo raspi-config
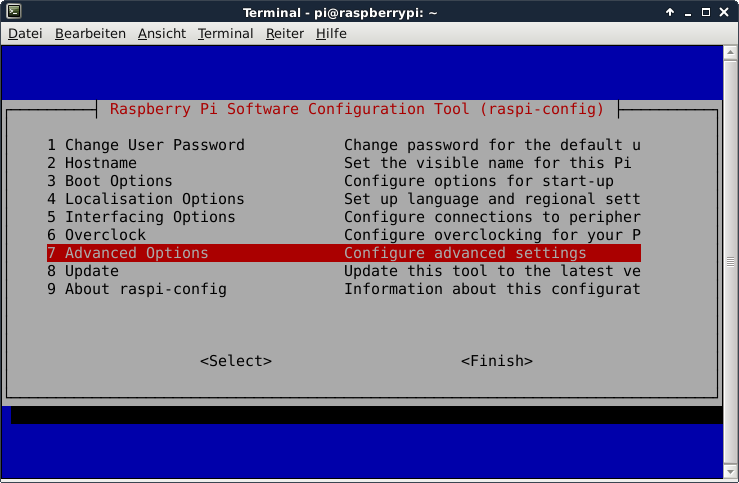
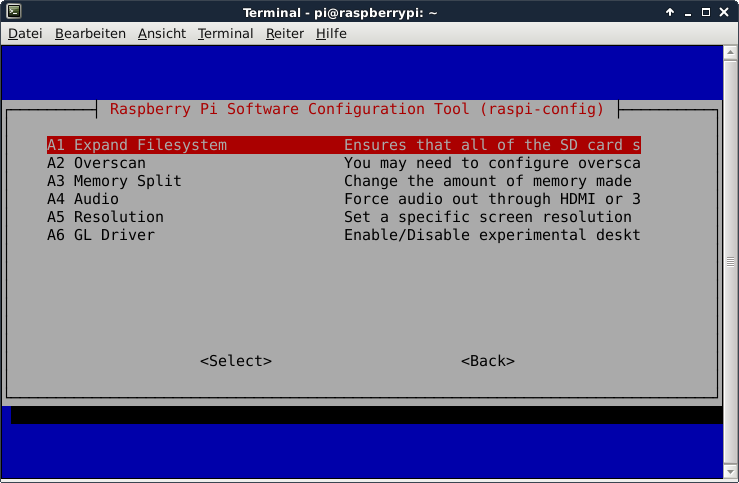
This is not required for running the Scality S3 Server, but the Raspberry Pi 3 has just 1 GB of main memory which is not much at all and there is no need to waste 48 MB.
A part of the main memory (just 1 GB) is assigned to the GPU. A pure server does not need a GPU at all. The share can me specified via the raspi-config tool. The minimum value is 16 MB, which is more useful compared with the dafault value (64 MB).
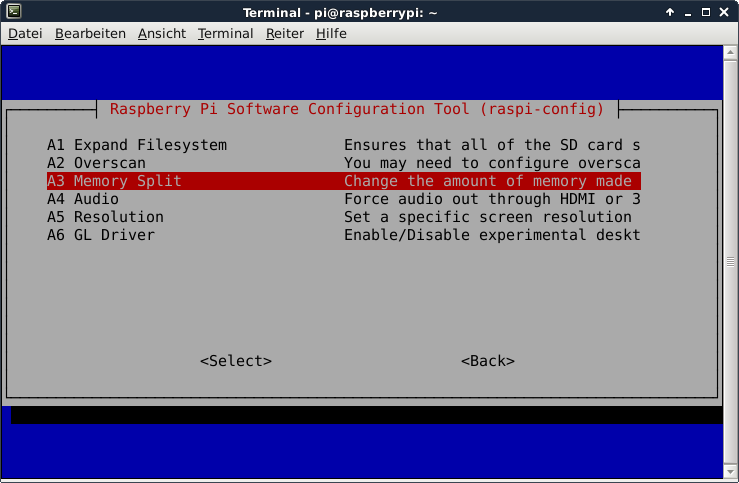
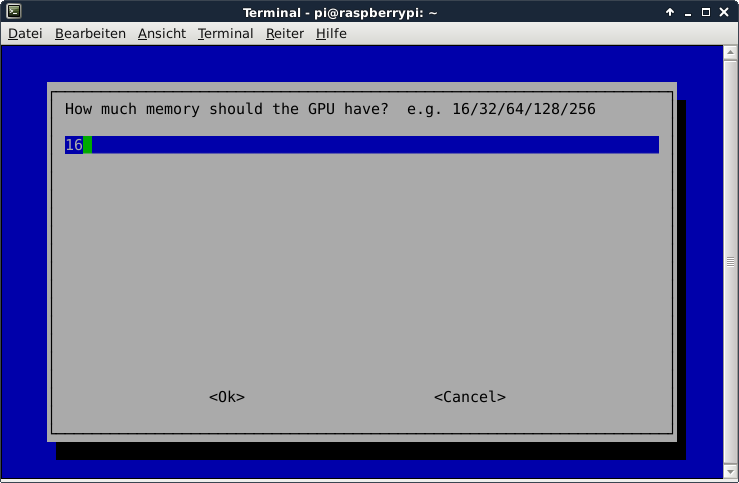
After the new value is specified and after a reboot, the new value should be visible:
# vcgencmd get_mem gpu
gpu=16M
This is not required for running Fake S3, but it is always useful to configure the operating system properly
$ sudo dpkg-reconfigure tzdata
$ cat /etc/timezone
Europe/Berlin
It is also possible to specify the time zone via the raspi-config tool.
This is not required for running Fake S3, but it is always useful to have the correct time on a computer
$ sudo apt-get update && sudo apt-get install -y ntp ntpdate
Now the time sould be synchronized with several NTP servers.
$ ntpq -p
remote           refid      st t when poll reach   delay   offset  jitter
==============================================================================
+fry.celeborn.de 192.53.103.103   2 u   33   64    1   35.674   -0.135   0.233
*business-90-187 .PPS.            1 u   32   64    1  285.478    2.081   5.360
-ns1.customer-re 192.53.103.108   2 u   31   64    1   26.315    4.983   0.193
+ns1.univ-montp3 195.83.222.27    2 u    7   64    3   48.498    1.842   0.376
fritz.box       192.86.14.67     3 u    8   64    3    0.789    5.124   0.404
Check the time and date:
$ date -R
Tue, 25 Apr 2017 14:20:23 +0200
Some of them are not required for the installation of Fake S3, but just nice to have.
$ sudo apt-get install -y curl htop joe nmap git
Install Ruby
$ sudo apt-get install ruby rubygems

$ dpkg -l | grep ruby
ii  libruby2.1:armhf               2.1.5-2+deb8u3                    armhf        Libraries necessary to run Ruby 2.1
ii  ruby                           1:2.1.5+deb8u2                    all          Interpreter of object-oriented scripting language Ruby (default version)
ii  ruby2.1                        2.1.5-2+deb8u3                    armhf        Interpreter of object-oriented scripting language Ruby
ii  rubygems-integration           1.8                               all          integration of Debian Ruby packages with Rubygems
This command deploys the lastest revision of Fake S3 (which is 1.0.0)
$ gem install fakes3

$ gem list

*** LOCAL GEMS ***

bigdecimal (1.2.4)
builder (3.2.3)
fakes3 (1.0.0)
io-console (0.4.2)
json (1.8.1)
minitest (4.7.5)
psych (2.0.5)
rake (10.1.0)
rdoc (4.1.0)
test-unit (2.1.5.0)
thor (0.19.4)
Fake S3 revision v0.2.4 is the last one, which is free software (MIT-LICENSE). It can be deployed this way:
$ cd ~ && wget https://github.com/jubos/fake-s3/archive/v0.2.4.zip
$ unzip v0.2.4.zip
Later revisions are not licensed according to a software license which complies with the open source definition of the Open Source Initiative (OSI).
Create a storage path for objects and buckets
$ mkdir ~/s3folder
Start Fake S3 (version 1.0.0)
$ fakes3 version
======================
FakeS3 1.0.0

Copyright 2012, Curtis Spencer (@jubos)

$ fakes3 -r ~/s3folder -p 8080
Loading FakeS3 with /home/pi/s3folder on port 8080 with hostname s3.amazonaws.com
[2017-04-25 15:14:34] INFO  WEBrick 1.3.1
[2017-04-25 15:14:34] INFO  ruby 2.1.5 (2014-11-13) [arm-linux-gnueabihf]
[2017-04-25 15:14:34] INFO  WEBrick::HTTPServer#start: pid=823 port=8080
Just these lines need to be modified:
access_key = 123
host_base = <the_ip_of_your_raspberry>:8080
host_bucket = <the_ip_of_your_raspberry>:8080
secret_key = abc
use_https = False
Now s3cmd should work properly with the Fake S3 service.
$ s3cmd mb s3://testbucket
Bucket 's3://testbucket/' created
$ s3cmd ls
2017-04-25 15:13  s3://testbucket
$ s3cmd rb s3://testbucket
Bucket 's3://testbucket/' removed
Fake S3 works case sensitive. It accepts bucket names, which are encoded entirely in lower case letters, as well as bucket names, which are encoded in upper case letters.
The default access key is 123, with the default secret access key is abc. It is unclear how to modify the specify different credentials.
Some bugs of Fake S3 revision 1.0.0 have been observed. One example: Removing buckets does not work properly.
$ s3cmd ls
$ s3cmd mb s3://s3perf-testbucket
Bucket 's3://s3perf-testbucket/' created
$ s3cmd ls
2017-04-25 15:33  s3://s3perf-testbucket
$ s3cmd rb s3://s3perf-testbucket
Bucket 's3://s3perf-testbucket/' removed
$ s3cmd ls
2017-04-25 15:33  s3://s3perf-testbucket
$ s3cmd ls s3://s3perf-testbucket
ERROR: Bucket 's3perf-testbucket' does not exist
ERROR: S3 error: 404 (NoSuchBucket): The resource you requested does not exist
$ s3cmd rb s3://s3perf-testbucket
ERROR: Error parsing xml: syntax error: line 1, column 48
ERROR: <!DOCTYPE HTML PUBLIC "-//W3C//DTD HTML 4.0//EN">
<HTML>
  <HEAD><TITLE>Internal Server Error</TITLE></HEAD>
  <BODY>
<H1>Internal Server Error</H1>
The bucket you tried to delete is not empty.
<HR>
<ADDRESS>
WEBrick/1.3.1 (Ruby/2.1.5/2014-11-13) OpenSSL/1.0.1t at
10.0.0.253:8080
</ADDRESS>
  </BODY>
</HTML>

WARNING: Retrying failed request: / (500 (Internal Server Error))
WARNING: Waiting 3 sec...
- Nimbus Cumulus on...
- Minio on...
- S3ninja on...
- S3rver on...
- Fake S3 on...
- Scality S3 on...
- OpenStack Swift on...
- Riak CS on...
- Measurements with s3perf and...
- Measurements with gsutil and...