forked from pentaho/pentaho-kettle
-
Notifications
You must be signed in to change notification settings - Fork 197
Admin: Cloud Deployment
Hiromu Hota edited this page Jan 25, 2018
·
1 revision
This guide will give you an example of how to deploy webSpoon to the cloud with the following requirements.
- Deploy webSpoon to the cloud
- Deploy webSpoon with plugins
- Auto-scale and load-balance
To easily satisfy the requirements, this example uses the Docker image with the plugins and deploys it to AWS Elastic Beanstalk.
These are the rough steps using the new Amazon Configuration Interface:
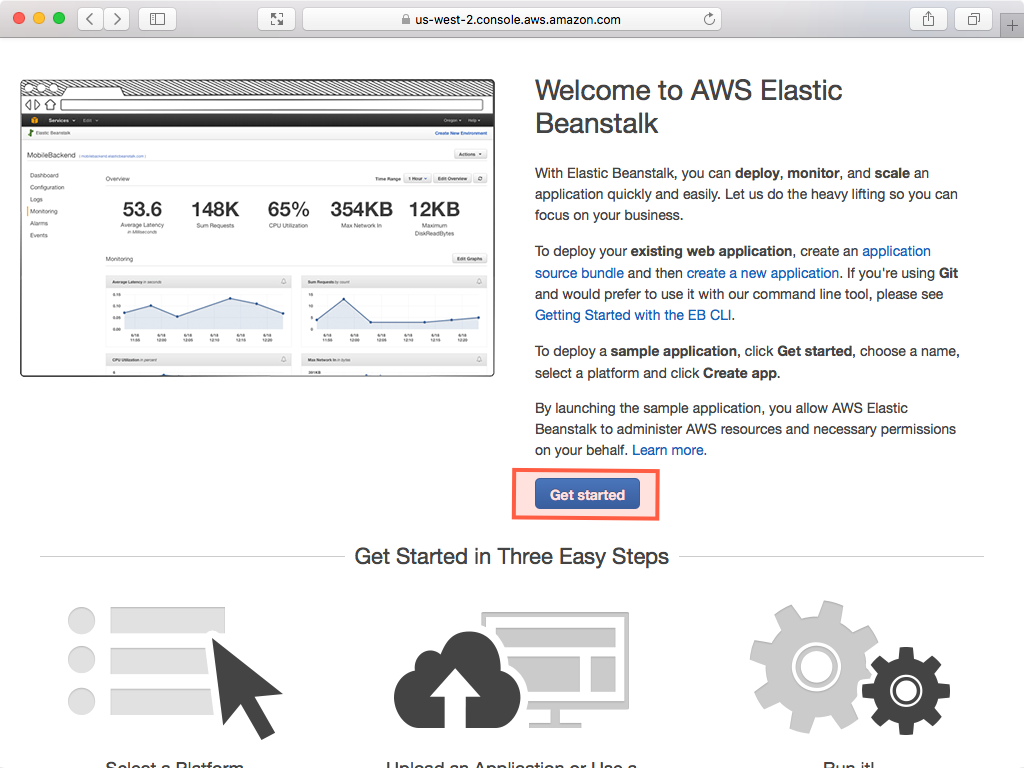
- Head to the AWS Console and sign into the console. Choose Beanstalk from the main menu. Then click Get Started or Create New Application:
-
In the Choose Environment dialog pick Web server environment.
-
In the Platform section, choose Multi-container Docker as a Preconfigured platform.
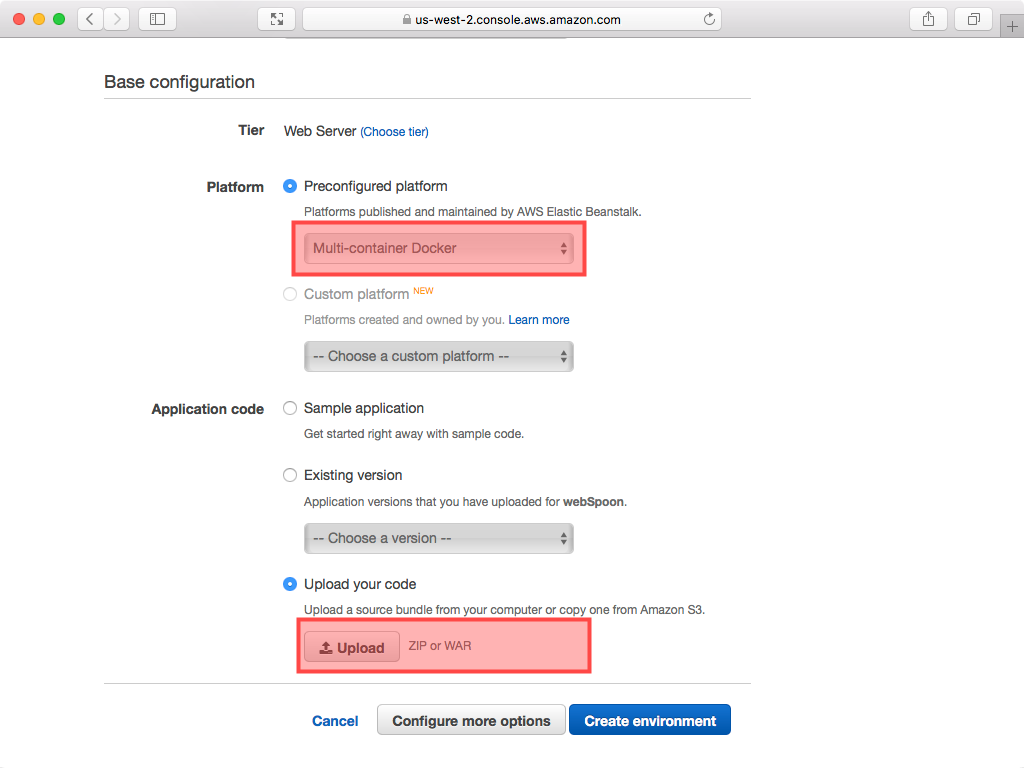
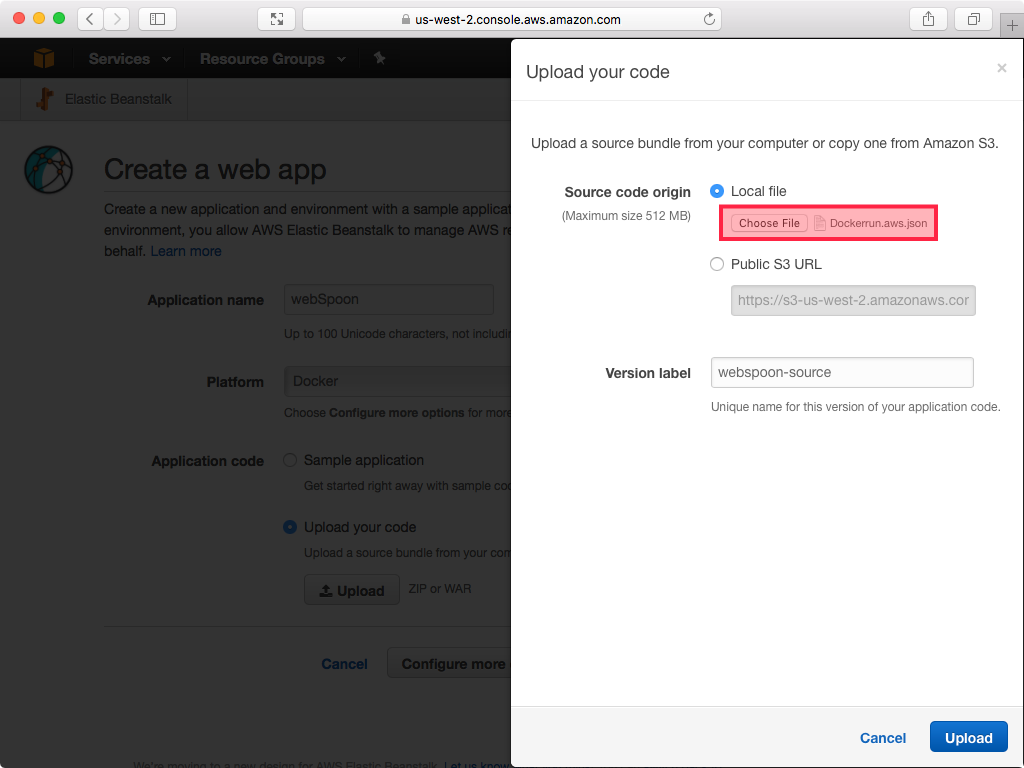
- In the Application code section, tick Upload your code and choose Dockerrun.aws.json as an Application code - contents copied below for convenience:
{
"AWSEBDockerrunVersion": 2,
"containerDefinitions":
  [
    {
      "name": "webSpoon",
      "image": "hiromuhota/webspoon:latest-full",
      "essential": true,
      "memory": 1920,
      "environment": [
        {
          "name": "JAVA_OPTS",
          "value": "-Xms1024m -Xmx1920m"
        }
      ],
      "portMappings": [
        {
          "hostPort": 80,
          "containerPort": 8080
        }
      ]
    }
  ]
}
- Click Configure more options instead of Create application.
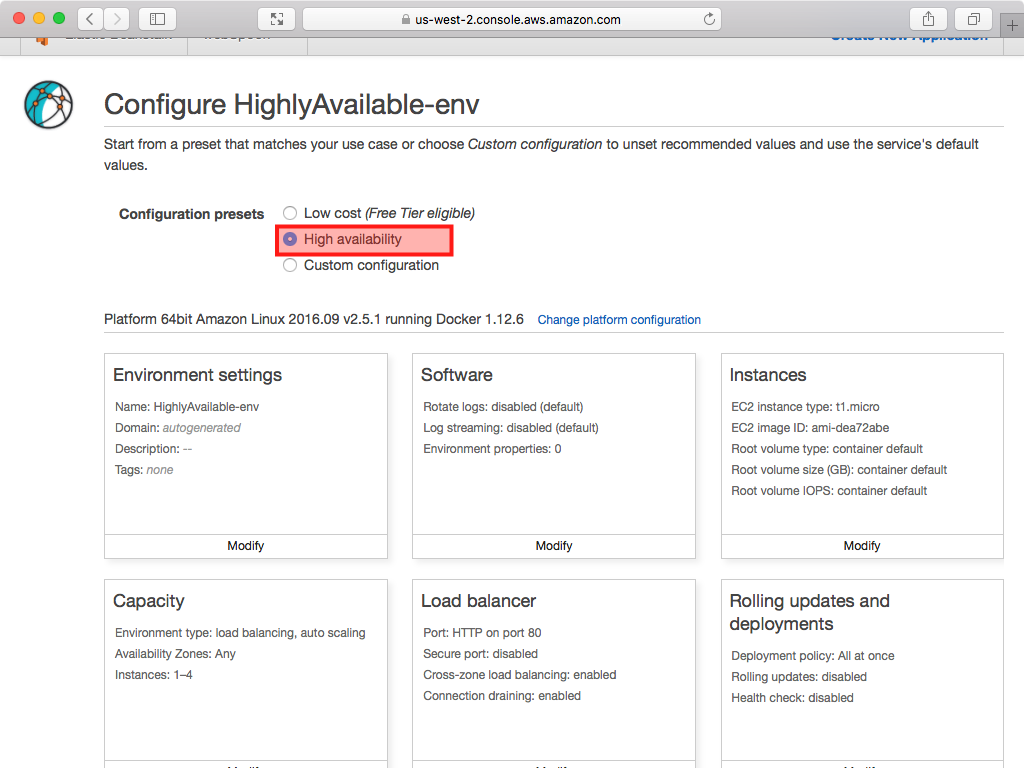
- On the next screen under Configuration presets you have two options. If you just want to run the container on one node choose Custom Configuration, otherwise choose High Availability.
- On the same page, change EC2 instance type from
t2.microtot2.smallor an instance type with 2GB+ memory. - Click Create Environment. Wait until your application and environment are created, which will take a few minutes:
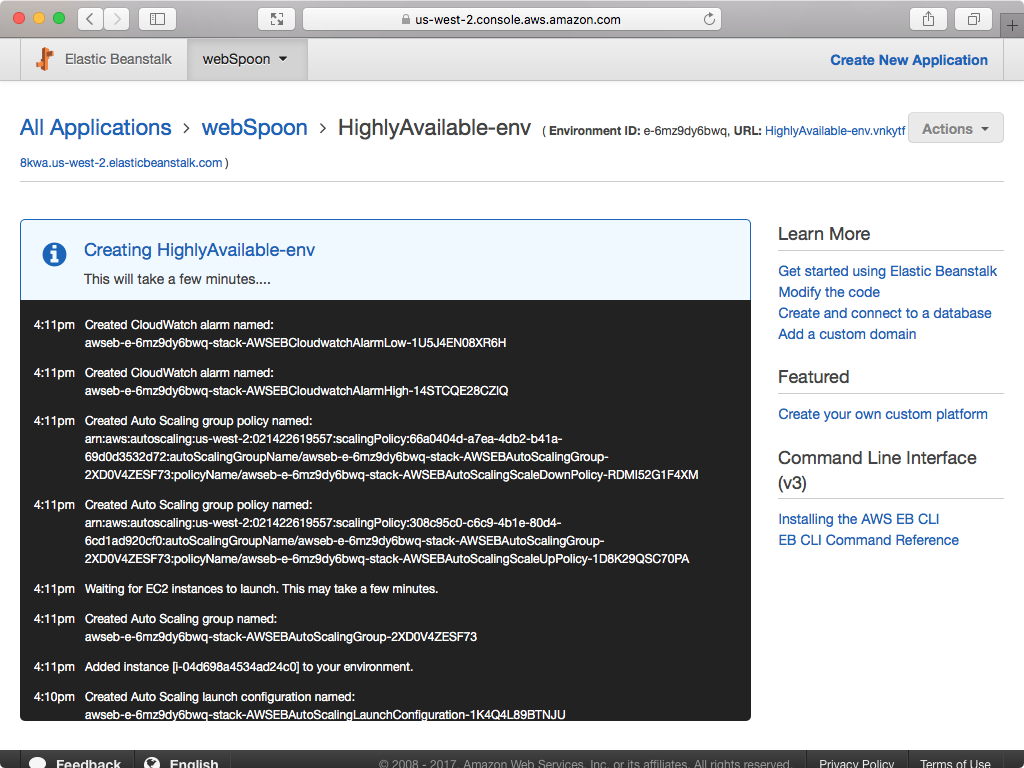
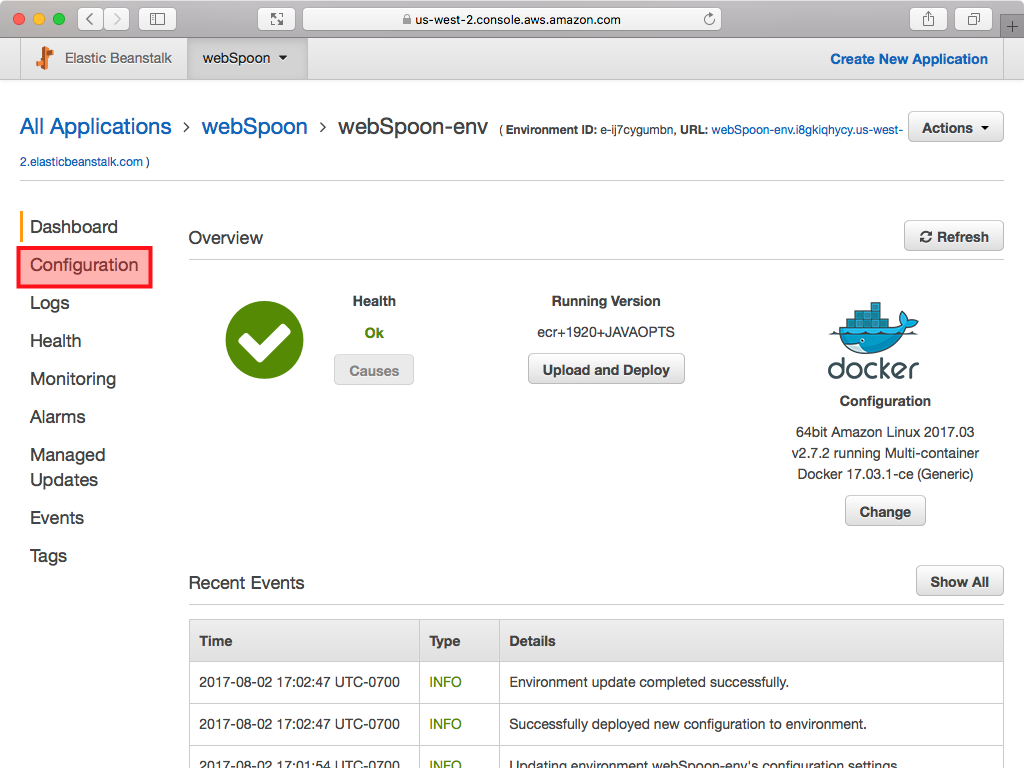
- High Availability option only: The screen will look like this one the environment is ready. Click on Configuration in side panel.
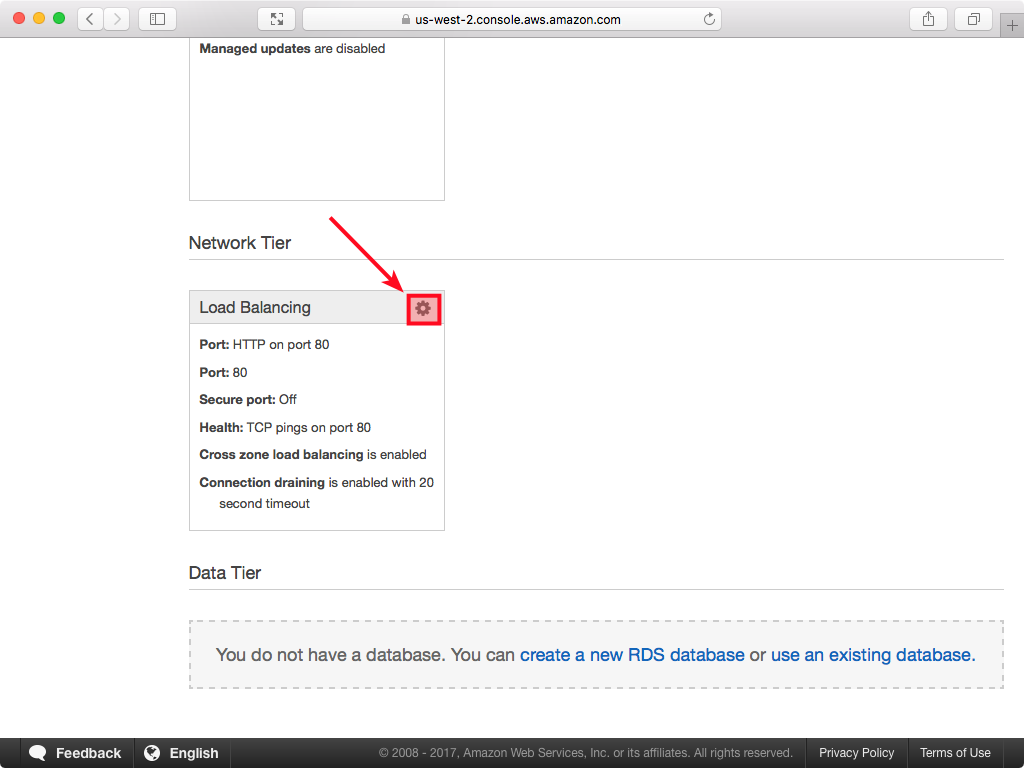
- High Availability option only: Scroll down to find the Load Balancing section and click on the wheel icon:
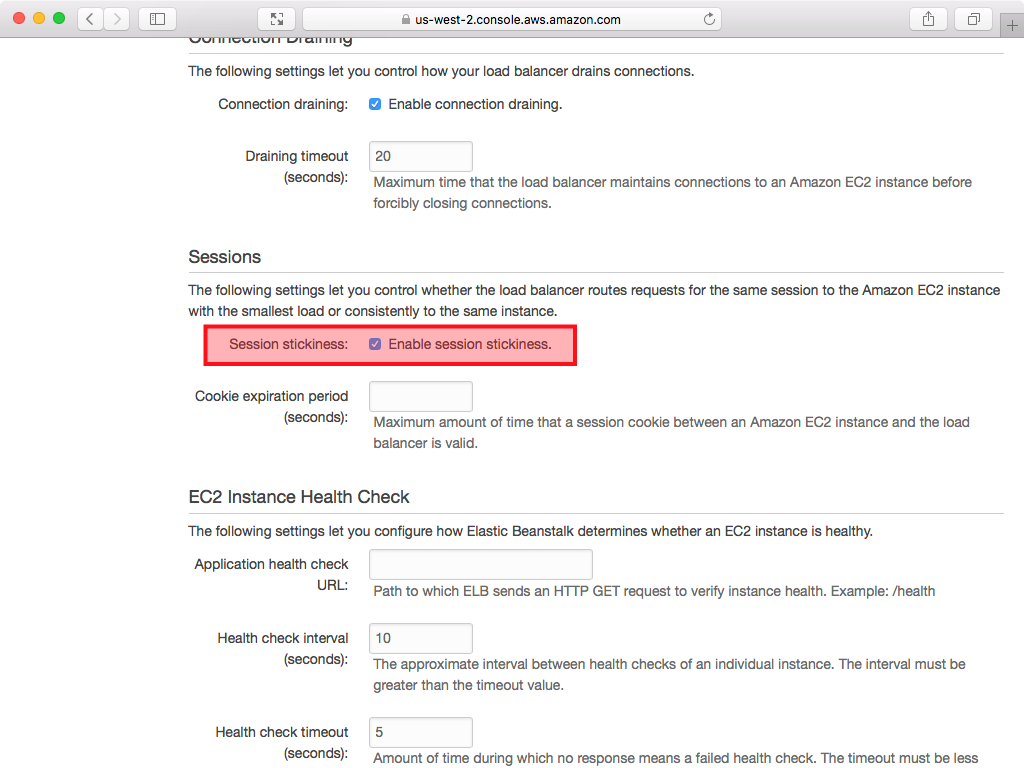
- High Availability option only: On the following screen enable session stickiness:
- You can access the Spoon Web Interface via this URL:
http://<your-beanstalk-app-url>.com:8080/spoon/spoon
Your Beanstalk App URL is shown on the AWS Beanstalk application overview page.