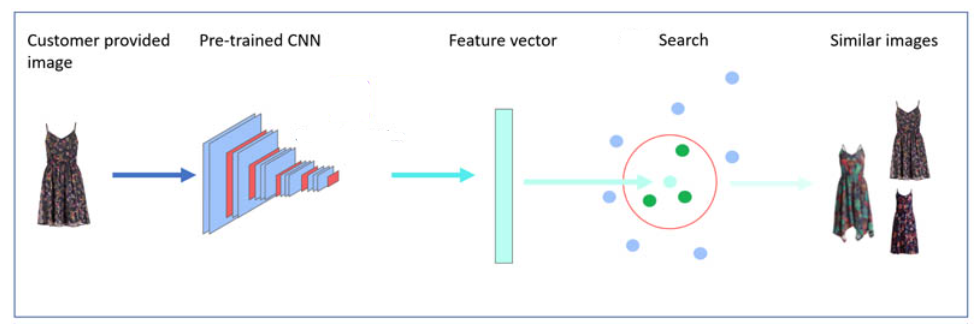
Figure 1: Reverse Visual Search
- To view the outputs for 10 query images in the notebook checkout:
- For Detailed Documentation checkout : Documentation
We have all played the game of “spot the difference” in which we need to find differences between two similar images. To build upon the context, can you find images that are similar to a given image? The google reverse image search is an apt description of what we are trying to building in this project. Our problem statement is to find N similar images, given an input image.
In this project, we are going to utilize the LFW Dataset (Labelled Faces in the Wild), a compilation of face pairs of positively and negatively weighted images samples collected by the researchers of the University of Massachusetts. The dataset comprises 13233 images of 5749 people with 1680 people having two or more images. LFW Dataset is the benchmark for pair matching, also known as face verification. For our project, we are going to build our model on this dataset and later utilize this model for a reverse visual search on a given face image.
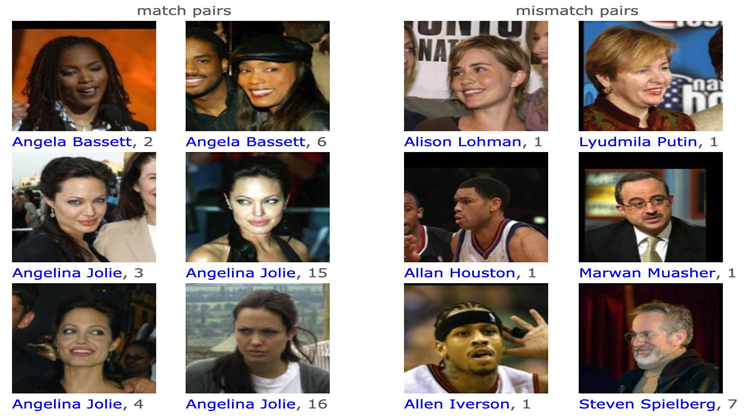
Figure 2: LFW Dataset
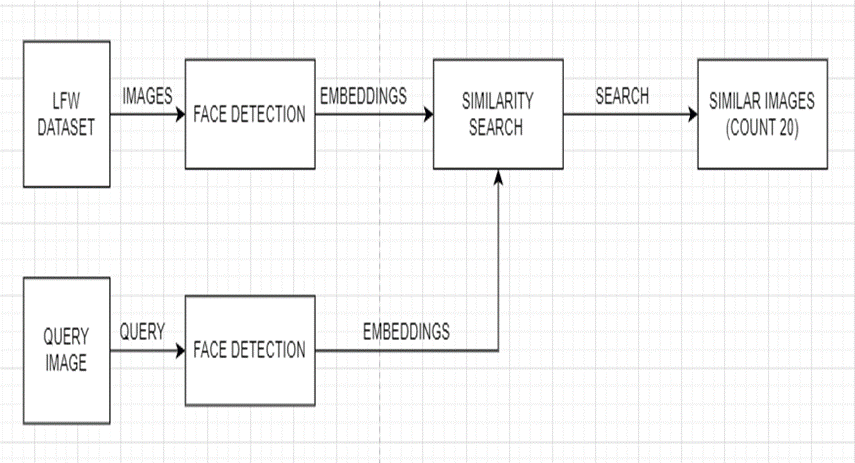
Figure 3: Model Architecture
Steps for reverse visual search:
- Generating the embeddings for entire dataset.
- Storing these embeddings in a vector database.
- Generating the embedding for query image.
- Searching the 20 closest neighbors in the vector database.
- Giving the results.
For the purpose of developing a model from ground up we have developed three different architectures and tried to get better results in each iteration. Different models are discussed below:
- Developing a Baseline Model: In this model we have used ResNet50 for generating the embeddings of an image and providing it as an input to searching ML model, in this case K-Nearest Neighbor.
- Initial Improvement on Baseline Performance: Utilizing MTCNN Face detection to extract target images (faces) and utilizing ResNet50 along with K- Nearest Neighbor (similar to the baseline model) for visual search.
- Final Improvement on Baseline Performance: Utilize MTCNN Face detection to extract target faces from the image, generating embeddings using FaceNet and finally using Milvus to search for the similar images.
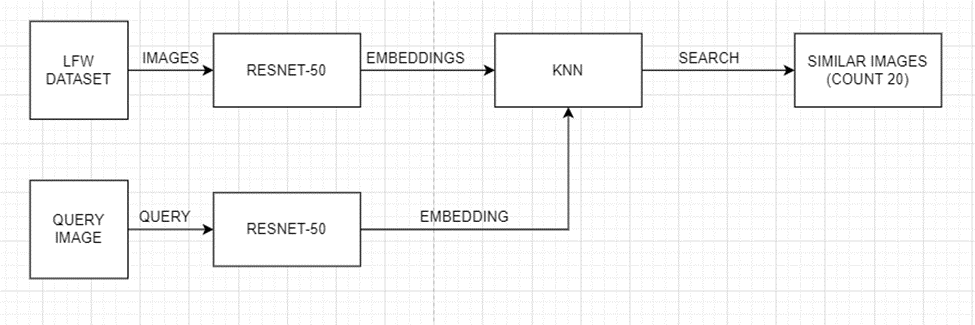
Figure 4: Baseline Model

Figure 5: Carmen_Electra
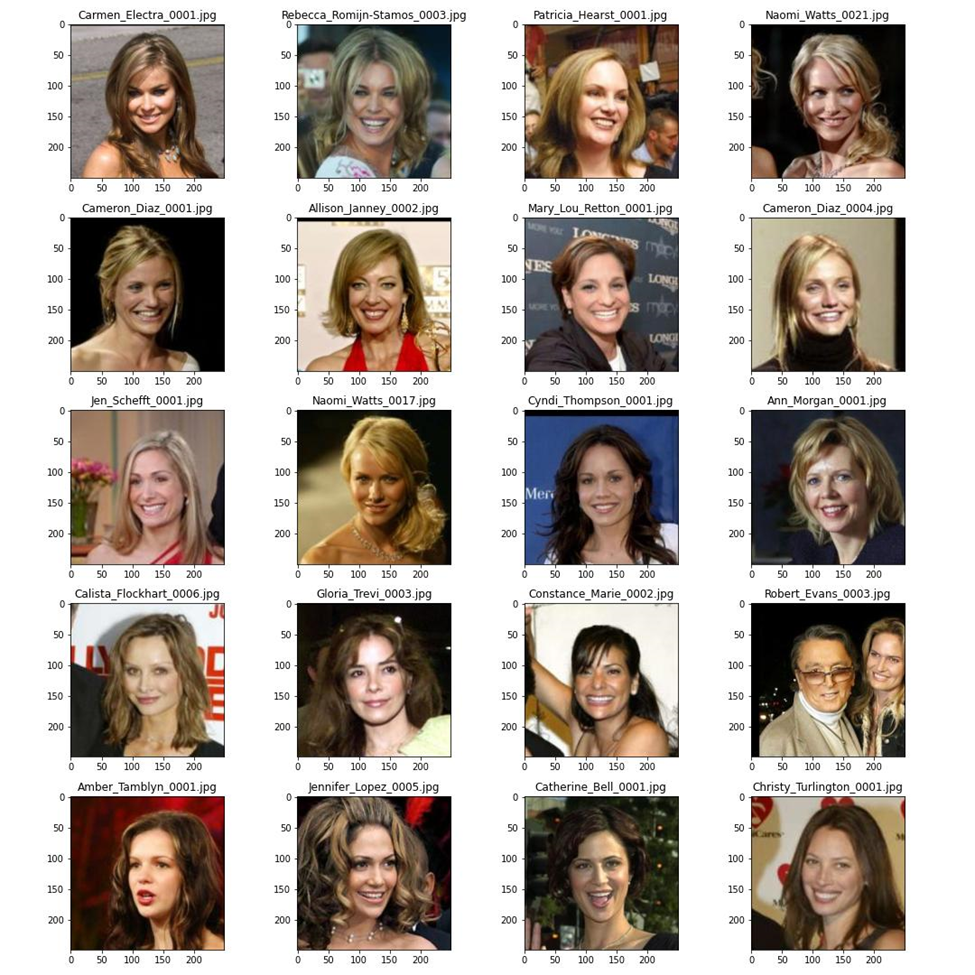
Figure 6: 20 Similar Faces for Carmen Electra
- Other outputs for baseline can be viewed here: BaseLine Output
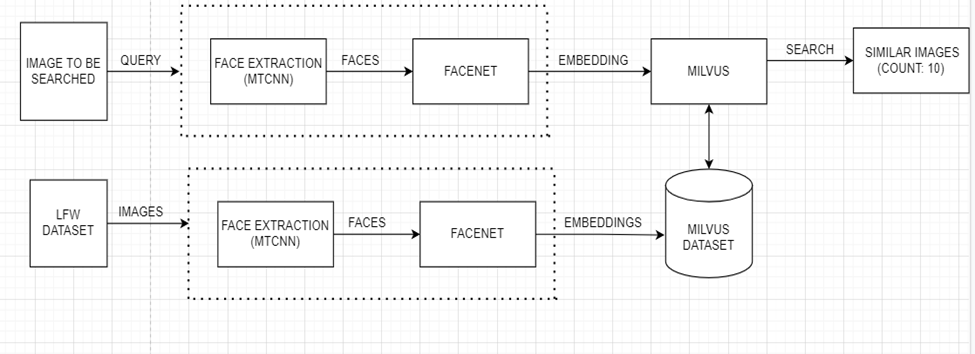
Figure 7: Improved Model
Figure 8: Carmen Electra
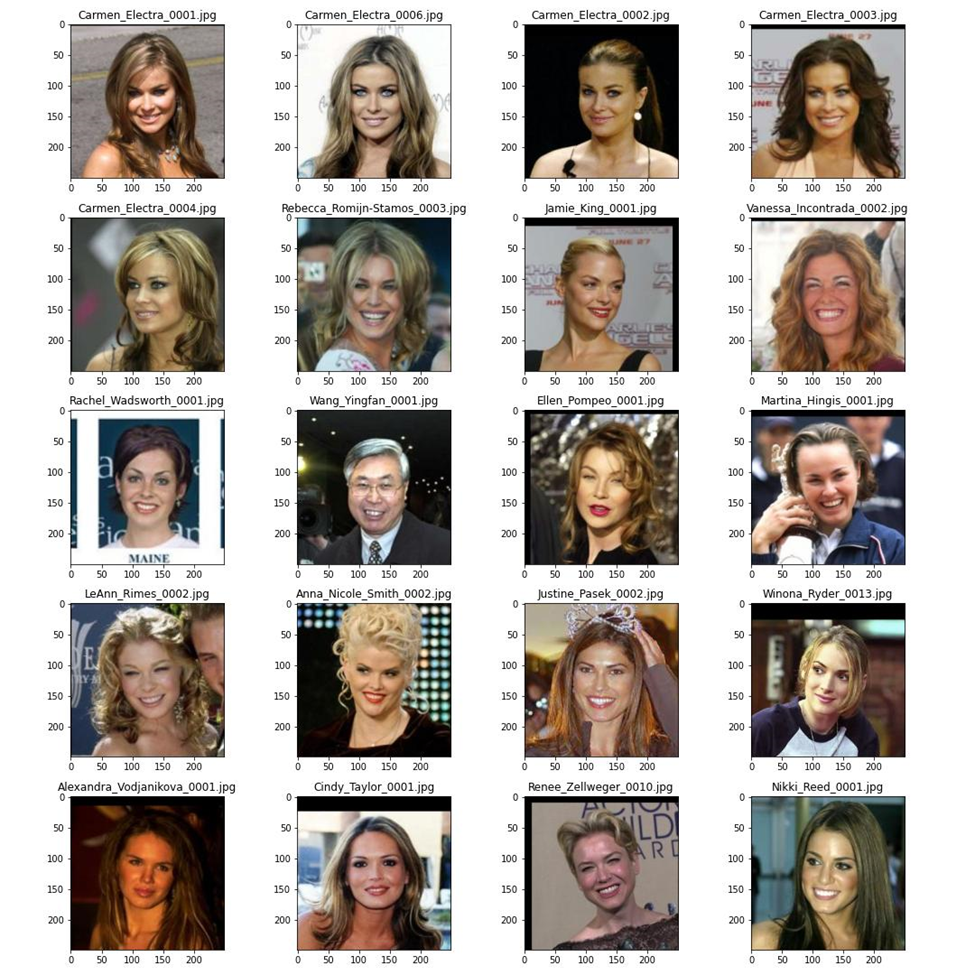
Figure 9: 20 Similar Faces for Carmen Electra
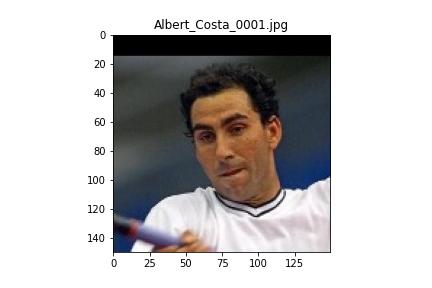
Figure 10: Albert Costa
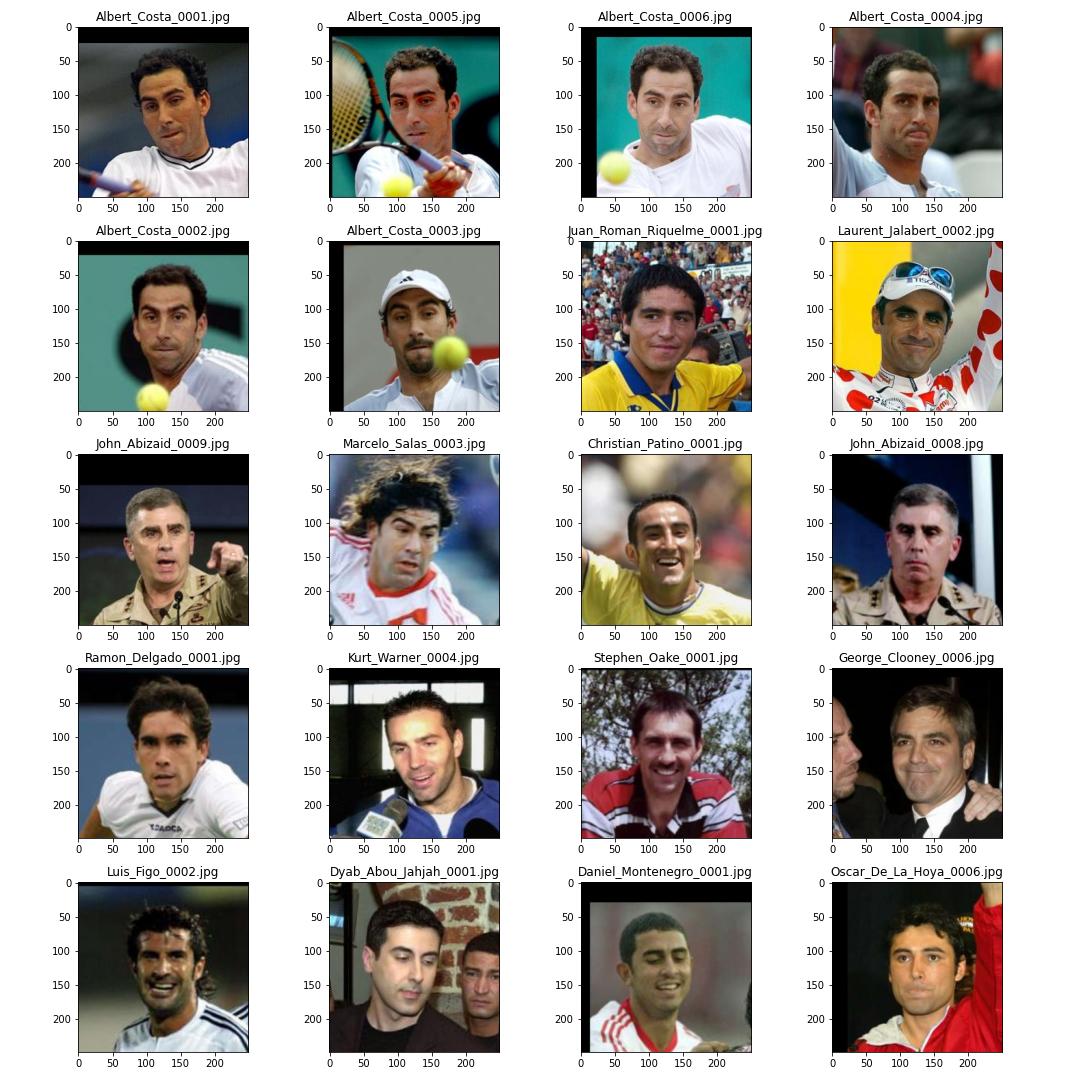
Figure 11: 20 Similar Faces for Albert Costa

Figure 12: Angela Bassett

Figure 13: 20 Similar Faces for Angela Bassett
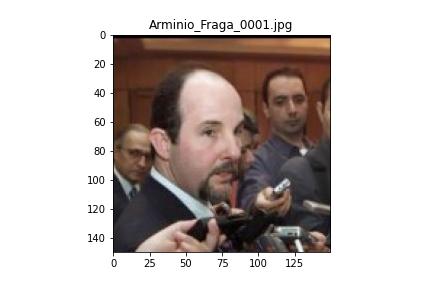
Figure 14: Arminio Fraga
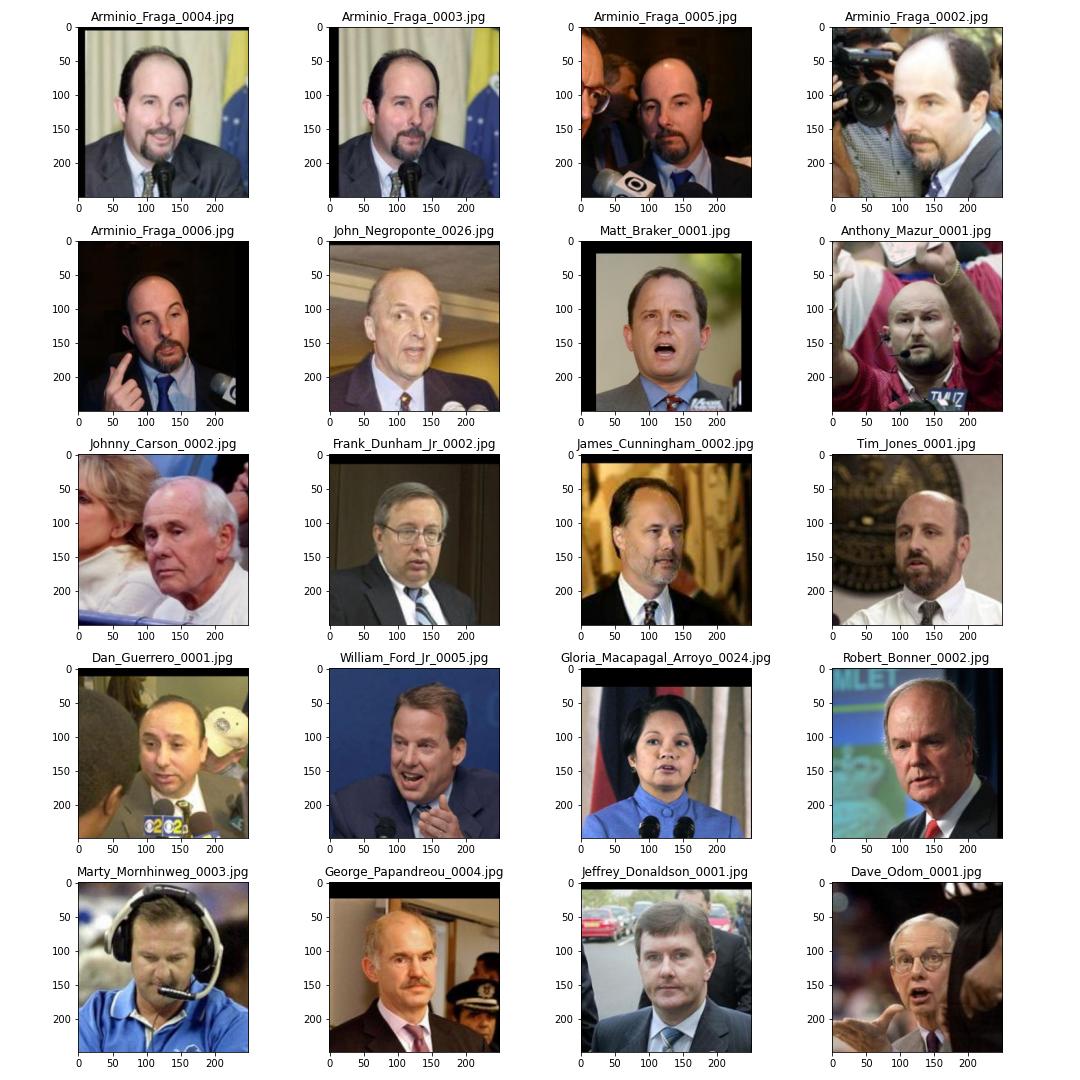
Figure 15: 20 Similar Faces for Arminio Fraga
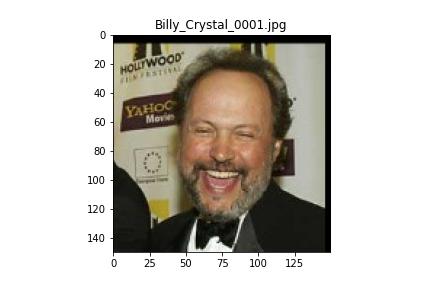
Figure 16: Billy Crystal
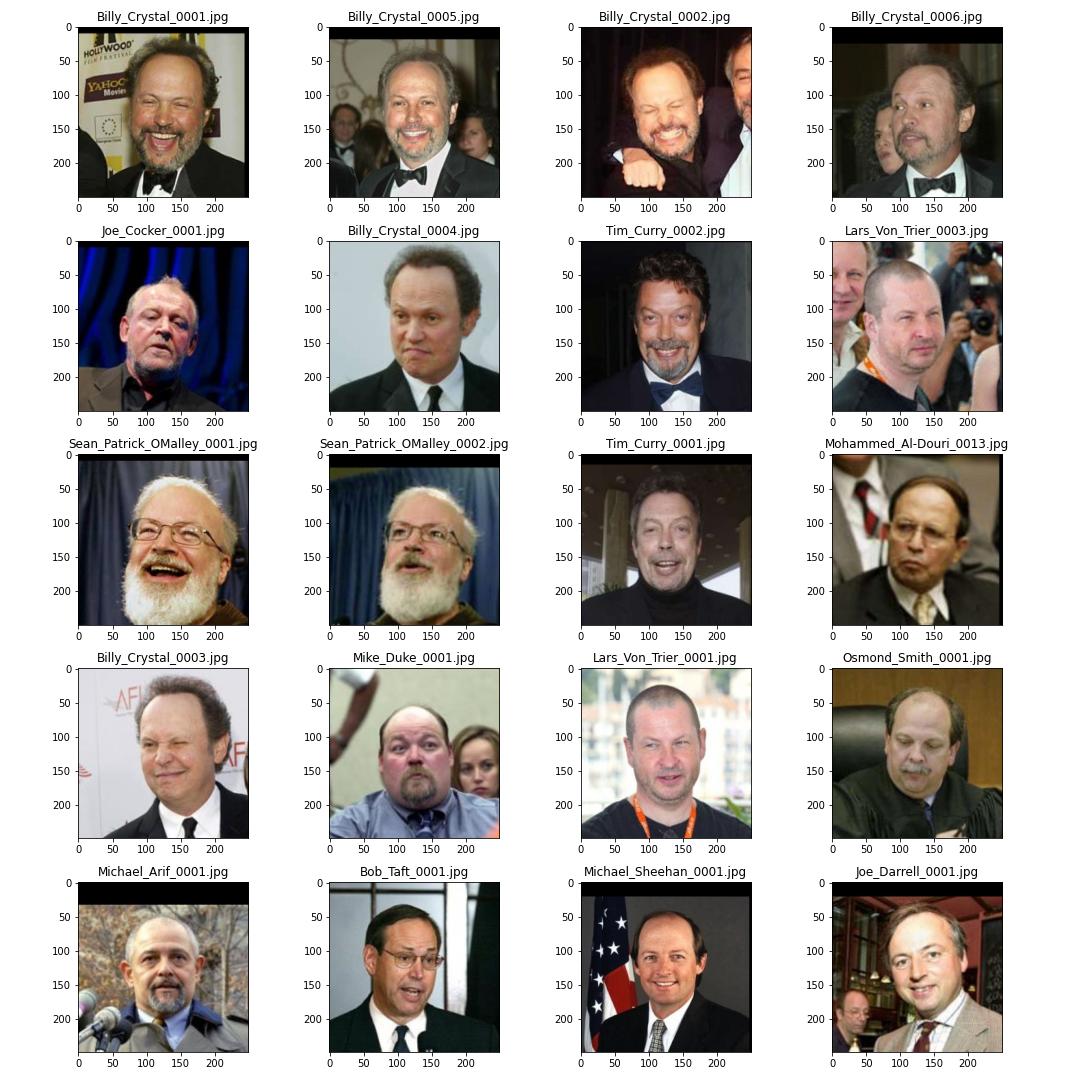
Figure 17: 20 Similar Faces for Billy Crystal
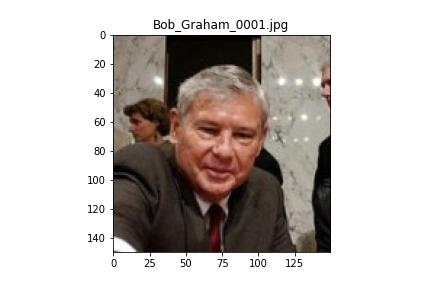
Figure 18: Bob Graham
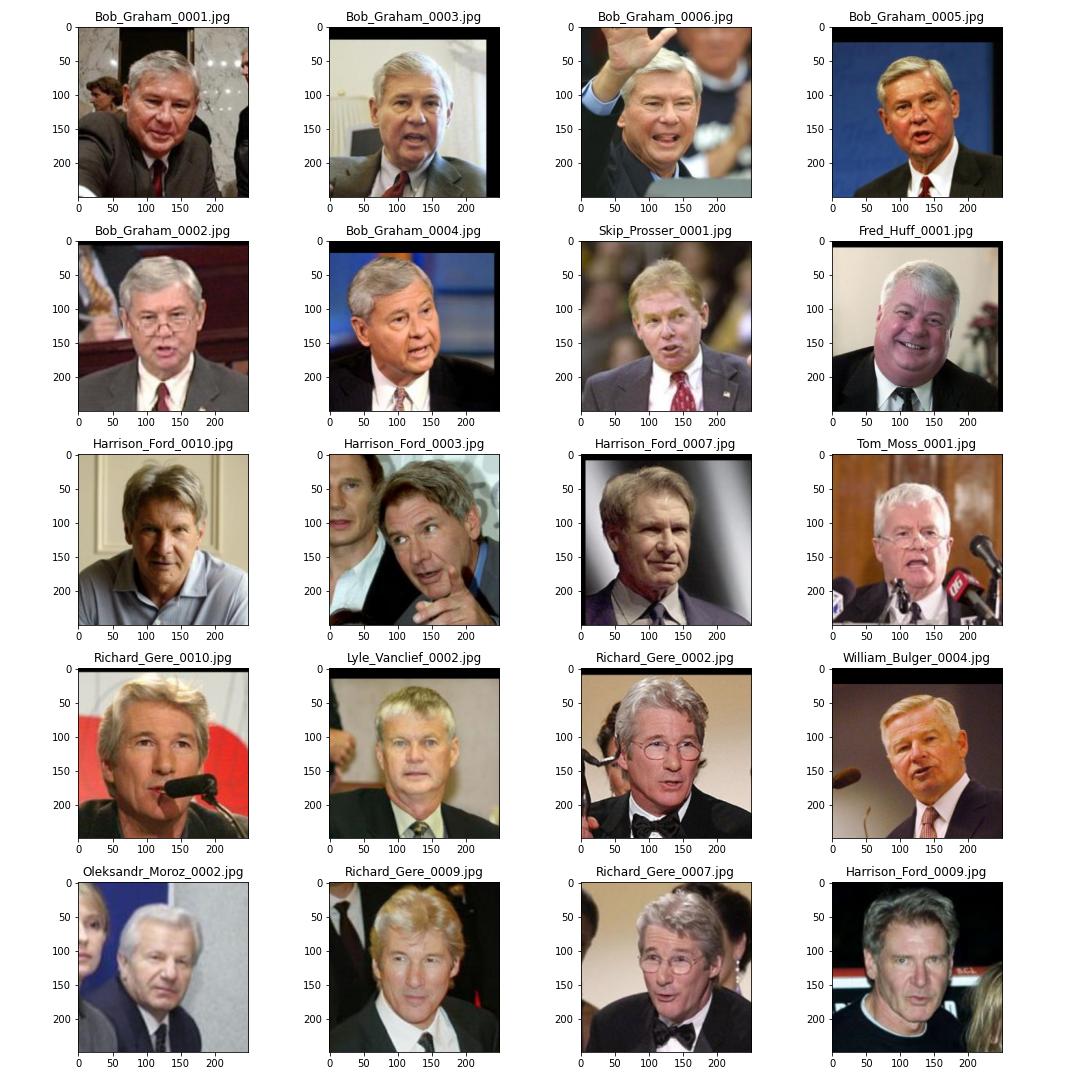
Figure 19: 20 Similar Faces for Bob Graham
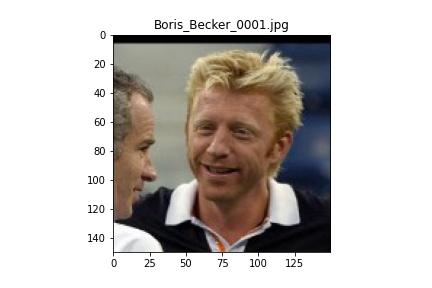
Figure 20: Boris Becker
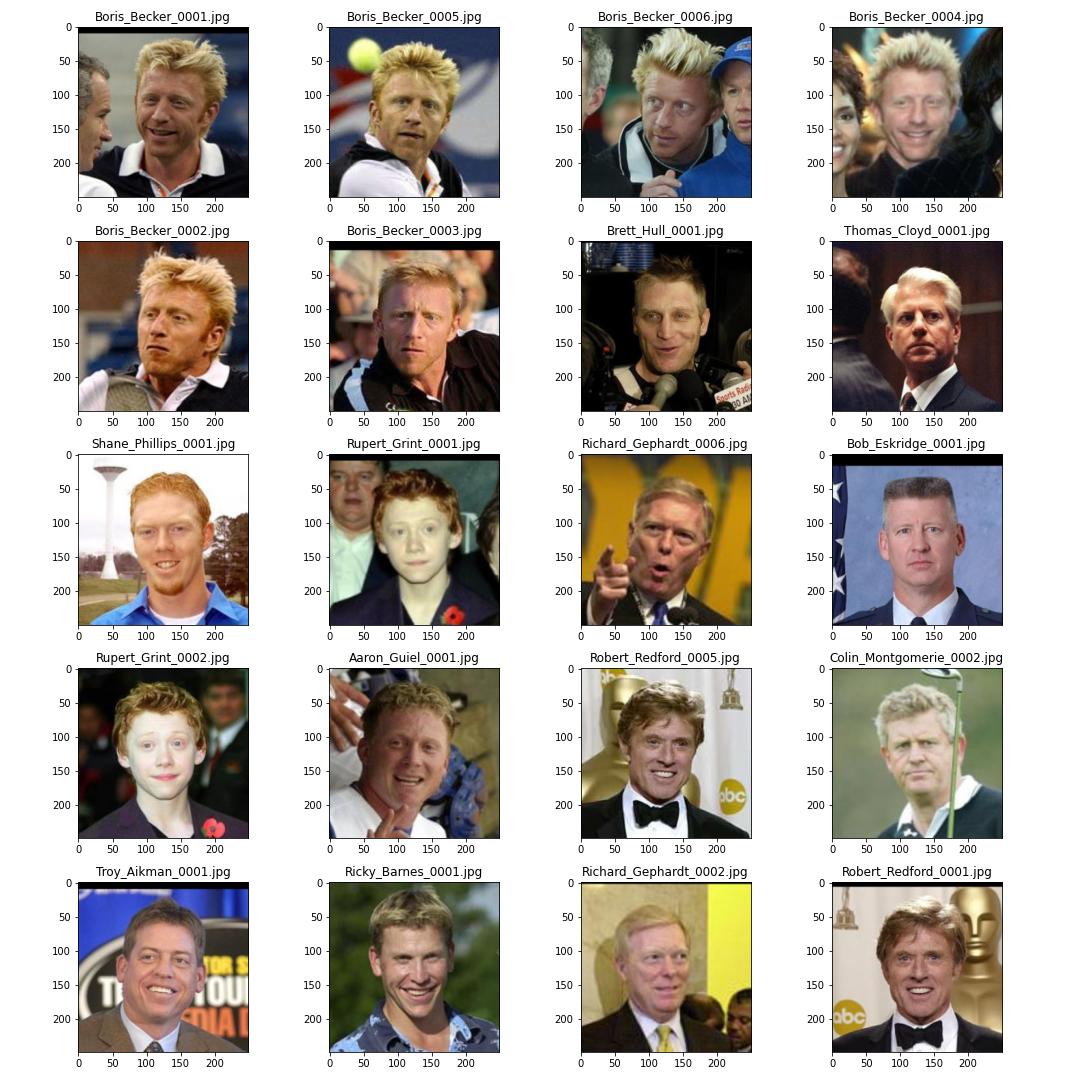
Figure 21: 20 Similar Faces for Boris Becker
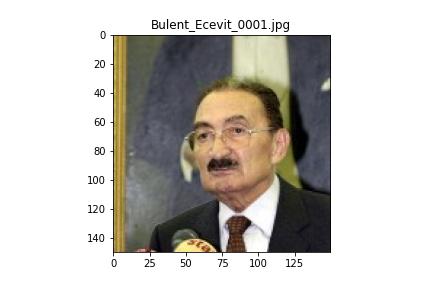
Figure 22: Bulent Ecevit
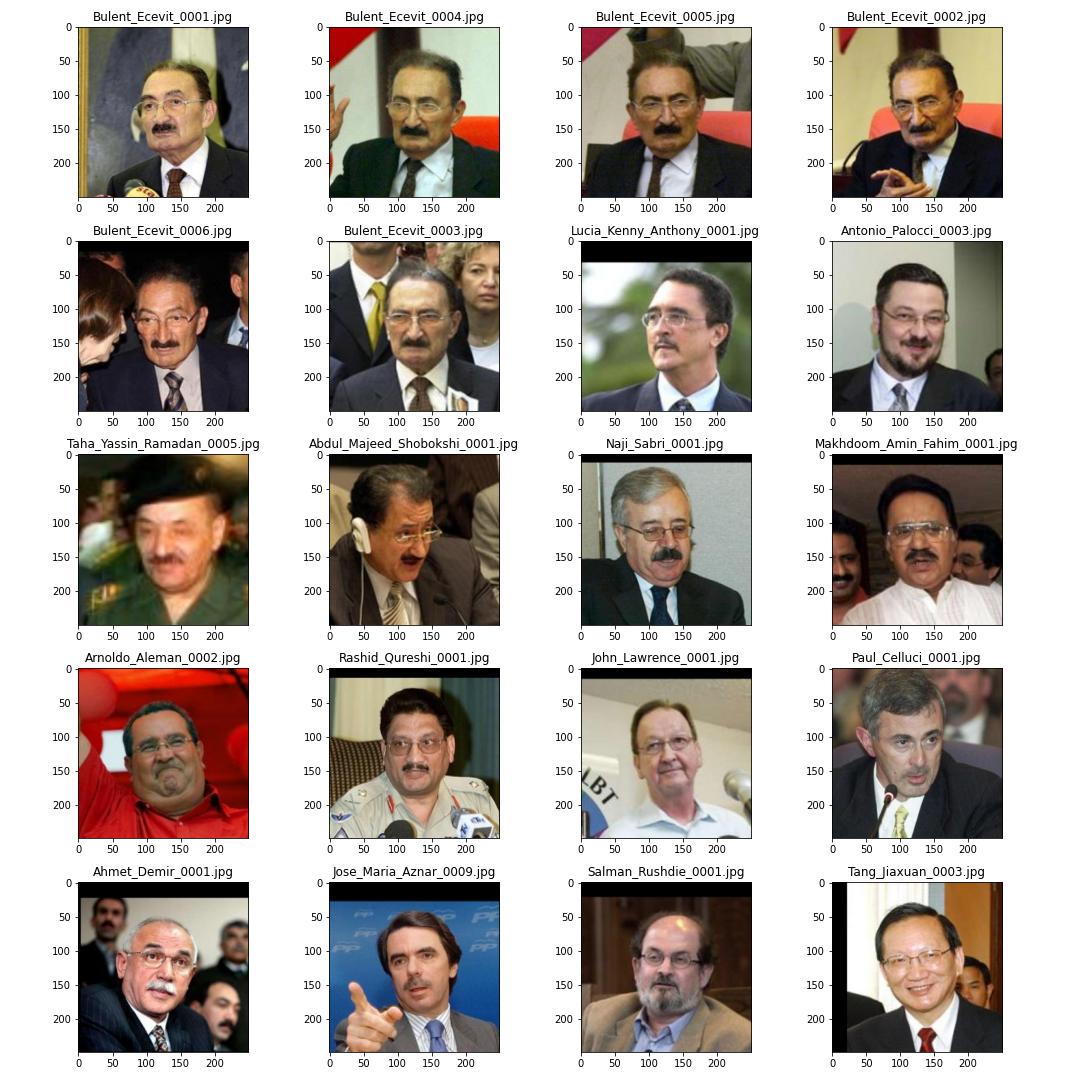
Figure 23: 20 Similar Faces for Bulent Ecevit
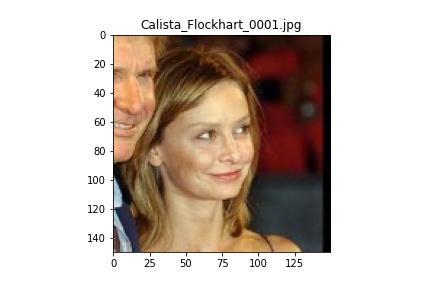
Figure 24: Calista Flockhart

Figure 25: 20 Similar Faces for Calista Flockhart
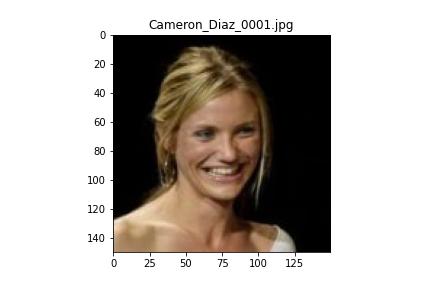
Figure 26: Cameron Diaz
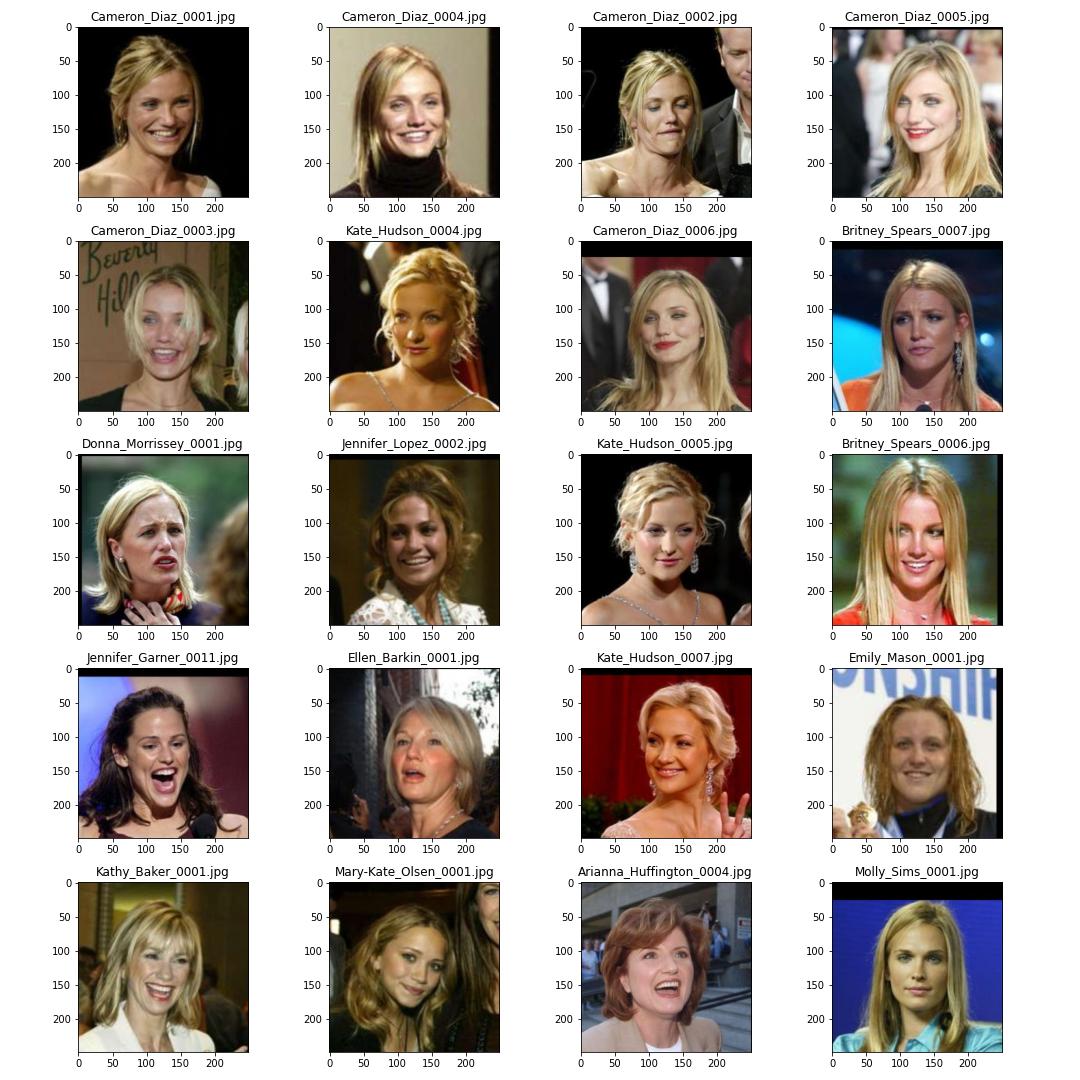
Figure 27: 20 Similar Faces for Cameron Diaz
This project was completed on multiple machines:
Input LFW Dataset: Input
Output: Output
Input: Input
Output: Output
Input:
Output: Output
Input:
Output Final Model: Output
Input: Input
Output MTCNN: Output
Input:
Output Baseline Images: Output
Input:
Output: Output
Download the LFW Dataset: Dataset
In this step we will generate embeddings for our training dataset which is essentially the entire LFW dataset. Also for comparison purposes we will get accuracy for our Baseline Model and Improved Model. Please Note that accuracy is not the correct term for this problem statement however just to compare models we have incorporated this into our experiments. We will split the LFW dataset into train and test images (however when we generate results for query images we will use the entire LFW dataset). Notebooks that are used in this step are as follows:
(1) model-training-baseline.ipynb (Colab)
(2) model-training-facenet.ipynb (Colab)
(3) model-training-milvus.ipynb (EC2)
In this step we will get 20 similar faces for 10 query images. Query images are the first 10 images in http://vis-www.cs.umass.edu/lfw/number_6.html. The notebooks used in this section are as follows:
(1) PreProcessing Step: query/Preprocessing-Queries.ipynb (First notebook to run)
(2) Baseline Model: query/Baseline_Model-Output.ipynb
(3) Final Improvement: query/Improvement-final-FaceNet.ipynb, query/Improvement-final-Milvus.ipynb
[1] https://towardsdatascience.com/understanding-and-coding-a-resnet-in-keras-446d7ff84d33
[2]https://towardsdatascience.com/how-does-a-face-detection-program-work-using-neural-networks-17896df8e6ff
[3] https://milvus.io/docs/image_similarity_search.md
[4] https://aws.amazon.com/blogs/machine-learning/building-a-visual-search-application-with-amazon-sagemaker-and-amazon-es/
[5] http://vis-www.cs.umass.edu/lfw/
[6] https://www.geeksforgeeks.org/facenet-using-facial-recognition-system/
[7] https://milvus.io/docs/v2.0.x/overview.md
- Eashan Kaushik (AWS Contact)
- NYU Email: [email protected]
- N#: N19320245
- GitHub Email: [email protected]
- Rishab Redhu
- NYU Email: [email protected]
- N#: N18032325
- GitHub Email: [email protected]
- Rohan Jesalkumar Patel
- NYU Email: [email protected]
- N#: N13328358
- GitHub Email: [email protected]