This plugin extends existing FilamentPHP 3 components with advanced features and enhanced functionality, offering more powerful and flexible options for your projects.
Note
All components are extending the default Filament components, so you can use them as you would use the default components without any issues. This package is designed to enhance the default components, not to replace them.
You can buy a license for the plugin on the AnyStack website for $59.99. This is a lifetime license, which means you only need to pay once and the best part is that you can use it on multiple projects.
Filament Advanced Components uses AnyStack to handle payment, licensing, and distribution.
To install you'll need to add the repository to your composer.json file:
{
    "repositories": [
        {
            "type": "composer",
            "url": "https://filament-advanced-components.composer.sh"
        }
    ]
}
Once the repository has been added to the composer.json file, you can install Filament Advanced Components like any other composer package using the composer require command:
composer require codewithdennis/filament-advanced-componentsYou will be prompted to provide your username and password. The username will be the email address and the password will be equal to your license key.
Loading composer repositories with package information
Authentication required (filament-advanced-components.composer.sh):
Username: [licensee-email]
Password: [license-key]You will need a custom theme to use the plugin.
Make sure you add the following to your `tailwind.config.js file.
'./vendor/codewithdennis/filament-advanced-components/resources/**/*.blade.php',- Multiple prefix and suffix images on components
The following components are available in the package:
- AdvancedCheckboxList
- AdvancedSelectFilter
- AdvancedSelect
- AdvancedTextColumn
- AdvancedTextEntry
- AdvancedBadge (can only be used inside the AdvancedTextColumn)
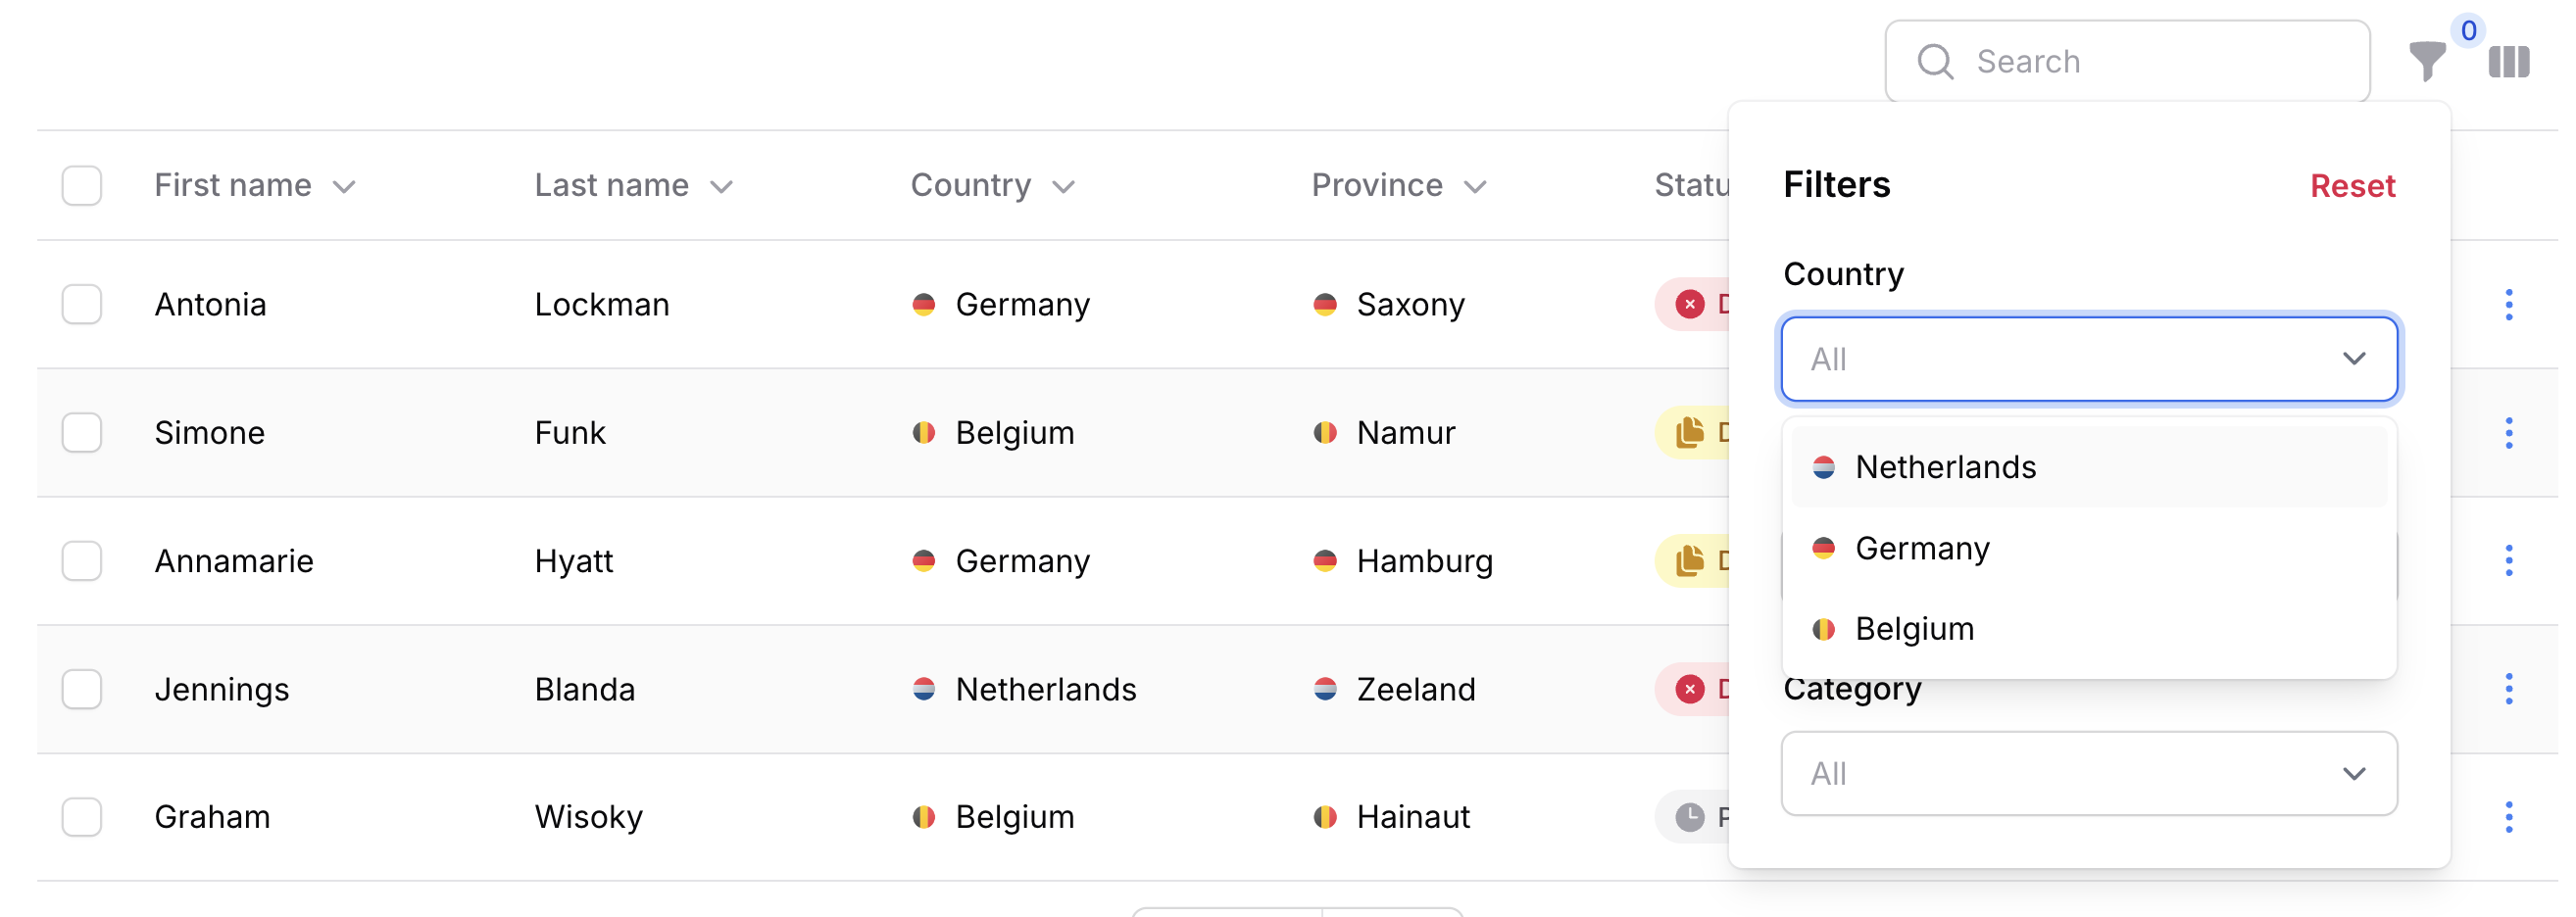
You can add a prefix or suffix images to AdvancedTextColumn, AdvancedCheckboxList, AdvancedSelectFilter, AdvancedSelect, AdvancedTextEntry, AdvancedBadge components. This allows you to add more context to the data you are displaying.
Note
The prefix and suffix method on the AdvancedTextColumn is similar to ->icon('') but with more flexibility and also allows both prefix and suffix image at the same time.
Here is an example of how you can add a prefix image to a column:
AdvancedTextColumn::make('country.name')
->prefixImage(fn (Country $record) => asset('images/'.$record->image))AdvancedTextColumn::make('country.name')
->suffixImage(fn (Country $record) => asset('images/'.$record->image))You can change the size of the image by passing a size option to the component.
AdvancedTextColumn::make('country.name')
    ->prefixImage(fn (Country $record) => asset('images/'.$record->image))
->prefixImageSize(32) // Default: 16pxAdvancedTextColumn::make('country.name')
->suffixImage(fn (Country $record) => asset('images/'.$record->image))
->suffixImageSize(32) // Default: 16pxDo you have a badge-able column? No worries, the image will be displayed inside the badge.
If you want to add extra attributes to the image, you can use the prefixImageExtraAttributes or suffixImageExtraAttributes methods.
AdvancedTextColumn::make('country.name')
    ->prefixImage(fn (Country $record) => asset('images/'.$record->image))
    ->prefixImageExtraAttributes([
        'class' => 'pr-4',
        'style' => 'background: red'
])AdvancedTextColumn::make('country.name')
->suffixImage(fn (Country $record) => asset('images/'.$record->image))
->suffixImageExtraAttributes([
'class' => 'pr-4',
'style' => 'background: red'
])A simple way to make a value clickable and open the default mail client with the email address.
AdvancedTextColumn::make('email')
    ->mailable()
If you want to apply a mailable based on a condition, you can pass a closure that returns a boolean value.
AdvancedTextColumn::make('email')
->mailable(fn (string $state) => str($state)->endsWith('.com'))A simple way to make a value clickable and open the default phone client with the phone number.
AdvancedTextColumn::make('phone')
    ->callable()
If you want to apply a callable based on a condition, you can pass a closure that returns a boolean value.
AdvancedTextColumn::make('phone')
->callable(fn (string $state) => str($state)->startsWith('+')),A simple way to make a value clickable and open the default WhatsApp client with the phone number.
AdvancedTextColumn::make('phone')
    ->whatsappable()
If you want to apply a WhatsApp-able based on a condition, you can pass a closure that returns a boolean value.
AdvancedTextColumn::make('phone')
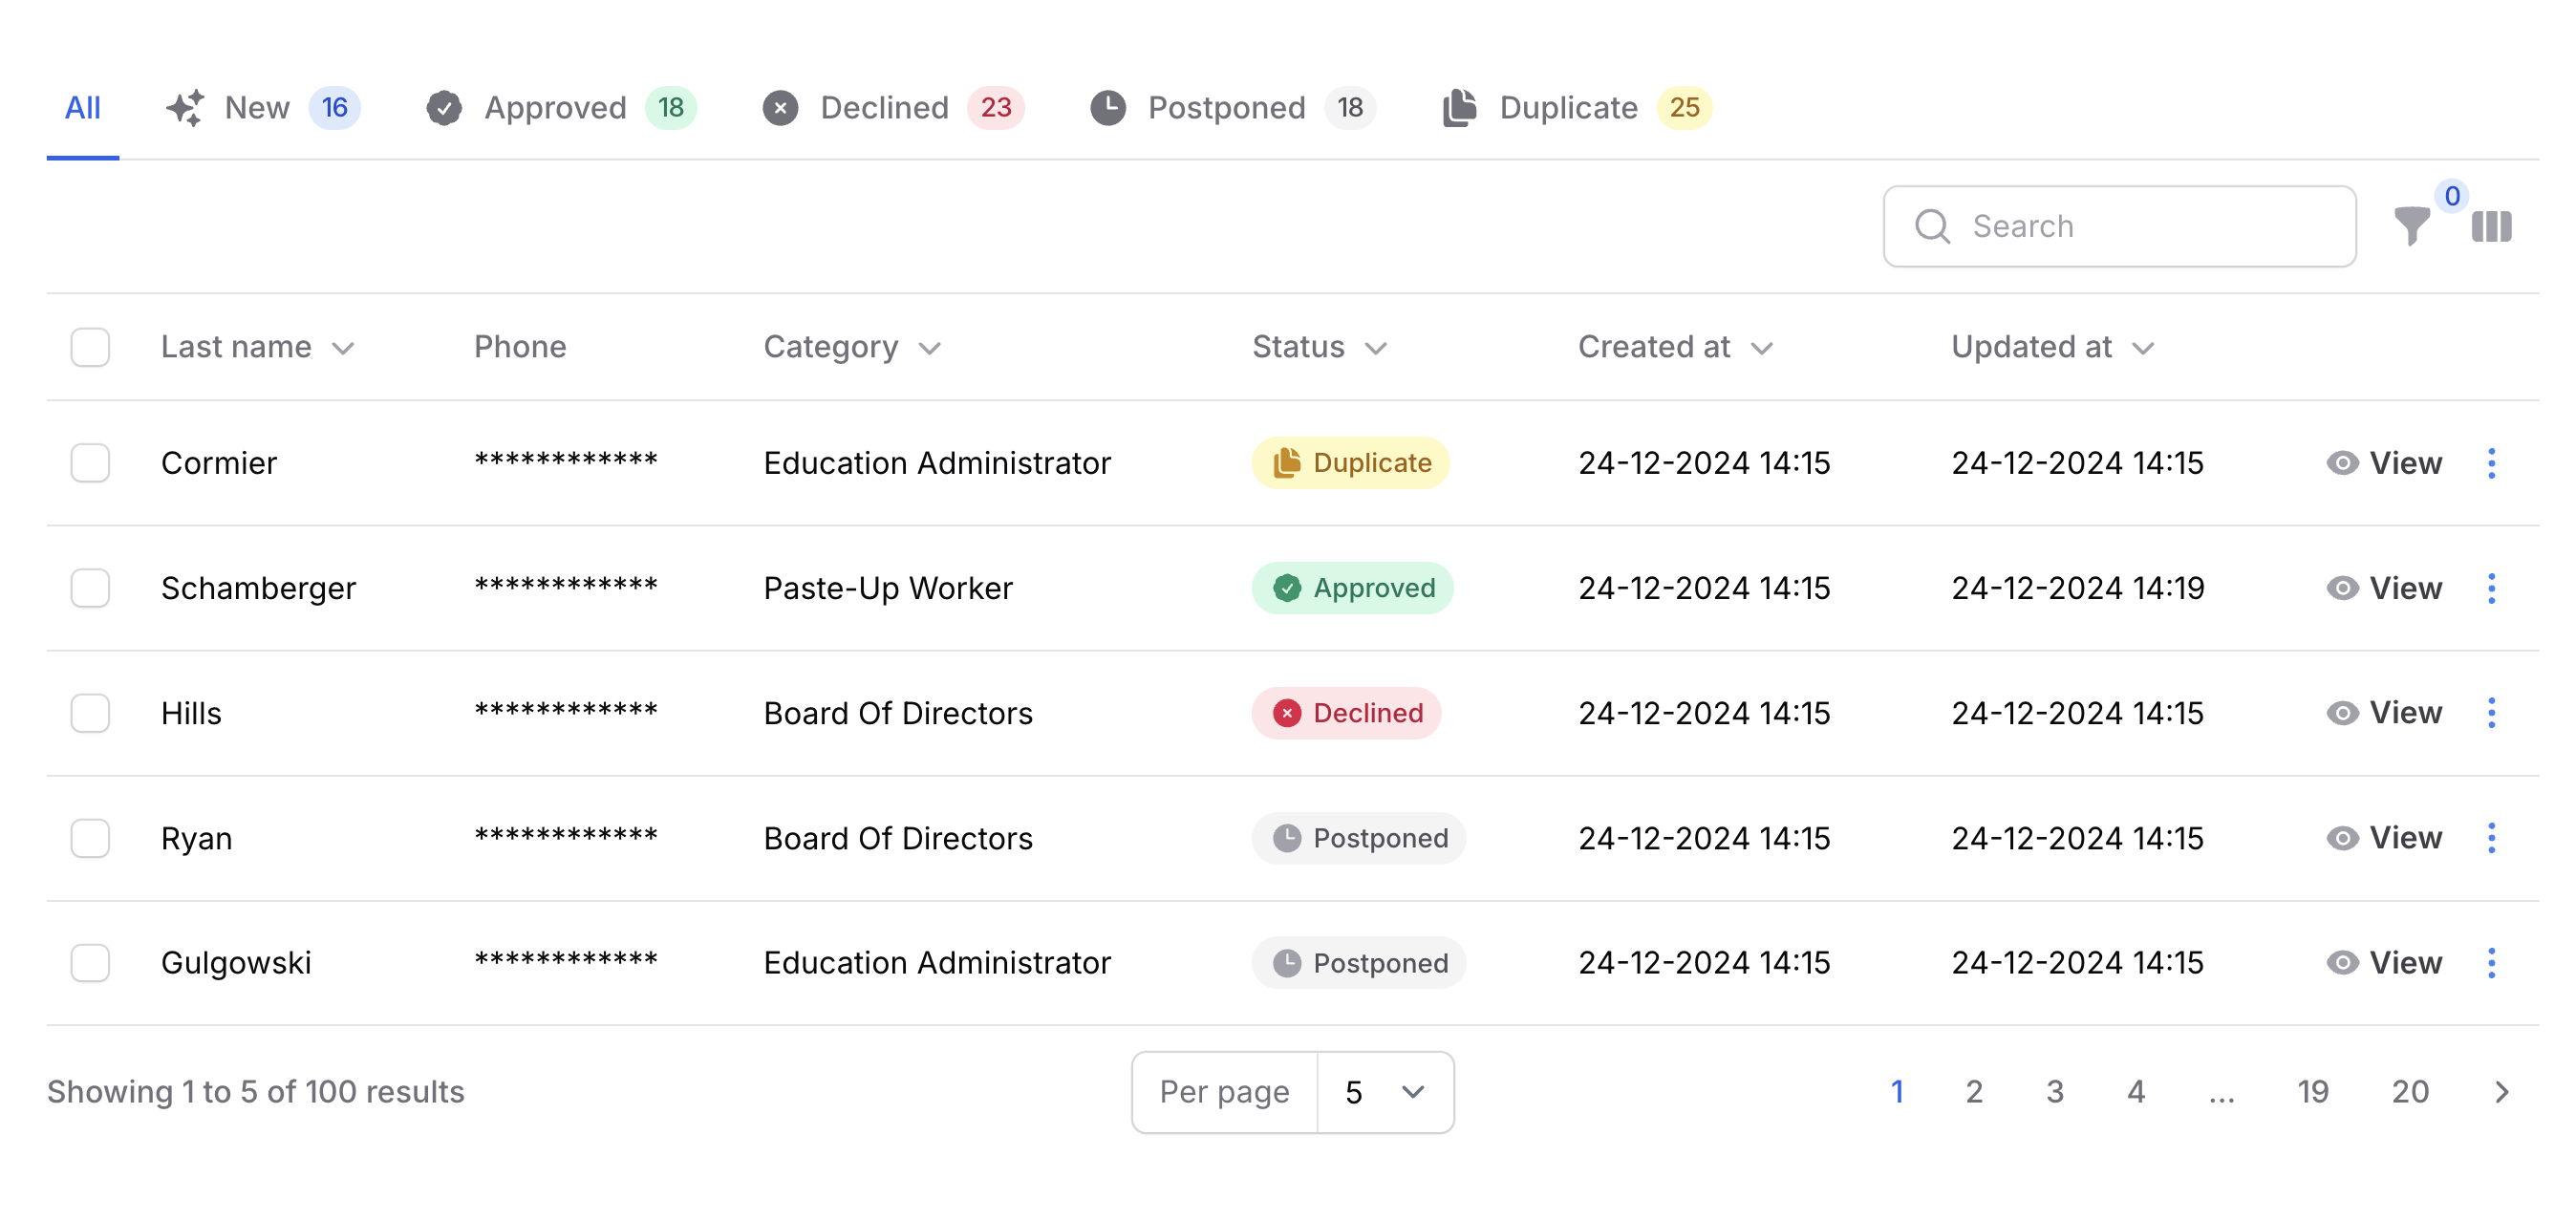
->whatsappable(fn (string $state) => str($state)->startsWith('+')),If you want to mask a value on a AdvancedTextColumn or AdvancedTextEntry, you can use the masked method.
AdvancedTextColumn::make('phone')
    ->masked()
If you want to apply a mask based on a condition, you can pass a closure that returns a boolean value.
AdvancedTextColumn::make('phone')
    ->masked(! auth()->user()->is_admin)
You can change the mask character by passing a maskCharacters option to the component.
AdvancedTextColumn::make('phone')
    ->masked()
    ->maskCharacters('█')
Do you want to start the mask from a specific index? No worries, you can add a maskIndex option to the component.
AdvancedTextColumn::make('phone')
    ->masked()
    ->maskIndex(5)
The length of the mask can be changed by adding a maskLength option to the component. When the length is set to null (default), the mask will be applied to the whole value.
AdvancedTextColumn::make('phone')
    ->masked()
->maskLength(5)If you want to make a value bold on a AdvancedTextColumn, AdvancedTextEntry or AdvancedBadge, you can use the bold method.
AdvancedTextColumn::make('name')
->bold()If you want to underline a value on a AdvancedTextColumn, AdvancedTextEntry or AdvancedBadge, you can use the underline method.
AdvancedTextColumn::make('name')
->underline()If you want to italicize a value on a AdvancedTextColumn, AdvancedTextEntry or AdvancedBadge, you can use the italic method.
AdvancedTextColumn::make('name')
->italic()If you want to "strikethrough" a value on a AdvancedTextColumn, AdvancedTextEntry or AdvancedBadge, you can use the strikeThrough method.
AdvancedTextColumn::make('name')
->strikeThrough()If you want to add badges to a AdvancedTextColumn, you can use the badges method.
AdvancedTextColumn::make('name')
    ->badges([
        AdvancedBadge::make('gold')
            ->label(__('High Quality'))
            ->color('warning'),
])If you want to change the color of the badge you can use the color method.
AdvancedBadge::make('gold')
->color('warning')If you want to make a badge pulse you can use the pulse method.
->pulse()If you want to make a badge bounce you can use the bounce method.
->bounce()If you want to change the border radius of the badge you can use the borderRadius method.
->borderRadius(5) // in pixelsFilament Advanced Components licenses strictly prohibit the public distribution of its source code. This means you are not permitted to use Filament Advanced Components to build an application and then distribute that application publicly through open-source repositories, hosting platforms, or any other code-sharing platforms.


