


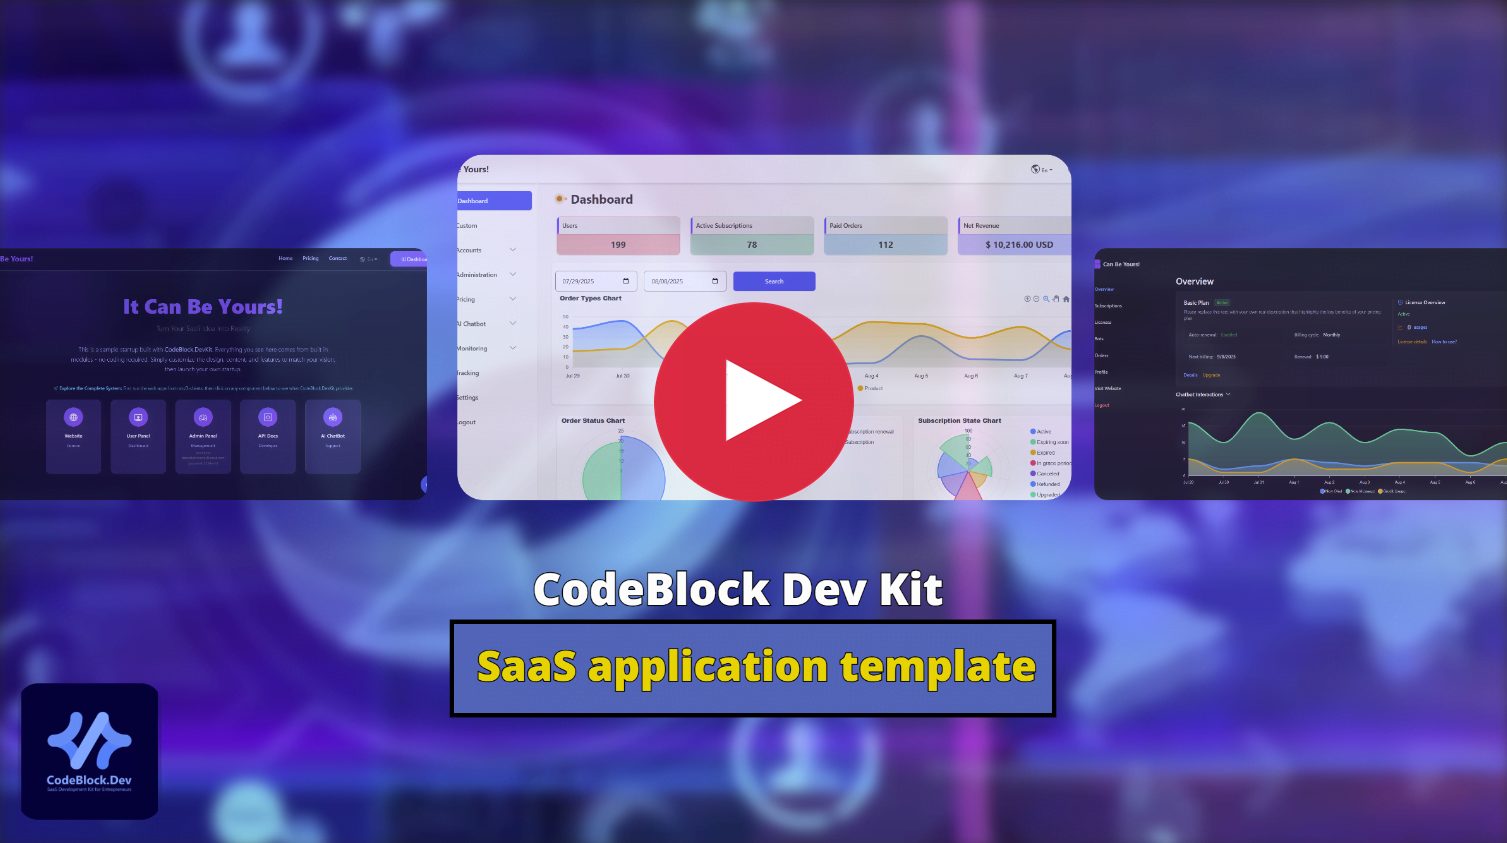
A comprehensive SaaS application template built with the CodeBlock DevKit. This template provides a complete foundation for building modern, scalable SaaS applications with enterprise-grade architecture.
 .
.
You can download this template in two ways:
- Go to the GitHub repository
- Click the green
< > Codebutton - Select
Download ZIP - Extract the ZIP file to your desired location on your PC
git clone https://github.com/CodeBlock-Dev/CodeBlock.DevKit.SaaS.Template.git
cd CodeBlock.DevKit.SaaS.TemplateNote: All DevKit modules are delivered via NuGet packages, so you only need to maintain your own business logic.
To use this template, you need to purchase a license from theCodeBlock DevKit website. Here's how to get started:
- Visit codeblock.dev and purchase a plan.
- Go to your dashboard and download your license file (
codeblock.dev.license.lic). - Copy the license file to the root directory of this template project
- Execute the setup script to configure your SaaS application
⚠️ Warning: Do not share your license publicly. If your repository is public, add the license to your .gitignore file to prevent it from being uploaded.
The template includes automated setup scripts for different operating systems:
- Go to the
/setupdirectory in the template root - Run the appropriate setup script for your OS:
- Configure your application via the setup wizard.
This template requires three dependencies to run:
- Purpose: Required to build and run the .NET applications
- Version: .NET 8.0+
- Download: .NET 8 SDK
- Installation: Follow the official installation guide for your operating system
- Verification: Run
dotnet --versionin your terminal to confirm installation
- Purpose: Primary database for storing application data
- Minimum Version: 4.4+
- Download: MongoDB Community Server
- Connection: Default connection is
mongodb://localhost:27017in allappsettings.jsonandappsettings.Development.jsonfiles. If you change the default port while installing MongoDB server, remember to update the connection in appsettings files as well. - Run as service: The MongoDB server needs to be running as a service on your server or PC.
⚠️ Important: For security reasons, do not use the default connection in production and use username/password authentication for your MongoDB connection
- Purpose: Vector database for AI chatbot features (optional)
- Minimum Version: 1.7+
- Download: Qdrant Vector Database
- Connection: Default connection is
http://localhost:6334in allappsettings.jsonfiles ⚠️ Important: Change default connection in production- Note: Only required if your application includes AI chatbot functionality
Configuration: After installation, update connection strings in all client projects (AdminPanel, Api, WebApp) appsettings.json files if you change from defaults.
The template includes a complete example implementation called 'DemocThings' to help you understand how to build your own features.
- Run the
src/2-Clients/Apiproject and seeDemocThingsAPIs. - Run the
src/2-Clients/AdminPanelproject and navigate toDemomenu item. - Look at the code in the
src/1-Libraries/Application/Services/DemoThingsto see how the application services are structured. - Look at
src/1-Libraries/Application/UseCases/DemoThings/to see how the use cases are implemented. - Look at the
src/1-Libraries/Core/Domain/DemoThings/to see how the domain logic is structured. - Look at the
src/3-Tests/Application.Tests.Unit/UseCases/DemoThings/to see how unit tests are written. - Look at the
src/3-Tests/Application.Tests.Integration/UseCases/DemoThings/to see how integration tests are structured.
For detailed guidance on implementing features and customizing the template, refer to the CodeBlock DevKit Documentation.
💡 AI Coding Tip: When using AI coding agents (like GitHub Copilot, Cursor), you can reference the DemoThings sample implementation to help the AI understand your project's architecture and coding patterns. This sample serves as a great example for the AI model to follow when implementing similar features in your SaaS application.
This template includes comprehensive build automation that covers compilation, linting, and testing. The build system is already integrated into the CI workflow at .github/workflows/ci.yml.
For convenience, we've provided scripts to run build tasks locally:
| Script Location | Purpose |
|---|---|
src/4-Build/scripts/compile/ |
Builds the entire solution |
src/4-Build/scripts/lint/ |
Runs code quality checks |
src/4-Build/scripts/tests/ |
Executes unit and integration tests |
src/4-Build/scripts/packages/ |
UpdatesCodeBlock DevKit NuGet packages |
For detailed build system documentation, see the Build README.
- CI Workflow (
.github/workflows/ci.yml): Pre-configured to build, test, and package your application - CD Workflow (
.github/workflows/cd.yml): Configured for Windows IIS deployment
You can modify these workflows based on your deployment environment. The template is not limited to any specific platform - you can deploy to cloud services, Linux servers, Windows servers, or any other environment of your choice.
For detailed CI/CD guidance, refer to the CodeBlock DevKit Documentation.
After setting up and running the template, you need to configure essential services in the admin panel to ensure all pre-built modules work correctly and provide a complete user experience.
- Run the
AdminPanelproject - Navigate to the Settings page in the admin panel
- Configure the following three service providers:
- Purpose: Required for user registration, password reset, and notification emails
- Recommended: Mailgun (suggested for production)
- Alternatives:
- SendGrid
- Self-hosted email server
- Setup: Configure email settings with your chosen provider's credentials
- Purpose: Required for two-factor authentication and SMS notifications
- Recommended: Twilio
- Setup: Add your Twilio Account SID, Auth Token, and phone number
- Purpose: Required for subscription management and payment processing
- Recommended: Stripe
- Setup:
- Create a Stripe account
- Configure payment settings with your Stripe API keys (Publishable Key and Secret Key)
If you need help, have a question, or want to report a bug, you can create an issue and we will respond as soon as possible.
- Visit GitHub Issues
- Click the green "New issue" button
- Input a title and explain the issue
- Submit your request
Soon, we will provide a Discord server for easier communication and community support.