This repository contains the starter code for the second part of Penn CIS 3500's Password Validator exercise:
-
In the first part, you tested a password validator API endpoint
-
In this second part, you will implement a simple password validator and deploy it.
The goal of this activity is to first deploy the unimplemented password validator, and once your deployment is successful, edit the main.py to implement the code logic that is missing, see FIXME comment. For instance, you might start by checking the length of the password, based on the password policy that you were assigned (here we are checking a length of 10):
# check length requirement
if len(pw) < 10:
return flask.jsonify({"valid": False, "reason": "Password too short"}), 200-
Fork (or import/copy) this repository to your own GitHub account, keep the name
my-password-validator. -
Sign-up for an account at Render.com. For this entire exercise, the free tier is sufficient.
-
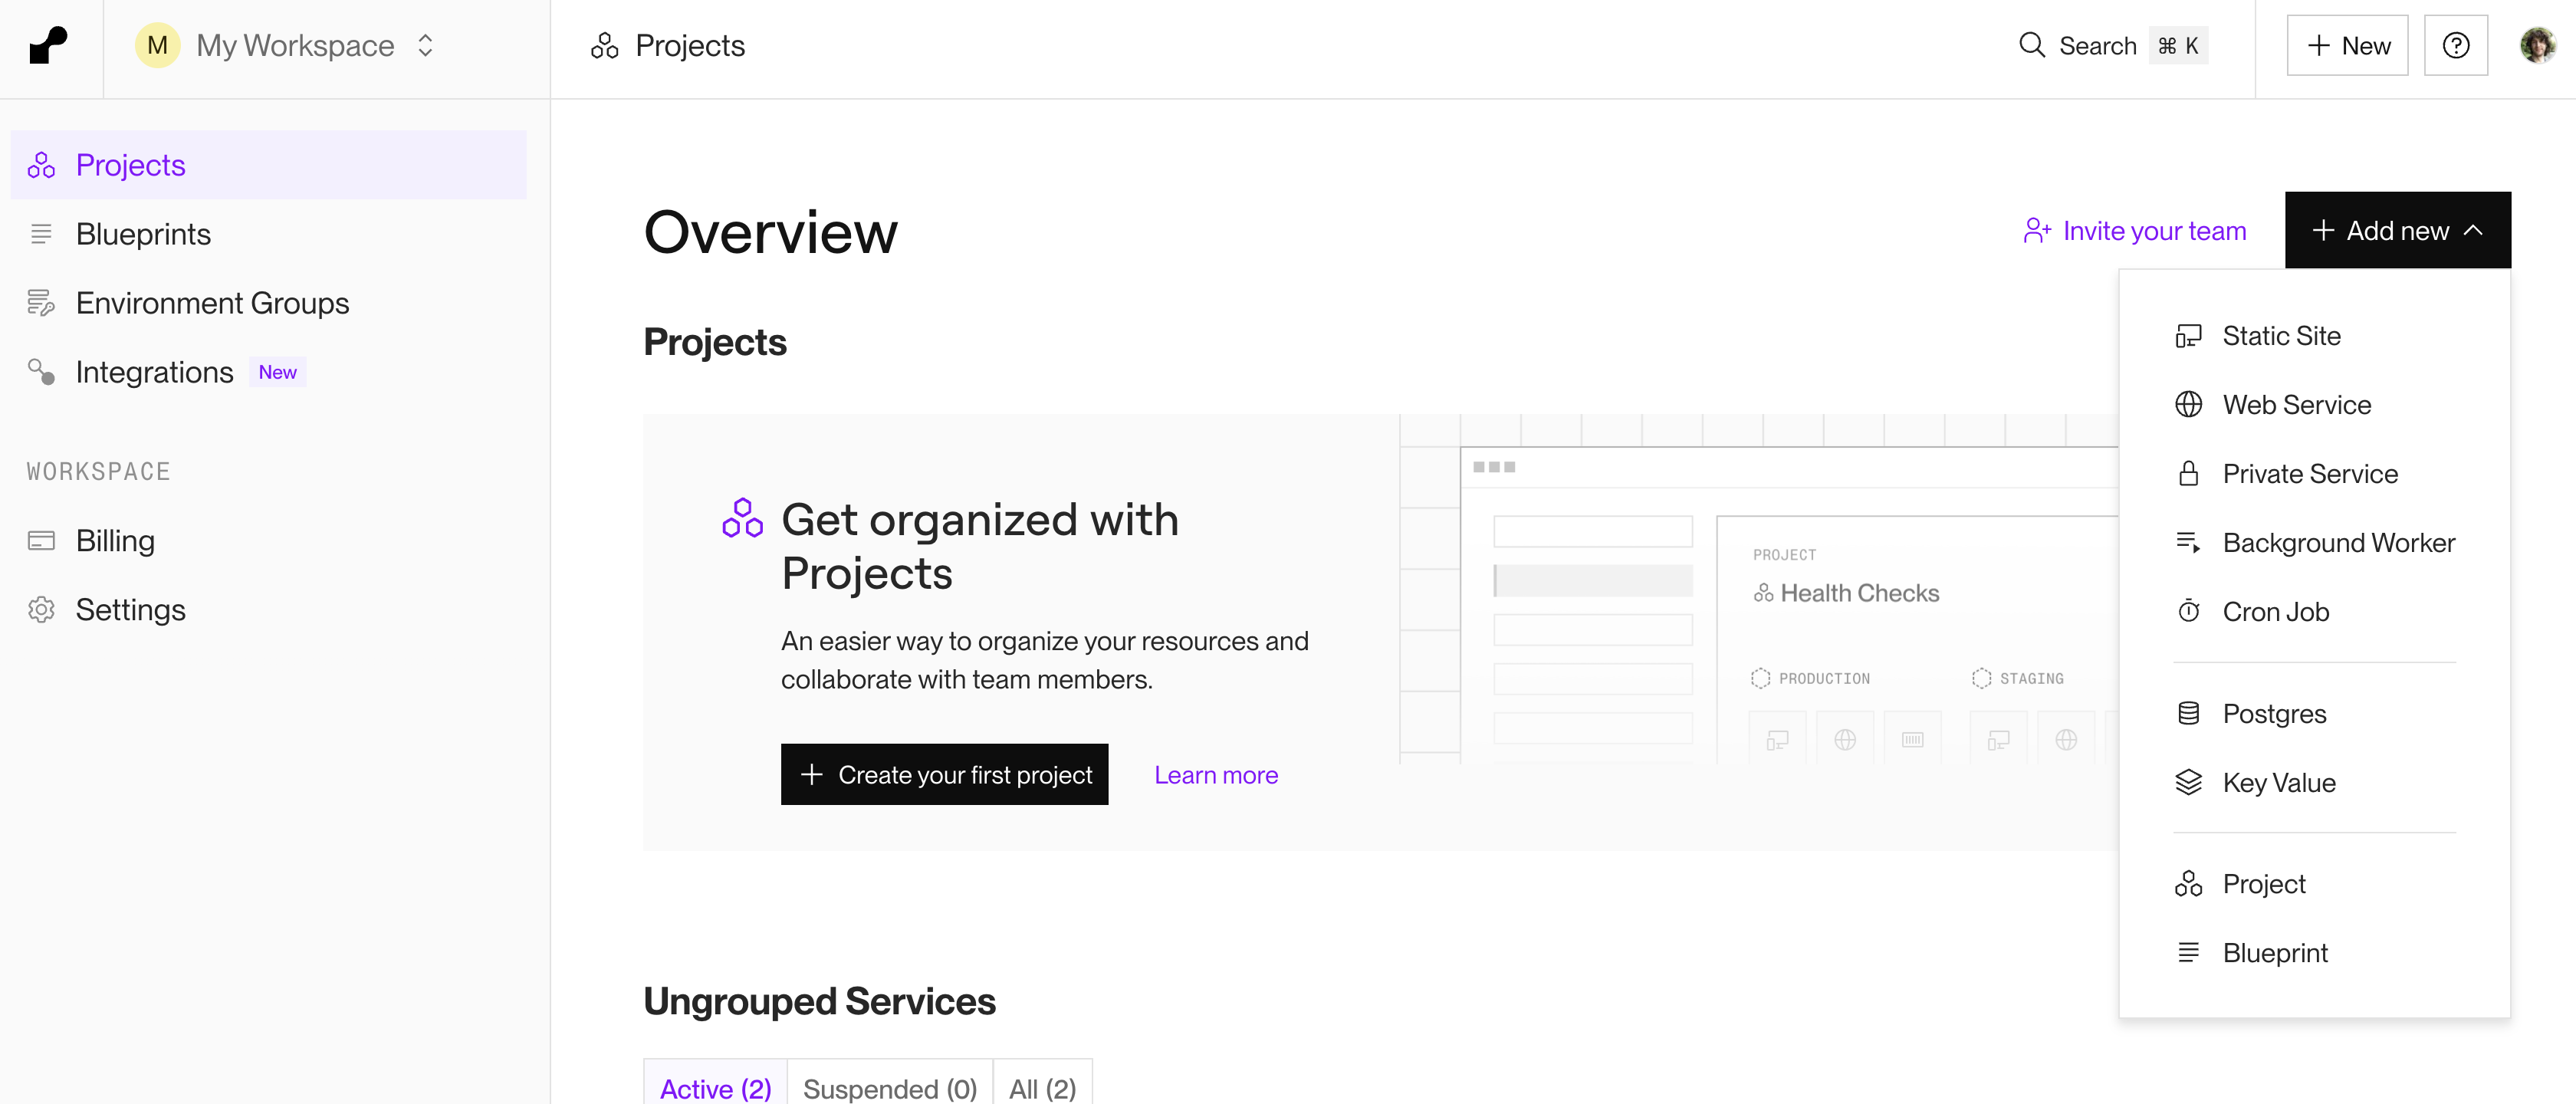
Once you are logged in to Render's dashboard, click on the
+ Add newbutton and selectBlueprint: -
In the following form, scroll down, and select
Public Git Repositoryand choose the repository you forked in step 1. Please note:-
Render can deploy from a public repository, or, if you connect your GitHub account to Render and provide the necessary permission, from a private repository. Here, for simplicity, we are using the public repository option.
-
One consequence of using the
Public Git Repositoryoption is that you will have to manually trigger a new deployment every time you push new code to your repository. If you want to automate at a later point, you can connect your GitHub account to Render and use the GitHub integration option. -
We are using the Infrastructure as Code approach, where the configuration for the deployment is stored in the repository itself, in the file
render.yamlusing Render's Blueprint format (see full documentation here). This is a best practice, as it allows you to version-control your deployment configuration. For this reason, you should not have to provide any configuration beyond the URL to your GitHub repository.
-
-
In the following screen, you can provide any "
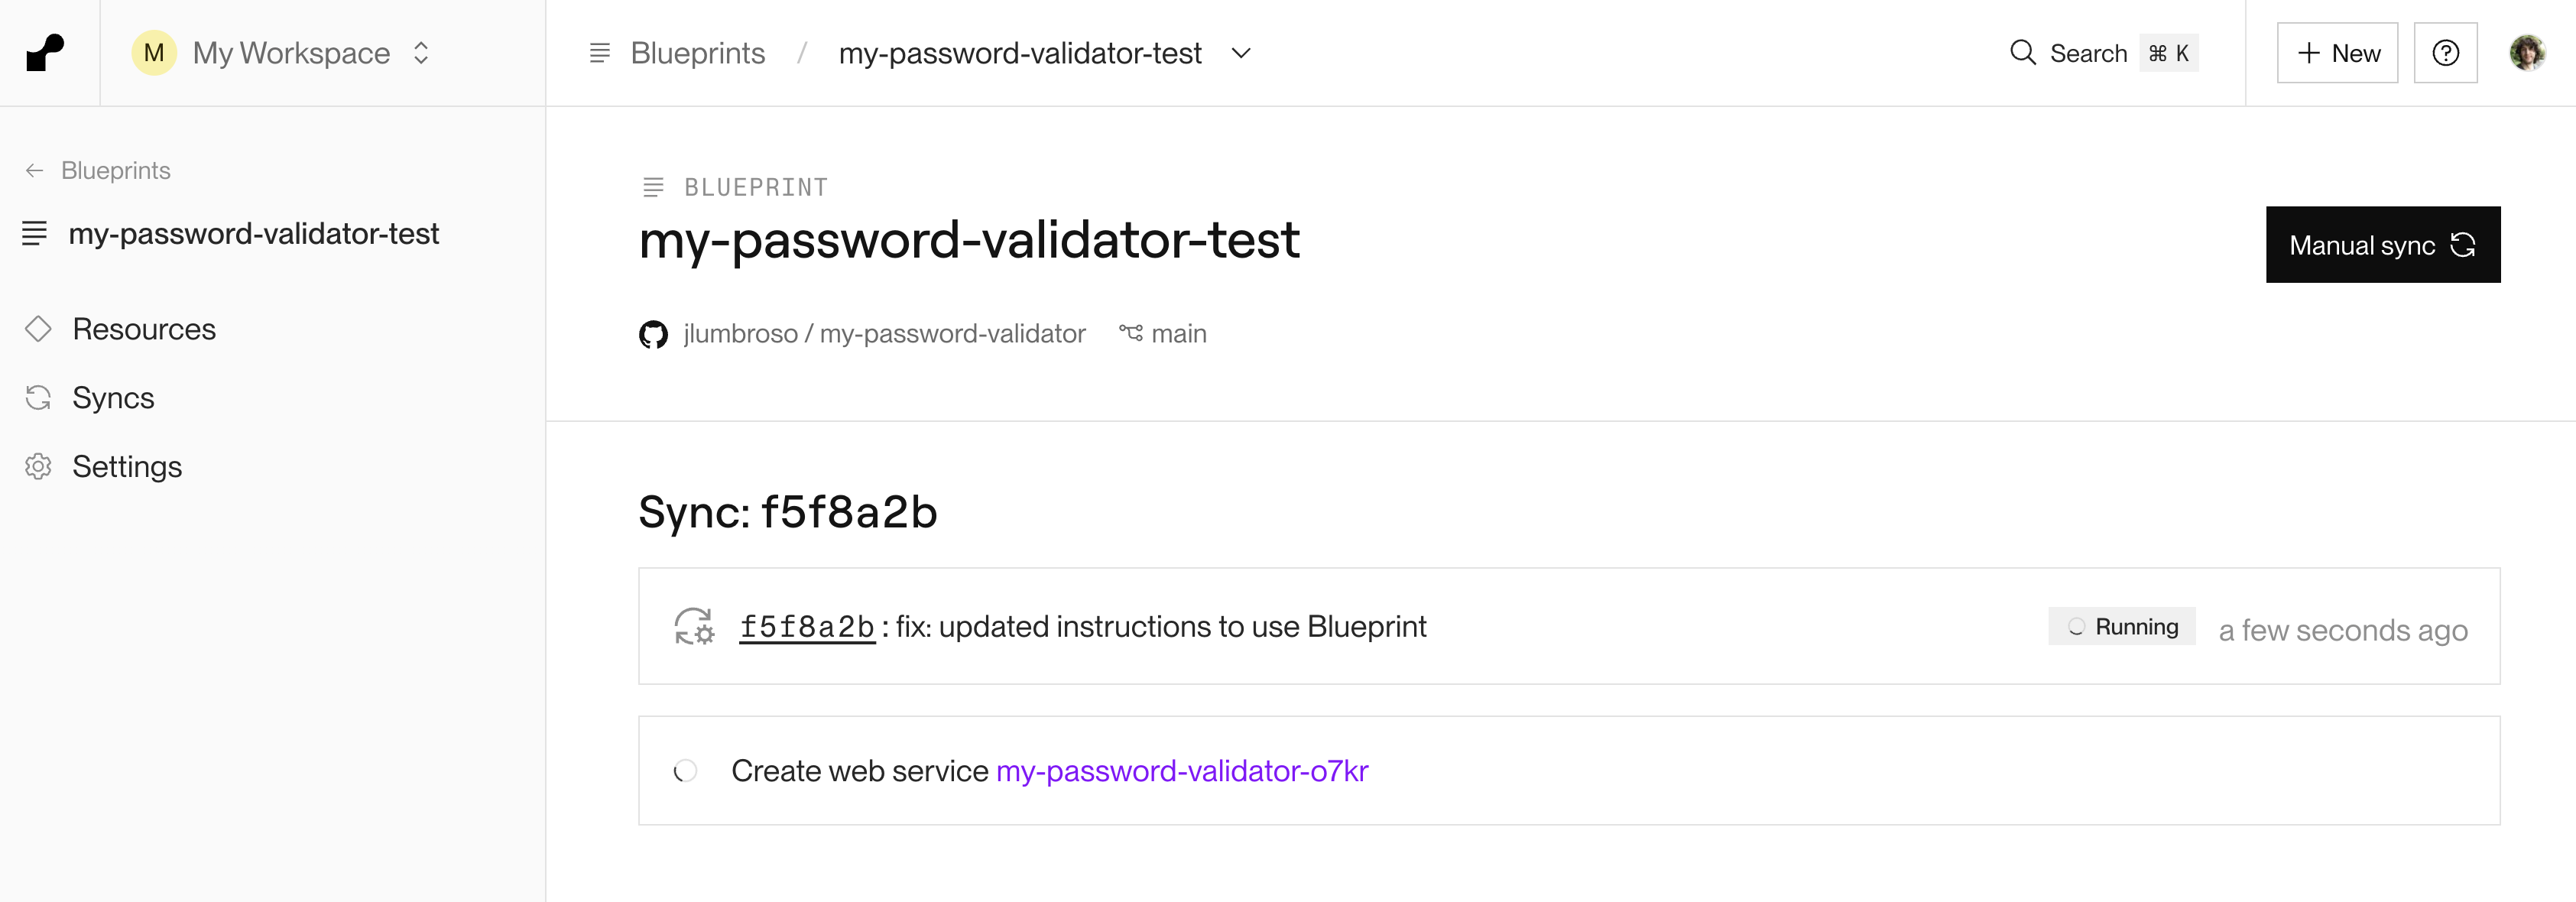
Blueprint Name" you want, themainbranch should be selected, and click on the "Deploy Blueprint" button. -
Once your app has been added, Render will start building and deploying an initial release. You can see the progress in the dashboard. Once it is done, you will see a URL for your app. Click on it to see your app live.
Hello from my Password Validator! —
[email protected]
- Don't forget to change the
AUTHORvariable in themain.pyfile to your own Penn email address!
The above instructions should help you deploy this project to Render. However, you may want to run the project locally for development purposes.
To do so, you will need to have Python 3 installed on your machine. If Python 3 is not installed, we recommend you install it using Homebrew which can be used both on macOS and Windows (Windows Subsystem for Linux): brew install python3.
-
Clone your repository to your local machine.
-
Open a terminal and navigate to the project's directory.
-
Use
pipenv(you may have to install it:pip install pipenv) to install the project's dependencies:pipenv install
The benefit of using
pipenvis that it transparently creates a virtual environment for each of your project, so you don't have to worry about dependencies conflicting with other projects. -
Once the dependencies are installed (
flaskandgunicorn), you can activate the virtual environment:pipenv run gunicorn main:app --bind 0.0.0.0:1234
The above command will start a local server on port 1234. You can access it by visiting
http://localhost:1234in your browser.
In this section, replace https://password-validator.onrender.com/ with the URL of your Render app (or of your local server, if you are running it locally).
Browser test: Go to https://password-validator.onrender.com/; you should see the "Hello from my Password Validator!" text.
Endpoint test: You can test the password validation endpoint by sending a POST request with a JSON body. For example, using curl, this request my look like this:
@app.route(...) routes in main.py).
curl -X POST -H "Content-Type: application/json" \
  -d '{"password":"Abc12345"}' \
  https://password-validator.onrender.com/checkPassword
This is making a POST request to the /v1/checkPassword endpoint with a JSON dictionary, containing the key "password" mapped to the value "Abc12345". The server should always respond with a JSON object containing two keys: valid and reason.
Initially, before you've made any changes, it should return {"reason":"Not implemented","valid":false}.
You can also use a tool like RapidAPI for macOS, or Postman, for to send the request.
THE SPECIFIC PASSWORD POLICY TO IMPLEMENT WILL BE COMMUNICATED IN CLASS. PLEASE FOLLOW CAREFULLY.
The goal of the assignment is to implement a password validation endpoint that checks if a password is valid or not. The endpoint should be available at /v1/checkPassword and should accept a POST request with a JSON body that looks like this:
{
    "password": "my-password"
}
The response should be a JSON object with a two keys, valid, that is true if the password is valid and false otherwise; and reason, a string that explains why the password is invalid (this string is always present, but empty when the password is valid).
Initially all passwords are considered invalid, and the app returns an HTTP status code of 501 (Not Implemented). You should implement the password validation logic in the main.py file, and ensure the returned HTTP status code is 200 at all times (even when the password is invalid).
-
You can add tests by adding the
pytestpackage:pipenv install pytest --dev
-
Add your tests to a
test_main.pyfile (the toolpytestautomatically looks for files that start withtest_or that are in thetestsdirectory):# test_main.py import pytest from main import app @pytest.fixture def client(): """ Pytest fixture that creates a Flask test client from the 'app' in main.py. """ with app.test_client() as client: yield client def test_root_endpoint(client): """ Test the GET '/' endpoint to ensure it returns the greeting and a 200 status code. """ resp = client.get("/") assert resp.status_code == 200 assert b"Hello from my Password Validator!" in resp.data # Not that this test only makes sense for the starter code, # in practice we would not test for a 501 status code! def test_check_password_not_implemented(client): """ Test the POST '/v1/checkPassword' endpoint to ensure it returns HTTP 501 (Not Implemented) in the starter code. """ resp = client.post("/v1/checkPassword", json={"password": "whatever"}) assert resp.status_code == 501 data = resp.get_json() assert data.get("reason") == "Not implemented" assert data.get("valid") is False
-
You can run them with:
pipenv run pytest
This will run all the tests in the
test_main.pyfile.
This activity was designed by Jérémie O. Lumbroso in Spring 2025 for CIS 3500 at the University of Pennsylvania, and refined thanks to the feedback of the students from the class.
The list of banned passwords is from this repository.

